
Operation Manual


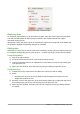


5) In the Name box of the Add AutoFormat dialog that opens, type a meaningful name for the
new format.
6) Click OK to save. The new AutoFormat is now available in the Format list in the AutoFormat
dialog.
Using themes
Calc comes with a predefined set of formatting themes that you can apply to spreadsheets. It is not
possible to add themes to Calc and they cannot be modified. However, you can modify their styles
after you apply them to a spreadsheet, and the modified styles become available for use in that
spreadsheet after you have saved it.
To apply a theme to a spreadsheet:
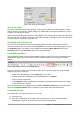
1) Click the Choose Themes icon in the Tools toolbar. If this toolbar is not visible, go to
View > Toolbars on the Menu bar and select Tools, and the Theme Selection dialog
(Figure 124) opens. This dialog lists the available themes for the whole spreadsheet.
2) Select the theme that you want to apply. As soon as you select a theme, the theme styles
are applied to the spreadsheet and are immediately visible.
3) Click OK.
4) If you wish, you can now open the Styles and Formatting window to modify specific styles.
These modifications do not modify the theme; they only change the appearance of the style
in the specific spreadsheet you are creating.
Figure 124: Theme Selection dialog
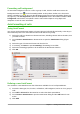
Using conditional formatting
You can set up cell formats to change depending on conditions that you specify. For example, in a
table of numbers, you can show all the values above the average in green and all those below the
average in red.
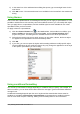
Conditional formatting depends upon the use of styles and the AutoCalculate feature must be
enabled. Go to Tools > Cell Contents > AutoCalculate on the Menu bar to enable this feature.
See the Calc Guide Chapter 2 Entering, Editing, and Formatting Data for more information.
150 | Getting Started with LibreOffice 5.1