
Operation Manual

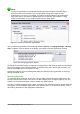

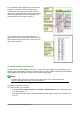


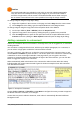


Figure 83: Header marker at top of text area
After a header has been created, a down-arrow appears on the header marker. Click on this arrow
to drop down a menu of choices for working with the header (Figure 84).
Figure 84: Header menu
To format a header, you can use either the menu item shown in Figure 84 or Format > Page >
Header. Both methods take you to the same tab on the Page Style dialog.
Inserting header and footer contents
Other information such as document titles and chapter titles is often put into the header or footer.
These items are best added as fields. That way, if something changes, the headers and footers are
updated automatically. Here is one common example.
To insert the document title into the header:
1) Choose File > Properties > Description and type a title for your document.
2) Add a header (Insert > Header and Footer > Header > Default).
3) Place the cursor in the header part of the page.
4) Choose Insert > Fields > Title. The title should appear on a gray background (which does
not show when printed and can be turned off).
5) To change the title for the whole document, go back to File > Properties > Description.
Fields are covered in detail in Chapter 14, Working with Fields, in the Writer Guide.
For more about headers and footers, see Chapter 4, Formatting Pages, and Chapter 6,
Introduction to Styles, in the Writer Guide.
Numbering pages
Displaying the page number
To display page numbers automatically:
1) Insert a header or footer, as described in “Creating headers and footers” above.
2) Place the cursor in the header or footer where you want the page number to appear and
choose Insert > Fields > Page Number.
Chapter 4 Getting Started with Writer | 105