
Operation Manual


palette, is displayed. You can also use the Background tab of the Format Cells dialog (Figure 107
on page 131). See the Calc Guide Chapter 4 Using Styles and Templates in Calc for more
information.
AutoFormat of cells
Using AutoFormat
You can use Calc’s AutoFormat feature to format a group of cells quickly and easily.
1) Select the cells in at least three columns and rows, including column and row headers, that
you want to format.
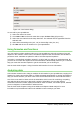
2) Go to Format > AutoFormat on the main menu bar to open the AutoFormat dialog
(Figure 117).
3) Select the type of format and format color from the list.
4) If necessary, click More to open Formatting if Formatting is not visible.
5) Select the formatting properties to be included in the AutoFormat function.
6) Click OK.
Figure 117: AutoFormat dialog
Defining a new AutoFormat
You can define a new AutoFormat so that it becomes available for use in all spreadsheets.
1) Format the data type, font, font size, cell borders, cell background and so on for a group of
cells.
2) Go to Edit > Select All on the main menu bar to select the whole spreadsheet.
3) Go to Format > AutoFormat to open the AutoFormat dialog and the Add button is now
active.
4) Click Add.
5) In the Name box of the Add AutoFormat dialog that opens, type a meaningful name for the
new format.
6) Click OK to save. The new AutoFormat is now available in the Format list in the
AutoFormat dialog.
Chapter 5 Getting Started with Calc | 141