
Installation Manual


evr-green
™
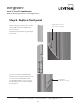
Level 1 / Level 2 Combination
Network Charging Station For Public Applications
lll#aZk^idc#Xdb$Zkg\gZZc&"-,,"((-",),(Zkg\gZZc5aZk^idc#Xdb
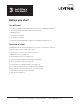
Before you start
3-1
You will need:
:kg"<gZZc8IBEGEdaZBdjci7gVX`ZiVcY:kg"<gZZc8IB:G:miZgcVaH]Zaa
Ç'%bb%#%(%Ç#,+bbhiV^caZhhhiZZaWVcY^c\
7VcY^c\iddah
'E]^aa^ehhXgZlYg^kZg
'HadiiZYhXgZlYg^kZg
AZk^idcEgdk^h^dc^c\Ldg`h]ZZiVcYEgdk^h^dc^c\EdgiVa>chigjXi^dch
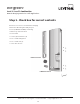
>chiVaa^c\i]Z:kg"<gZZcEdaZBdjciZYAZkZa&$AZkZa'8dbW^cVi^dcHiVi^dch
body assembly involves a few simple steps:
]ZX`Wdm[dgXdggZXiXdciZcihhZZeV\Z("'
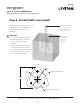
'#9g^aa]daZ^cedaZhZZeV\Z("(
(#BdjciWgVX`ZiidedaZhZZeV\Z(")
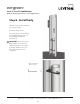
)#EgZeVgZWdYnVhhZbWan[dgbdjci^c\hZZeV\Z("*
*#BdjciWdYnidWgVX`ZihZZeV\Z("+
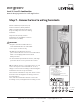
+#8dccZXil^gZhidl^g^c\iZgb^cVahhZZeV\Z(",
These steps are detailed in the remainder of this chapter.
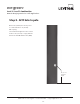
L]Zcndj]VkZXdbeaZiZYi]ZhZhiZeh!ndjl^aaWZgZVYn
to install the holster and cable assembly
VhYZhXg^WZY^c8]VeiZg*#
Overview of steps
3
Installing a
Pole Mount