
User Manual

Help Manual
56
10 Capture
10.1 Capture Image F8
During the Video preview, you can always choose Capture>Image Capture command
to capture the Video image.
After the image is captured, the captured image will be the current active window.
The Capture>Capture Image menu will be disabled. If you wish to capture image
again, click the Video window title to activate the Video window and the
Capture>Capture Image menu will be enabled again.
Note: 1) The “Snap” button on the Camera sidebar can continuously shoot
the image even if the Video window is not activated. Click this button on the Camera
sidebar to capture image quickly;
2) Only when the Video window is active, the Capture>Capture Image will be
enabled;
3) If the Live and Snap resolutions are different,ToupView need to switch the
resolution from Live to Snap in the background to capture an image with Snap
resolution. After the Snap is finished,ToupView will switch back to the Live resolution
to continus the Video stream process. Thus it will take more time to capture a still
image.
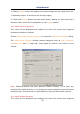
10.2 Time-lapse (Auto Capture)•••
This function can capture a sequence of pictures with the same time interval; you can
precisely set the time interval (2 to 3600 seconds) and the total number of images.
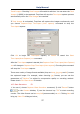
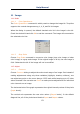
Choosing “Capture>Time-lapse (Auto Capture)•••” command will bring up
Time-lapse (Auto Capture) dialog shown below:
Directory: The file Directory can be select by clickin the Browse button.
File: The File name including Name of Format, File Prefix, File type. It can be a
combination of prefix, time and type and is shown in the Sample.
Time Slot: Time slot(Second,2-3600S) is a time segment to capture an image.