
User Manual

Help Manual
22
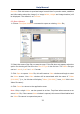
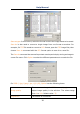
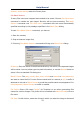
(can be BMP, JPG, PNG, TIF). Click Option button to select the different parameters
to encode the file (For BMP format, the Option will be disabled. See File>Save As•••
menu about the details of the format encoding methods);
Sample: The final file name is shown at the right of the Sample: label for reference.
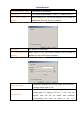
4, If everything was finished, click OK button to begin the file batch save process or
Cancel to cancel the File>Batch Save••• command and return to the application
area.
Note: 1) In the process of the File>Batch Save••• command, the title on the Image
tab will be modified with the file name specified in the Batch Save dialog.
2) The File>Batch Save••• will be disabled if all the modified files are saved. It
will be enabled again if more than 1 file is modified.
6.9 Paste as New File•••
Choose File>Paste as New File••• command to place the contents of the clipboard
image into a new image window, which becomes the active image.
Before Choosing File>Paste as New File••• command, valid image data must be
copied to the clipboard first (see the Edit>Copy menu). If there is no image data on
the clipboard, the File>Paste as New File••• menu will be disabled.
The new image type will be the same as that of the original image. ToupView will
accept image data from other applications via the clipboard as long as it is in
Windows Bitmap (DIB) format.
Note: ToupView will assign title the only digital to the window.
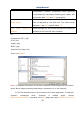
6.10 Print Setup•••
Choose this command to access the setup panel for the printer that have selected.
ToupView will present the standard setup panel for the particular printer (this is the
same panel one would receive if one were setting up the printer from the Windows
Control Panel). Change printer's setup to satisfy the requirements, click OK button to
return.