
User Guide
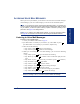


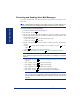

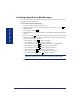


Table Of Contents
- Front Cover
- Quick Reference Guide
- Pocket Quick Reference Guide
- Notice
- Product Disposal Instructions
- Finding Your Way
- Getting Started
- Introduction
- Adjusting Your Endpoint’s Viewing Angle
- Adjusting Your Endpoint’s LCD Contrast
- Setting Up Voice Mail
- Making and Receiving Calls
- Placing Calls On Hold
- Placing Conference Calls
- Transferring Calls
- Using Reverse Transfer
- Forwarding Calls
- Redialing a Number
- Displaying Information on Your Endpoint
- Using a Headset
- Using the Speaker and Microphone
- Using the Message Button
- Accessing Your Mailbox
- Disabling and Enabling ASR
- Accessing Voice Mail Messages
- Using Do-Not-Disturb Mode
- Using Reminder Messages
- Moving On
- Introduction
- Setting Endpoint Preferences
- Setting Mailbox Preferences
- Speed Dialing
- Using Record-A-Call
- Paging
- Performing a “Hookflash” During a Call
- Programming Your Feature Buttons
- Programming Direct Station Selection Buttons
- Programming Secondary Extension Buttons
- Using Account Codes
- Screening Calls
- Using Call Logging
- Using Directories
- Programming Remote Feature Access
- Requesting Agent Help
- Working in Hunt Groups
- Using E-Mail Reader
- Learning More
- Index
- Standard Mailbox Flowchart
- Back Cover

42
Inter-Tel
®
Model 8560/8660 User Guide
GETTING STARTED
Recording and Sending Voice Mail Messages
You can record and send voice mail messages by accessing the record option on the
main menu.
NOTE: If E-Mail Reader is enabled for your mailbox, a reply to an e-mail message (see
page 84) is a recorded voice message that is attached to the e-mail as a .wav file.
To record and send voice mail messages:
1. Access your mailbox as described on page 37.
2. Say “Record” or press .
3. Say or enter the desired mailbox number or group list number. The system
announces the name assigned to the mailbox number or group list number. You
have the following options:
• Say “Yes” or press to accept the subscriber’s name.
• Say “No” or press to start over.
4. Record your message after the tone. While recording, you have the following
options:
• Press to pause while recording. (Say “Continue” or press to con-
tinue.)
• Press to erase and re-record your message.
5. When finished recording, you can press to access the following options:
NOTE: If you select the copy or special delivery options and then do not respond
to the prompts, the system will time out and deliver your message to the original
recipient.
• Say “Send” or press to send the message and return to the voice mail
options.
• Say “Cancel” or press to cancel the recording.
• Say “Replay” or press to replay your message.
• Say “Append” or press to add to your message.
• Say “Erase” or press
to erase and re-record your message.
• Say “Copy” or press to copy your message to other mailboxes.
NOTE: If you are not using an Enterprise Messaging (EM) voice mail sys-
tem, you can send the message to additional mailboxes from the “Special
Delivery Options” menu after sending the message to the first recipient (see
page 43).
2
#
2
#
3
#
#
1
2
3
4