
User's Manual
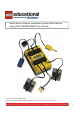


Pilot Level 3
Programming with two steps, introducing light sensor and loops
At this level you can work with all three outputs and use the light sensor. Furthermore you now have two programming
steps. You will need to use the red stop sign to block a port that is not in use.
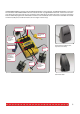
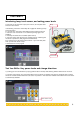
1. See building instructions. Follow instructions for 4b on page 29—attaching a light sensor and a lamp.
2. Select Pilot level 3.
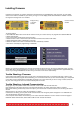
3. Program the following:
4. Download the program to the RCX.
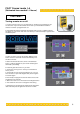
5. Press the black view button on the RCX. Continue pressing until the arrow in the display points to port 1.
6. Hold the car in your hand. Point the sensor at a light surface (at a distance of about 5mm) and press Run. Then move
around the room holding the sensor up to different surfaces. As soon as the light sensor records a darker surface (5% less
light than previously) the motor will change direction. Since you have programmed it with a loop, it will do that continuously
until you press the green button again.
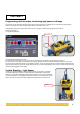
Trouble Shooting – Light Sensor
If there is no signal (red light) on the light sensor when you connect it to the RCX
this means that ports 1, 2 and 3 on the RCX do NOT automatically recognise the
sensors. You must write a program where the light sensor is set to port 1. Download
this to the RCX and run the program. Now port 1 knows that it is connected to a light
sensor. You can turn the RCX off and on again and the light sensor will still work.
Light sensor
Port 1
9