
User's Manual
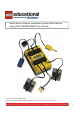


Pilot Level 2
Introducing lamp, touch sensor, and setting power levels
At this level you can work with output ports A and C, set the power level
and use a touch sensor.
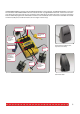
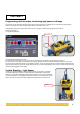
1. See building instructions. Follow step 4a on page 28—attaching a lamp
and touch sensor.
2. If you are still in Pilot level 1 select Back and then select Pilot level 2.
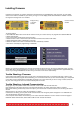
3. The motor icon must be set to run clockwise (pointing right) at full
speed (5)
4. The lamp should be set to the lowest power level (1)
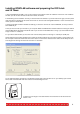
5. The touch sensor must be set to port 2. Select the icon indicating that
the sensor is pressed in. (See program illustrated below)
6. For this activity you will hold the touch sensor in your hand and press
when you want the vehicle to stop.
7. Download and run the program
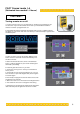
Test Your Skills—Vary power levels and change directions
Try making your own combinations by varying power levels for the lamp and selecting different directions for the motor.
Try the other touch sensor icon, which reacts when the touch sensor is released. This works, for example, when a vehicle
drives over a raised surface where the touch sensor is pushed in—then reaches a lowered surface where the touch sensor
is automatically released.
Lamp
Touch sensor
Touch sensor icons
8