
User's Manual
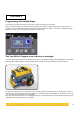


Use your two motored vehicle as for Inventor level 1.
1. Delete all icons between the start and stop lights. Start by dragging the red traffi c light icon further to the right so that you
have enough space on the screen to build your program.
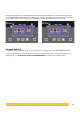
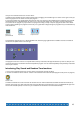
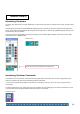
2. Copy the program string shown below. Note that the motor icon should not be predetermined to a specifi c port, and that
the fl ip direction icon is situated below the motor icons in the functions palette. You now need to use new programming
icons, which tell the program to jump and land. Jumping and Landing is a way to loop the program as seen in Pilot levels.
Looping means repeating the program continuously. It is a good idea to begin saving the programs that you create. See top
menu under File.
Motor not Flip Direction Jump and Land
predetermined
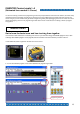
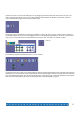
3. Download the program and run it. NOTE: Modifi ers also need stringing together. Motor modifi ers must be connected to
the rear left and power levels to the rear right.
The program turns motor A and C on at power level 3, waits for 2 seconds, then fl ips the direction of motor C, waits for 1 sec-
ond and jumps back to the red land arrow and repeats the program. Your car should repeatedly move forward for 2 seconds
and turn for 1 second.
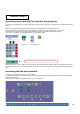
Introducing Play Sound and Random Time functions
1. Use your two motored vehicle as for Inventor level 1 and the same program as above.
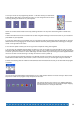
2. You will now make the vehicle “wait for” random time instead of 2 and 1 seconds. (See program under point 6 on page 17)
Random Time
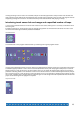
3. Delete the two Wait For icons and insert the random time icon. Remove bad wires (illustrated as black and white as op-
posed to pink) using Ctrl b and insert new wires using the cable reel via the Tab button. (If you use ROBOLAB 2.5 right click
the icon and choose replace). The next icon you choose will be inserted and connected automatically.
16