
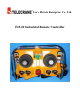
User's Guide


Before ID code remote setting, please follow the instruction below,
Make sure both TX and RX are same model and in the same frequency channel.
Receiver JP1 jumper must be installed in order to perform ID code remote setting.
To avoid interference during remote setting, have transmitter closer to RX as possible.
Receiver AC power supply must be disconnect and turn on again after 20 seconds. (ID code
remote setting must be completed within 4 minutes after receiver is being turn on again).
Instructions:
1. Disconnect receiver AC power supply completely (MAIN SWITCH) and turn on again after 20
seconds.
2. Press EMS button and switch Start Key into ON position.
3. Press R1 pushbutton and hold it (Do not release R1 button until next step is completed).
4. Press R2 button 4 times continuously and release all buttons when red LED flashing.
5. Start the system as usual.
Warning:
(1) Any other receiver within control distance, the ID code is possible to be overwritten unintentionally.
(2) ID code remote setting synchronized ID code data only. No any other data will be overwritten or
changed.
NC/NO output connection
Relay module are designed for both type of relay such NO and NC/NO. Both outputs connection of
NC/NO relay are available on the relay module. To replace NC/NO relay, remove existing NO relay
and insert a new NC/NO relay. Follow the relay module indication for new output wire connections for
NC/NO relay.
COM Configuration
P1~P44 are terminal for COM, changing COM configuration by using wire included inside the
packages. Different size of wire is available.
Troubleshooting
Symptom Causes or solution
Transmitter red LED
indicator flashing quickly
(every 0.2 sec) when
operating
One of the pushbuttons is jammed.
Joystick is not in neutral position.
The EMS mushroom is not released completely.
The transmitter is not properly Power-On.
Note: Please contact the distributor nearest you for further
assistant if need.