
User Guide
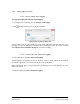


Table Of Contents
- Table of Contents
- Version History
- List of Figures
- List of Tables
- Contact Information
- Document Conventions
- 1. Label Explanation and Safety Information
- 1.1. Regulatory Compliance
- 2. Introduction
- 2.1. Definitions
- 2.2. Underlying Principles and LiDAR Fundamentals
- 2.3. Key Factors for Best Sensor Performance
- 3. Description
- 3.1. Equipment Designation and Description
- 3.1.1. Key Components
- 3.1.2. Distance Measurement
- 4. Specifications
- 4.1. General Characteristics
- 4.2. Mechanical Specifications
- 4.2.1. Leddar T16 Traffic Dimensions
- 4.2.2. Leddar T16 Tolling Dimensions
- 4.2.3. Distance Screw
- 4.3. Electrical Specifications
- 4.4. Environmental Specifications
- 4.5. Software System Requirements
- 5. Installing the Leddar T16 Sensor
- 5.1. Installing and Orienting the Sensor
- 5.2. Connecting the Leddar T16 Sensor
- 6. Installing LeddarTM Configuration
- 6.1. Connecting to LeddarTM Configuration
- 7. LeddarTM Configuration
- 7.1. Main Windows, Menus and Buttons
- 7.2. File Menu
- 7.2.1. Recordings (.ltl file)
- 7.2.1.1. How to Edit Recording Settings
- 7.2.1.2. How to Record a Scene
- 7.2.1.3. How to Play a Recording
- 7.2.1.4. How to Extract a Scene Segment
- 7.2.2. Data Logging (.txt file)
- 7.2.2.1. How to Setup Data Logging
- 7.2.2.2. How to Start and Stop Data Logging
- 7.3. Device Menu
- 7.3.1. Configurations
- 7.3.1.1. Device Name and How to Change it
- 7.3.2. Acquisition Settings
- 7.3.3. Network Settings
- 7.3.4. Orientation Control (Pan/Tilt Adjustment)
- 7.3.5. Video Settings
- 7.3.6. Action
- 7.4. View Menu
- 7.4.1. Device State
- 7.4.2. Image Activation
- 7.4.3. Grid Activation
- 7.4.4. Raw Detections
- 7.4.5. Raw Detections Graph
- 7.4.5.1. Setting Scale Areas and Detection Points
- 7.4.5.2. Detection Scene Short Keys
- 7.5. Settings Menu
- 7.5.1. Record Settings
- 7.5.2. Data Logger
- 7.5.3. Preferences
- 7.5.4. Access Level
- 7.6. Help Menu
- 7.6.1. User Guide
- 7.6.2. LeddarTM SDK Help
- 7.6.3. About
- 8. Communication Protocol
- 9. Troubleshooting
- 10. Maintenance
- 11. Warranty
- 12. Technical Support
- 13. Index
- Appendix A. Static IP and DHCP Configuration Under Windows 7 and Up
- Appendix B. Making Connectors for the Ethernet Cable
- Appendix C. Procedure to Use LeddarCDemo (SDK Code Example) with the Leddar T16 Sensor

54A0043-2EN 032019 © LeddarTech Inc. Page 58 of 109
7.3.4. Orientation Control (Pan/Tilt Adjustment)
To access this menu, click Device > Configuration > Orientation.
This menu is available with the Traffic configuration only.
This feature allows the user to adjust the orientation of the sensor.
In the Orientation Control dialog box, use the arrows to move the sensor so that the active grid is
centered on the zones to monitor.
The Step Size field sets the move, in degrees, for each click on an arrow button (0.1 to
1.0 degrees).
Figure 30: Orientation Control Window
The start of the first lane line must match the physical delimitation of the first lane and the reference
line must be perpendicular to the road; this means that they both should line up with the reference
mark and the marking or object it was aligned with.
Figure 31: Active Grid Application Example