
User's Manual

Create One or More Print Messages
18
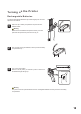
Creating Print Messages
5
1
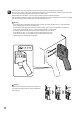
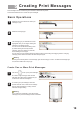
Select the slot you would like to create your
message in (0-9).
To change the vertical position of the message, right click and drag up or down. To delete the message right
click, and the delete menu will pop up.
If you create new messages in slots with existing
messages, the previous messages will be overwritten.
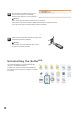
Print messages must be created using the software included with the printer.
This section describes how to create new print messages.
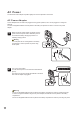
Basic Operations
2
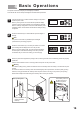
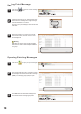
Select the message type.
3
The message type you selected will now be
highlighted. Now you can begin creating the
message in the editing window.
You can access the advanced editing menu
by double clicking the recently created
message. This menu allows font, text size,
and formatting to be changed.
You can also move the message within the editing window by left clicking and dragging it about. Changing
message position within the window will affect the print layout.
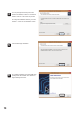
2
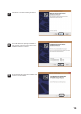
To create a group of messages, select the
second radio dial. Then, select which message
slots to create messages in. Finally, click the
OK button to begin editing.
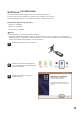
String
1
Left click on to set up new print messages.
To create a single message, select the first
radio dial, then select which message slot you
would like to create the message in.
1
2
Warning
Warning