
User Manual


8
LAUNCH Creader Professional CRP12X Series User's Manual
4. Connection
4.1 Install TF card
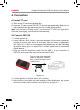
1) Take out the TF card from package box.
2) Insert the TF card into the CRP12X TF card slot perpendicularly. Make sure is
fully inserted in the right place with the “micro” label facing upward.
Note: You can hear a clicking sound if you insert the TF card in the right place.
Press the card slightly, it will be ejected automatically.
4.2 Connect CRP12X
Turn the ignition off.1.
Locate vehicle’s DLC socket: it provides standard 16 pins and is generally 2.
located on driver’s side, about 12 inch away from the center of dashboard.
See Figure 2-2. If DLC is not equipped under dashboard, an label indicating
its position will be given. In case no DLC is found, please refer to Automobile
Repair Manual.
Plug one end the diagnostic cable into the OBD II 16 pin connector of 3.
CRP12X, and connect the other end to the vehicle’s DLC.
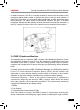
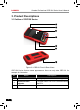
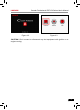
Plug one end of the diagnostic
cable to diagnostic interface,
then connect the other end to
vehicle's DLC.
Figure 4-1
Turn the ignition on. Engine can be off or running.4.
After nishing, the system will start initializing. After initialization, the system 5.
will enter the main menu interface. See Figure 4-2 & Figure 4-3.