
User's Manual


LAUNCH X-431Tool User’s Manual
46
46
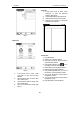
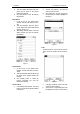
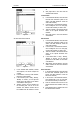
Fig 4-26
Set the content of the schedule:
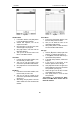
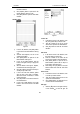
Fig 4-27
1) In the Schedule New interface, activate
Soft Keyboard, and fill the subject and
contents.
2) In the textbox on the top of the interface,
fill the time of the schedule.
3) If the selected cycle is ‘Daily’, ‘Weekly’,
‘Monthly’ or ‘Annual’, you can input the
repeat time in the textbox on the bottom
of the interface. See Fig 4-27.
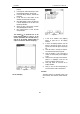
4) “Remind” function can be selected and
the reminding time can be set in the
interface. The “Remind” function will not
be available when the machine is turned
off.
5) Click [OK] button to save and close the
Schedule New interface
View Schedule
2) In the Schedule interface, select the date
that has been scheduled. (Refer to the
section “Add New Schedule Æ Set the
date of the schedule”)
3) In the list box of the Schedule interface,
click Scrolling Bar to turn to next page,
and click the schedule you want to view.
4) Then the contents of the schedule will be
shown in the opened Schedule View
interface.
5) Click [OK] button to close the Schedule
View interface.
Edit Schedule
1) In the Schedule interface, select the date
that has been scheduled. (Refer to the
section “Add New Schedule Æ Set the
date of the schedule”)
2) In the list box of the Schedule interface,
click Scrolling Bar to turn to next page,
and click the schedule you want to edit.
3) Then the contents of the schedule will be
shown in the opened Schedule View
interface.
4) If the edited affair is ‘Daily’, ‘Weekly’,
‘Monthly’ or ‘Annual’, you can edit the
repeat time in the textbox on the bottom
of the interface.
5) After editing, click [OK] button to save the
edited contents and close the Schedule
View interface.
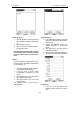
Delete
Schedule
1) In the Schedule interface, select the date
that has been scheduled. (Refer to the
section “Add New Schedule Æ Set the
date of the schedule”)
2) In the list box of the Schedule interface,
click Scrolling Bar to turn to next page,
and click the schedule you want to edit.
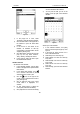
3) Then the schedule will be shown in the
opened Schedule View interface. See Fig
4-28.
4) Click [Delete] button to delete it and close
the Schedule View interface.