
User's Manual

LAUNCH X-431Tool User’s Manual
48
48
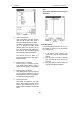
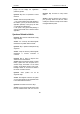
Fig 4-31
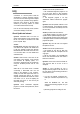
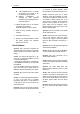
4) Insert a new submenu:
Click [Insert] button and input the item
name and the file path. Then choose a
group as its parent and click [OK] button.
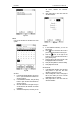
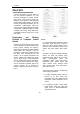
The path can be inputted directly or found
out in a dialogue box after clicking
[Browser] button. See Fig 4-31 and Fig
4-32. Click [OK] button after selecting an
item in the list. Then the selected file will
be automatically copied to the edit box.
The submenu should be linked to a
present group instead of the “Start” item or
another submenu.
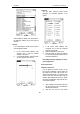
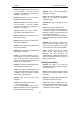
5) Delete a group or a submenu:
Select a group or a submenu and then
click [Delete] button. When a group is
deleted, all of its submenus will be deleted.
6) Modify a group or a submenu:
Click [Modify] button and then select the
group or submenu from the list. Now you
can modify the item name, file path and so
on followed by clicking [OK] button.
7) Save the information:
After editing the application, click [OK]
button. The modified information will be
saved in the corresponding file. If you
want to quit the modification, click [Cancel]
button.
Note:
Quit all other applications before saving the
modification.
Fig 4-32
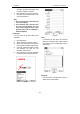
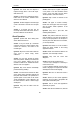
Power Management
In the Power Manager interface, you can see
the condition of memory, and set the standby
time. (See Fig 4-33)
1) In the Control Panel interface, click
‘Power’ icon to open the Power Manager
interface.
2) Click the button to the right of ‘Standby
time’, and select the time or ‘None’ in the
pop-up list.
3) Click [OK] button to save the setting and
close the Power Manager interface.