
User's Manual

LAUNCH X-431Tool User’s Manual
30
30
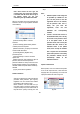
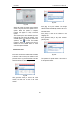
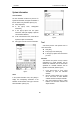
Click [save] to put into the[X-431TOOL update].
Display Program Download
When download the diagnostic program, users
can also download the display program. On the
drop-down menu, users select the language then
click [down]. On the pop-up menu, click [save] to
put the program into the[X-431TOOL update].
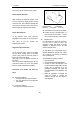
System Data Download
On the drop-down menu, users select the
language then click [down]. On the pop-up menu,
click [save] to put the program into
the[X-431TOOL update].
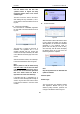
Diagnostic Program Download
On the drop-down menu, select the language
and the version (default version is the latest
version). Click [down] icon, then click [save] on
the pop-up menu to save the file.
Click [view] to learn the detailed information of
the version.
Users can down the diagnostic program into the
[X-431TOOL update]. Up to now, the software
that is for update is downloaded completely.
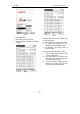
Connection of the Reader and Install the
Driver
z Necessary Hardware:
1. A computer that can access the Internet.
2. A CF card reader and a CF card that need
to be updated.
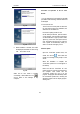
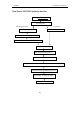
z Connection of Reader
See Fig. 3-59 for hardware connection.
Fig. 3-59
1-CF card reader 2-USB cable
3-USB Port 4-Computer 5-CF card
z Insert the CF card into the CF card reader.
z Connect one end of the USB cable② to
the port of the CF card reader①, and the
other end to the USB port of the computer.
z Install the Driver
If it is the first time to use the CF card reader,
you may have to install its driver. Use
CD-ROM or floppy disk which are bought
separately or delivered with the CF card
reader to install the driver.
CF card reader can use the default driver in
Windows Me/2000/XP and Mac OS 9.x/Mac
OS X. However, it is necessary to install the
driver on Windows 98.
The installation procedure is as follows:
1. Boot Windows 98.
2. Insert the CD-ROM into CD-ROM drive.
3. Connect CF card to the USB port of the
PC with the attached USB cable. Find and
Double click on setup.exe file in the
catalogue of CD-ROM. The system will
make preparation for the installation. See
Fig 3-60
4. When the preparation is complete, the
screen will prompt to continue the
operation. See Fig 3-61 Click “Next” to
start installation.