
User's Manual

LAUNCH X-431Tool User’s Manual
28
28
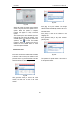
onto the member area, and then click
“product control” to register the newly
purchased product. Refer to the section
“Member login”.
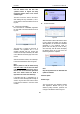
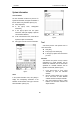
The terms of service is shown in the screen.
After reading and fully understand it, click “I
accept” button to enter the interface shown in
Fig 3-52.
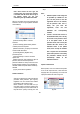
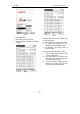
z Fill in Product Information
Fill in the serial No. of DIAGBOX, registration
No. and dealer code in the interface shown in
Fig 3-53.
Fig 3-53
The serial No. is marked on the back of
DIAGBOX. The registration No. is in an
envelope delivered with the product (the
number must be kept confidential). The dealer
code is attached on the last page of the user’s
manual.
After the information is filled, click “Next step”
to enter the next interface shown in Fig 3-55.
Note:
When a product is sold, the dealer will log
onto www. X431. com
and enter the dealer
code in the “Dealer administration” area so
that the user can do effective registration
later. User should contact the dealer if
registration can not be done effectively.
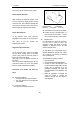
If the filled serial No. or registration No. is
invalid, the screen will display the message as
shown in Fig 3-54. Click “OK” button to return
to the previous interface to re-fill the correct
numbers.
Fig 3-54
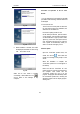
z Fill User Information
Fig 3-55
After information is filled in the interface shown
in Fig 3-55(The red textbox must be filled.
After registration, we will send the confidential
information to your registered e-mail, so
please make sure that your e-mail is valid.),
click “Next step”, then the screen will display
the interface shown as Fig 3-56. Click “OK’
then the registration is completed.
Fig 3-56
Note:
Only the registered user can download and
update the software.
Software Update
Member Login
The user becomes the registered member
after registration. Member can log in the
website by filling username, password and
user type in the interface shown in Fig 3-51.