Version: V1.00.
LAU N CH X-431 PRO User’s Manual — Safety Precautions Copyright Information Copyright © 2013 by LAUNCH TECH. CO., LTD. All rights reserved. No part of this publication may be reproduced, stored in a retrieval system, or transmitted in any form or by any means, electronic, mechanical, photocopying, recording or otherwise, without the prior written permission of LAUNCH. The information contained herein is designed only for the use of this unit.
LAU N CH X-431 PRO User’s Manual — Safety Precautions Safety Precautions Before using X-431 PRO, please read the following safety information carefully. Never collide, throw, or punch X-431 PRO, and avoid falling, extruding and blending it. Do not use X-431 PRO in exceptionally cold or hot, dusty, damp or dry environments. In places where X-431 PRO is forbidden or using X-431 PRO may cause interference or generate a potential risk, please turn off it.
LAU N CH X-431 PRO User’s Manual — Safety Precautions messaging, because it may cause a data communication interruption. If it happens, it is abnormal and just try to re-do it. Precautions on Operating Vehicle’s ECU z z z z z z Do not disconnect the vehicle inner consumer when the ignition switch is on. High voltage transients may encounter at the moment of disconnecting, which may damage the sensors and the ECU. Protect the computer from magnetic object.
LAU N CH X-431 PRO User’s Manual — Table of Contents Table of Contents 1 INTRODUCTIONS............................................................................................ 1 1.1 PRODUCT PROFILE ................................................................................... 1 1.2 FEATURES ................................................................................................ 1 1.3 KNOWLEDGE OF X-431 PRO .................................................................... 2 1.3.
LAU N CH X-431 PRO User’s Manual — Table of Contents 3.4.1 User registration ................................................................................ 9 3.4.2 Software layout .................................................................................11 3.4.3 DBScar Connector registration........................................................ 12 3.5 START DIAGNOSING ................................................................................... 13 3.5.1 Read trouble code .................
LAU N CH X-431 PRO User’s Manual — Table of Contents 4.5 CAMERA .................................................................................................... 24 4.5.1 Open and close camera .................................................................. 24 4.5.2 Take a photo .................................................................................... 24 4.5.3 View a photo .................................................................................... 24 4.5.4 Record a video .........
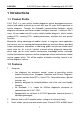
LAU N CH X-431 PRO User’s Manual — Knowledge of X-431 PRO 1 Introductions 1.1 Product Profile X-431 PRO is a new vehicle trouble diagnostic device developed based on internet and mobile terminals by Launch with over 20 years R&D experience in vehicle diagnosis.
LAU N CH X-431 PRO User’s Manual — Knowledge of X-431 PRO account for some common Web email service provider can be added; 4. Search: enables you to locate your target quickly and conveniently; 5. File Manager: with it, you can manage the files or downloaded files stored in SD card efficiently; 6. Settings: to configure your personalized X-431 PRO through it; 7. Other additional functions: alarm, calendar and calculator etc. 8.
X-431 PRO User’s Manual — Knowledge of X-431 PRO LAU N CH 1.3.2 X-431 PRO pad computer Fig. 1-2 X-431 PRO pad computer No. Name 1 POWER key 2 VOLUME +/- key 3 Earphone jack 4 Rear camera 5 Reset key (Inside the housing) 6 SD card slot 7 Speaker 8 USB port 9 Microphone Notes In Off mode, press it to turn on X-431 PRO; In On mode, press it to activate the LCD if the LCD is blank. In On mode, press it to turn off the LCD if the LCD lights up. Used to adjust the volume.
LAU N CH X-431 PRO User’s Manual — Knowledge of X-431 PRO 1.3.3 X-431 PRO protection sleeve Fig. 1-3 X-431 PRO protection sleeve Dismantling X-431 PRO protection sleeve To remove protection sleeve from X-431 PRO main unit, follow the steps described as below to proceed: 1. Pull the red sleeve outwards from the right margin of X-431 PRO, and then remove it completely. 2. Reverse the upper enclosure and then user the screwdriver to loosen all screws. 3.
X-431 PRO User’s Manual — Knowledge of X-431 PRO LAU N CH 1.3.4 DBScar diagnostic connector Fig. 1-5 DBScar diagnostic connector ① OBD-16 connector ② Power indicator It lights up while plugging the DBScar connector into the vehicle’s DLC. ③ Communication indicator It will flash once the DBScar connector is communicating with X-431 PRO or it is being reset. ④ Micro USB port To connect to PC for data transmission or upgrade via USB cable. diagnostic To connect to vehicle’s OBD2 DLC.
LAU N CH X-431 PRO User’s Manual — Knowledge of X-431 PRO 1.4 Technical Parameters X-431 PRO: Operating system: Android CPU: Dual core 1GHz Battery: 3000mh, rechargeable polymer lithium battery Standby time: it is subject to the using environment. Generally it can keep working for 4 hours. Extension memory card: 32G Micro SD(TF) card supported Memory: 512MB Storage capacity: 2GB LCD: 7.
LAU N CH • • • • • • • • X-431 PRO User’s Manual — Knowledge of X-431 PRO Password envelope X-431 PRO protection sleeve DBScar diagnostic connector OBD II extension cable Cigarette lighter cable Power adaptor USB data cable Non-16pin connector 7
LAU N CH X-431 PRO User’s Manual — Knowledge of X-431 PRO 2 Preparations 2.2 Charge X-431 PRO 1. Insert the included USB cable into the charger. 2. Plug the charger into AC outlet. 3. Connect the other end of USB cable to X-431 PRO. If appears on the screen, it indicates it is being charged. 4. If the logo changes into , it indicates that the battery is fully charged. Disconnect the charger from the AC outlet. 5. Unplug the USB cable on the charger from X-431 PRO. 2.
LAU N CH z z z z z z z X-431 PRO User’s Manual — Knowledge of X-431 PRO LCD. Shorten the standby time: Enter main menu, choose “Settings” > “DEVICE” > “Display” > “Sleep” to select a shorter standby time. Decrease the brightness of LCD display: Enter main menu, choose “Settings” > “DEVICE” > “Display” > “Brightness”, and then drage the slider to adjust it. Change “Live wallpaper” into “Gallery”.
X-431 PRO User’s Manual — Knowledge of X-431 PRO LAU N CH B. MAIN MENU key: To switch to main menu screen. C. SHORTCUT key: To view the recent applications. D. OPTION MENU key: To select operation option from the list. E. Notice bar: To notify users of new events and display the status (For detailed indicators, please see the following table.).
LAU N CH X-431 PRO User’s Manual — Knowledge of X-431 PRO 2.6.3 Delete items from the desktop 1. Hold and press the desired item, “X Delete” appears in the upper middle of the screen. 2. Drag it on the icon until it change into red, then release it. 2.6.4 Change your wallpaper 1. Hold and press a blank area on the desktop, a pop-up wallpaper window will be shown on the screen. 2. Set different wallpaper as desired: • Wallpapers: Choose a still picture from gallery as wallpaper.
LAU N CH X-431 PRO User’s Manual — Knowledge of X-431 PRO 2.8 Auto-rotate the screen To perform such operations as browsing webpage, viewing images etc, rotate X-431 PRO, the screen will automatically change the display direction. To disable this function, click “Settings”, and click “Display” to enter. Unselect the option “Auto-rotate screen”. 2.9 Lock & unlock the screen 2.9.
LAU N CH X-431 PRO User’s Manual — Knowledge of X-431 PRO 2.11 How to set as airplane mode According to the regulations of some countries or areas, PC device must be turned off before boarding on the airplane. The way to disable functions of X-431 PRO is to set it as airplane mode. In this mode, all wireless radio waves will be disabled, including mobile network, Bluetooth and WLAN.
LAU N CH X-431 PRO User’s Manual — Vehicle Diagnosis 3 How to diagnose 3.1 Connect DBScar Follow the steps mentioned below to connect DBScar connector: 1. Locate vehicle’s DLC socket. The DLC (Data Link Connector or Diagnostic Link Connector) is the standardized 16-cavity connector where diagnostic code readers interface with the vehicle's on-board computer. The DLC is usually located 12 inches from the center of the instrument panel (dash), under or around the driver’s side for most vehicles.
LAU N CH X-431 PRO User’s Manual — Vehicle Diagnosis 3.2 Bluetooth setting Enter X-431 PRO Bluetooth setting screen (“Settings” --> “Wi-Fi” --> “Bluetooth”), slide the Bluetooth switch to ON and X-431 PRO will start searching available Bluetooth device, click the desired connector to piar and match. By default, the Bluetooth name is 98269*****00 (where ***** stands for 5 digits.). Note: Bluetooth setting must be done before using the software. 3.
LAU N CH X-431 PRO User’s Manual — Vehicle Diagnosis 3.4 User and connector registration 3.4.1 User registration Click the icon on the desktop to launch the application, a disclaimer page will pop up on the window. Click “I’ve read it” to enter the login interface of diagnosis software, as indicated in Fig. 3-4. Fig. 3-4 If you are a new user, slide right arrow next to Register to enter registration page. See Fig. 3-5.
LAU N CH X-431 PRO User’s Manual — Vehicle Diagnosis Fig. 3-5 In Fig. 3-5, fill in the information in each field. After inputting, click “Register and Log In” to enter software main menu screen. If you have registered to be a member, input your name/CC and password in Fig. 3-4, and then click the “Log In” button to enter the main menu screen directly.
LAU N CH X-431 PRO User’s Manual — Vehicle Diagnosis 3.4.2 Software layout Fig. 3-6 Click to unfold function menu, it mainly includes the following items: Diagnosis: to enter vehicle diagnosis function. Service Info.: to provide a large amount of service data for car owners and maintenance personnel to make reference and review. My Space: to view diagnostic report, operation log and shopping record. Instant Info.: to view the Launch’s latest information and product trends.
X-431 PRO User’s Manual — Vehicle Diagnosis LAU N CH More: To view software version and user’s manual. Click to search vehicle models. Click to change the software theme. Click next to “Select Diag Model” to select the corresponding connector. While accessing other menus, click extend the display window. While browsing information, click shown on the bottom of the screen to or to zoom in or zoom out. 3.4.3 DBScar Connector registration After successfully registering, click “Management” to enter.
X-431 PRO User’s Manual — Vehicle Diagnosis LAU N CH 3.5 Start diagnosing Take Demo as an example to demonstrate how to diagnose a vehicle. Start the software to enter vehicle selection screen. Click “Demo” to enter demo menu screen. Click “DEMO” to enter system selection screen. Click “Engine”, the system starts initializing and then jump to the function menu. 3.5.1 Read trouble code Click “Read trouble code” in function menu, the screen will display the diagnostic result.
X-431 PRO User’s Manual — Vehicle Diagnosis LAU N CH On-screen buttons descriptions: Start Record: The system will record the real-time data and generate a text report. Create Word Report: to save the current data in text form. Create Screenshot Report: to save the current data in screenshot form. Click to return to the function selection screen. 3.5.4 Special function This option allows you to detect whether the system parameters are normal or not.
LAU N CH X-431 PRO User’s Manual — Vehicle Diagnosis shopping record. 3.7.1 Diagnostic report This option is used to view the diagnostic report generated in process of vehicle diagnosis. Additionally, delete, send operations are also supported. Click “Report”, a list of diagnostic report will appear below the tab. Click the desired one to view its content. Button definitions: :to send the report via email. :to delete the selected report. :to return to the previous screen. :to view the previous report.
LAU N CH X-431 PRO User’s Manual — Vehicle Diagnosis to start searching. To view public circle, click it, the Chat and Circle Data tabs will appear. Click “Chat” to view all history messages, you can also input the message in the input field and then click “Send” to join in the interactive discussion; click “Circle Data” to view the member’s picture. Click the desired one, a pull-down menu will pop up. You can choose to chat with him/her in private, add him/her as friend or view his/her data. 3.
LAU N CH X-431 PRO User’s Manual — Vehicle Diagnosis 3.11 More This option is used to view software information, quick start guide and user’s manual etc.
X-431 PRO User’s Manual — Others LAU N CH 4 Others 4.1 Email The function allows you to send and receive email. You can add POP3 or IMAP email account for some common web email service provider. 4.1.1 Add an email account Note: Before sending or receiving email, you have to set up an email account. In addition, this function required a stable network connection. 1. On the desktop, click to enter main menu screen, and then click . 2. Input email address and password, click “Next” or “Manual setup”.
X-431 PRO User’s Manual — Others LAU N CH 6. Enter the content in Compose email area. 7. After inputting, click , you can perform any one of the followings: attach file, add CC/BCC, save draft, discard and setting. to send email. 8. Click 4.1.4 View email 1. Enter main menu screen, and click 2. Click the desired email account. 3. Click to refresh the inbox. 4. Click the desired one to read. to enter account screen.
X-431 PRO User’s Manual — Others LAU N CH 4.2 WLAN This function enables you to enjoy surfing on the internet and downloading data from the internet via Wi-Fi. 4.2.1 Set Wi-Fi on 1. Enter main menu screen, choose “Settings” > “Wi-Fi”. 2. When the Wi-Fi switch is slid to ON position, it indicates Wi-Fi has been activated already. Note: To prolong the battery life, please switch Wi-Fi off when it keeps unattended. 4.2.2 Connect to Wi-Fi 1. 2. 3. Enter main menu screen, choose “Settings” > “Wi-Fi”.
X-431 PRO User’s Manual — Others LAU N CH 4.3 Browser 4.3.1 Open browser to launch the browser. You can choose the Enter main menu screen, click desired homepage or input the website address to browse. 1 Click to input or edit the web link 2 Web page display area 3 Click to open bookmarks, view history and saved web pages 4.3.2 Browse a webpage 4. 5. Open the browser. Input the web address, and click “Go” on the keyboard to visit the website.
X-431 PRO User’s Manual — Others LAU N CH 4.3.3 Zoom in / zoom out a page There are two ways to zoom in/ zoom out while browsing a webpage. • To zoom in so that the text on a webpage appears in a column that fits your device’s screen, double-tap with the tip of your finger. • To zoom in manually, place two fingers on the screen and then spread them apart. To zoom out, either double-tap again or place two fingers apart on the screen and then pinch them together. 4.3.4 Find on page 7. 8. 9.
X-431 PRO User’s Manual — Others LAU N CH 4.4 Using Bluetooth Bluetooth connection is supported on X-431 PRO. Using it, you can connect X-431 PRO to other compatible devices for data transmission. The effective distance between X-431 PRO and other Bluetooth devices is max. 10 meters. Please note Bluetooth connection is likely to be disturbed by other objects, such as walls or other electronic devices. 4.4.1 Open Bluetooth 1. 2. Enter main menu screen, click “Settings” > “Bluetooth”.
X-431 PRO User’s Manual — Others LAU N CH 3. 4. audio file. Click and choose “Bluetooth” from the pull-down menu. Click the target Bluetooth device you want to transmit files. 4.5 Camera 4.5.1 Open and close camera • Enter main menu screen, click . • In shoot mode, click to exit the camera. 4.5.2 Take a photo 1. 2. 3. Open camera. In shoot mode, aim the camera lens at the object you want to photograph and adjust it as desired. to take the picture. Click 4.5.3 View a photo 1. 2.
X-431 PRO User’s Manual — Others LAU N CH 4.5.5 View a video 1. 2. After a video is recorded, it will be displayed in thumbnail at the lower right corner of the screen. Click it to view in full-screen mode. The following operations can be done: • Click • Click • Click 3. to delete the video. to send this video file to your friend or upload it online. , you can stop playing it or play it in loop mode. In play mode, you can pause and play the video by swiping the screen. 4.5.
X-431 PRO User’s Manual — Others LAU N CH • Click to switch between front camera and rear camera. 4.6 Gallery This option is used to manage pictures and video files. 4.6.1 Open gallery Enter main menu screen, click “Gallery” to access it. The system searches images and videos in X-431 PRO and SD card automatically, and categorizes it into corresponding folders. 4.6.2 Browse images 1. 2. 3. 4. Enter main menu screen, click “Gallery”. Click the picture folder you want to view.
X-431 PRO User’s Manual — Others LAU N CH 3. 4. Open music file list. Click the desired audio files to start playing. Press VOLUME+/- key to increase or decrease the volume. to switch to other applications and the player will Hint: While playing, click be running in background. Open the status bar and choose the playing file to return to the player screen. 4.7.2 Music player interface 4 5 6 1 2 3 1 2 3 4 5 6 Hold and press it to open search screen.
X-431 PRO User’s Manual — Others LAU N CH ringtone, delete, sound effect and search etc. Click to return to the previous screen. Click to go back to desktop. 4.7.3 Create a new playlist 1. 2. 3. 4. 5. Enter main menu screen, and click “Music” to enter. Choose the desired music type. Open songs list. Hold and press the desired song, then choose “Add to playlist” > “New” Input the new playlist name, and then click “Save” to confirm.
X-431 PRO User’s Manual — Others LAU N CH 4.9.2 Delete an alarm 1. 2. 3. Enter main menu screen, click “Alarms”. Click the desired alarm. Click , then click “OK” in the confirmation dialog box to delete it. Hint: Alternatively, you can also hold and press the desired alarm on the alarm list screen, then choose “Delete alarm” from the pull-down list. 4.9.3 Customize your alarm 1. 2. Enter main menu screen, click “Alarms”. Click , and then choose “Settings”.
X-431 PRO User’s Manual — Others LAU N CH 4.11.2 Auto-rotate the screen 1. 2. Enter main menu screen, click “Settings” > “Display”. Tick the box “Auto-rotate the screen”. 4.12 Set screen lock This item allows you to protect your X-431 PRO from unauthorized use by creating a personal screen unlock pattern. Once it is set, X-431 PRO screen will not be unlocked until you draw the right pattern. 1. 2. 3. Enter main menu screen, click “Settings” > “Security” > “Screen lock”.
X-431 PRO User’s Manual — Others LAU N CH • View the currently running applications; • Click any one to stop it. 4.14 Language & input 1. 2. 3. Enter the main menu screen, click “Settings” > “Language & input”. Click “Language” and choose the desired language, the system interface will switch to the target language. To configure keyboard and input method, check the box before the desired input method. 4.15 Set date & time X-431 PRO is preset to use the network-provided date, time zone and time.
X-431 PRO User’s Manual — Others LAU N CH • In Browser, clear all cache, cookie data and history. • Uninstall the unnecessary applications. • Reset X-431 PRO to the default settings. 4.17 Restore X-431 PRO to factory settings This option enables you to restore X-431 PRO to the default factory settings. Once it is reset, all data (including downloaded applications) will be deleted. Note: Before resetting to factory data, please back up all important data saved in yourX-431 PRO. 1. 2.
Warranty THIS WARRANTY IS EXPRESSLY LIMITED TO PERSONS WHO PURCHASE LAUNCH PRODUCTS FOR PURPOSES OF RESALE OR USE IN THE ORDINARY COURSE OF THE BUYER’S BUSINESS. LAUNCH electronic product is warranted against defects in materials and workmanship for one year from date of delivery to the user. This warranty does not cover any part that has been abused, altered, used for a purpose other than for which it was intended, or used in a manner inconsistent with instructions regarding use.
determined to be out of warranty, it will be repaired for a nominal service charge plus return freight. Send the unit pre-paid to: Attn: Customer Service Department LAUNCH TECH. CO., LTD. Launch Industrial Park, North of Wuhe Avenue, Banxuegang, Bantian, Longgang, Shenzhen, Guangdong P.R.China, 518129 Launch website: http://www. cnlaunch.com http://www.x431.com Statement: LAUNCH reserves the rights to make any change to product designs and specifications without notice.
FCC STATEMENT This equipment complies with FCC RF radiation exposure limits set forth for an uncontrolled environment. This device complies with Part 15 of the FCC Rules. Operation is subject to the following two conditions:(1)this device may not cause harmful interference, and (2) this device must accept any interference received, including interference that may cause undesired operation.