
User Manual


14
LAUNCH X-431 PAD
User's Manual
A. Date setting
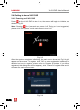
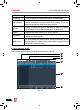
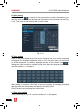
In Fig. 2-9, click
/ to switch to the previous/next month. Alternatively you
can also click month or year directly and choose from the pull-down list (see Fig.
2-10). Then click on the desired date to set the date.
Fig. 2-10
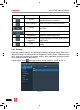
B. Time setting
Click on the time display area, the cursor will blink and a on-screen keyboard
will appear (For keyboard operation, refer to “2.5.2 Function items, UI layout and
on-screen keyboard” for details), highlight the time to be revised, click
to
change the input method to number mode, then input the desired time. Or you
can also click the +/- to adjust it.
After setting is complete, click [OK] to save your setting. A message prompting
date has been set successfully will appear, click [OK] to exit.
Click [Current time] to display the current time.
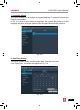
C. Time zone setting
Click [Timezone] in Fig. 2-9, a screen similar to 2-11 will appear.