
User's Manual


LAUNCH
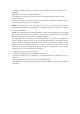
All illustrations are for reference purpose only and this Quick Start Guide is subject to change without notice.
1. Launch App -> 2. Create an App Account -> 3. Activate VCI Connector -> 4. Download
Diagnostic Software)
Register & Update
3
1. Launch App: Tap the application icon to
launch it. Tap “Login” on the right upper
corner of the screen.
a. For initial use, tap “New registration” to
open a sign-up page, refer to steps 2~4.
b. If you have an account, tap “Login” to
login directly.
c. If you forgot the password, tap “Retrieve
password” to retrieve it.
Login
Username
Password
Retrieve password New Registration
Login
2. Create Account: In Fig. B, fill in each field and tap “Register” to go to step 3. (Note: To
obtain more functions and better service, please enter the real information.)
3. Activate VCI Connector: In Fig. C, input the Product S/N and Activation Code (can be
obtained from the password envelope), and then tap “Activate”.
4. Update Diagnostic Software: Tap “Yes” in Fig. D to enter diagnostic software
download screen. (Note: To download the software later, tap “No”. In this case, tap
“Software Upgrade” on the function menu to download it.)
Tap “Update” to download and install the diagnostic software.(Note: Be sure that the tool
has a strong WLAN connection during downloading.)
Preparation & Connections
4
A
1. Preparation
1) Switch the ignition on.
2) The vehicle battery voltage should be 9-14V.
3) Throttle should be in a closed position.
2. Locate vehicle’s DLC
The DLC(Data Link Connector) provides standard
16 pins and is generally located on driver’s side,
about 12 inch away from the center of dashboard.
See Figure DLC Location. If DLC is not equipped under dashboard, a label indicating its
position will be given. In case no DLC is found, please refer to Automobile Repair Manual.
3. Connection
Select the desired diagnostic connector according to the vehicle DLC type and then follow
the steps below to proceed:
1. For vehicles equipped with an OBD II management system, plug the VCI connector into
the vehicle’s DLC directly or use the OBD II extension cable to connect the VCI
connector and the DLC.
2. For vehicles not equipped with an OBD II management system, do the following:
1). Select the corresponding non-16pin connector.
2). Plug the non-16pin end of the connector into the DLC socket, then connect the other
end to the OBD I adaptor, and then tighten the captive screws.
3). Connect the other end of the adaptor to the VCI connector.
4). To supply power to OBD I adaptor from:
A. Battery Clamps Cable(optional): Connect one end of the battery clamps cable to
vehicle's battery, and the other end to the power jack of OBD I adaptor, Or
B. Cigarette Lighter Cable(optional): Connect one end of the cigarette lighter cable
to vehicle's cigarette lighter receptacle, and the other end to the power jack of OBD
I adaptor.
Near center of dashboard
DLC Location
Start Diagnostics
5
For new users, follow the sequence below to start a new diagnostic session.
*Notes:
1. To start diagnosing a vehicle, you have to activate
the VCI connector and download the diagnostic
software. For details, refer to Section 3 “Register
& Update” in this Quick Start Guide.
2. All software is updated from time to time. To
enjoy more better service and functions, you are
suggested to keep updated with the latest version.
Quick Start Guide
CRP329
Tap “Diagnostic”
Select vehicle model
Select test system
Select test function
Select software
version
CAPTCHA
5169
*
Select Country
*
Email
*
Confirm Password
*
Password
*
Username
*
CAPTCHA
Create an Account Activate Connector Finish Registration
Register
Create an Account Finish RegistrationActivate Connector
Serial Number
Wher e is my activ ation cod e?
Activate
Activation Code
Product S/N
Activation Code
Create an Account Activate Connector Finish Registration
Congratulations! You have registered successfully. Do you download vehicle software now?
Yes No
B
C
D