
User guide

4: Configuration
xPrintServer User Guide 49
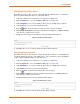
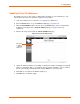
1. Login to the xPrintServer user interface (see Logging In) as Admin user.
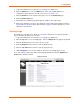
2. Click the Admin tab to access the Admin menu. A list of all available Admin user
configuration options appears to the left of the screen (see Figure 4-10).
3. Click the Restart link on the left side of the page to access the Restart Unit page.
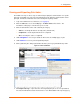
4. Click the Restart Unit button.
5. Click Yes in the confirmation popup that appears (or No to cancel this action).
6. Wait for the xPrintServer to reboot. The xPrintServer device will restart, bringing you back to
System Status on the Home Page. Authentication (Logging In) will be required to access the
xPrintServer user interface.
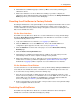
Viewing Logs
The Admin user may utilize these directions to view logs. xPrintServer user interface provides
logs for all diagnostic and access messages.
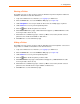
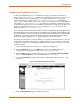
1. Login to the xPrintServer user interface (see Logging In) as Admin user.
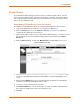
2. Click the Logs tab to access the Logs page. A list of all Diagnostic logs appears by default.
3. Click the Access link to the left to view only access logs.
4. Click the Diagnostic link to the left to view only diagnostic logs.
5. Click the Job Status link to the left to view only job status logs.
6. Utilize Navigation as necessary in situations where there are multiple pages of logs.
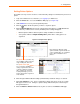
Note: The number of logs on the bottom of the page will update each time the Diagnostic or
Access link on the left is clicked.
Figure 4-18 Logs