
UBox USB Device Server User Guide UBX4100
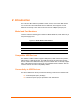
Table Of Contents
- Contents
- Using This Guide
- Introduction
- Installing the UBox
- Using USB Devices on the Network
- Changing the UBox's Settings
- Overview
- Viewing UBox Settings
- Editing Server Settings: Access Tab
- Editing Server Settings: Network Tab
- Editing Server Settings: USB Device Configuration Tab
- Applying, Canceling, or Removing Server Settings
- Restoring Default Settings
- Updating the UBox's Firmware
- Overriding Server Network Settings
- Refreshing Data
- Changing Local Software Settings
- Troubleshooting
- Status Light Behavior
- Configuring the Windows XP Firewall
- Compliance
- Lantronix Software License Agreement
- Lantronix Warranty
3: Installing the UBox
The UBox package has two components: the UBox hardware and the UBox software.
Both have their own settings and configuration options.
This chapter includes the following topics:
Installing the UBox Hardware
Installing the UBox Software
Uninstalling the UBox Device Server Software
Installing the UBox Hardware
Warning: Do not connect a USB device to the UBox until you have
finished installing the software and hardware. Chapter 4: Using USB
Devices on the Network walks you through the process of using your USB
devices.
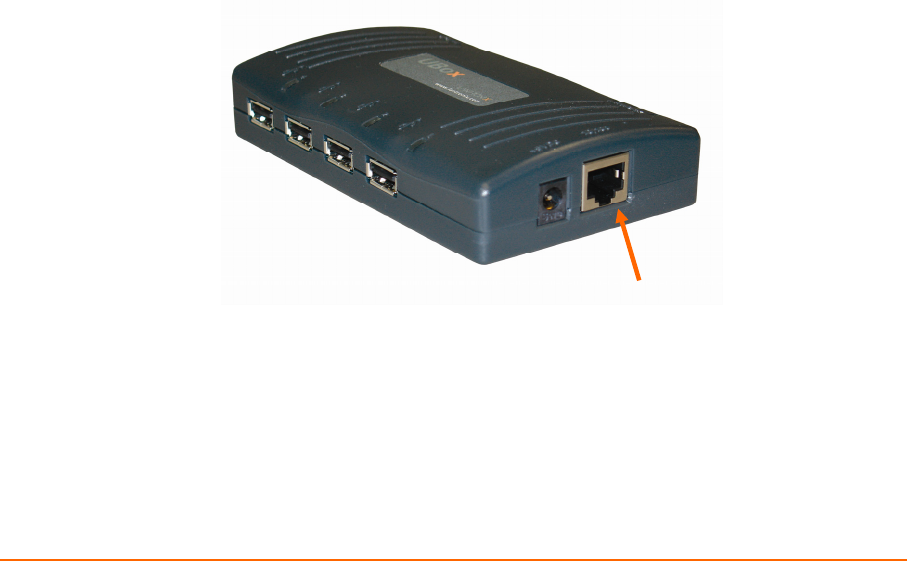
Step 1- Connect the UBox to Your Network
1. Connect an Ethernet cable to the Ethernet port of the UBox.
Figure 3-1. Ethernet Connection
Ethernet Port
2. Connect the other end of the cable to your network.
If you do not have a network, you can connect the UBox directly to the Ethernet
port on your computer using an Ethernet crossover cable.
UBox User Guide 10