
Use Instructions


PN 10232 Eagle V1.2 Instructions for Use Rev 1.0 Page 69 of 101
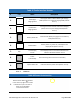
Table 35 Imaging Mode User Interface Icons
# Icon Name Description
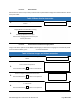
1.
Imaging Field of View N/A
Indicates the borders of the imaging field of
view
2.
Circle of Interest N/A
Recommended imaging region for Fluorescence
Imaging. Imaging in this region ensures optimal
Fluorescence Imaging.
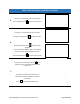
3.
End Session Icon
Pressing this button will end the current
imaging session after prompting.
4.
Device Information
Icon
Pressing this button will display device
information.
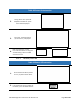
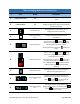
5.
Capture Image Icon
This icon turns grey to white during
Fluorescence Imaging or White Light Imaging
indicating the camera icon is active.
Pressing the active camera icon captures an
image.
6.
Capture Video Icon
This icon turns grey to white during
Fluorescence Imaging or White Light Imaging
indicating the icon is active.
Pressing the active video icon begins video
recording. During video recording, the video
icon is highlighted red . Pressing the active
video icon again stops and saves the video
recording.
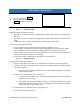
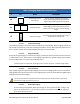
7.
Review Session Icon
Pressing this button will display the Review
Session screen (section 6.2.2.1.4)
8.
Fluorescence Imaging
Icon
Pressing this button initiates Fluorescence
Imaging from Imaging Mode. This icon turns
white to blue during Fluorescence
Imaging (section 6.2.2.2.5).
9.
White Light Imaging
Icon
Pressing this button initiates White Light
Imaging Mode. This icon turns from white
to blue during White Light Imaging
(section 6.2.2.2.4).