
Use Instructions


PN 10232 Eagle V1.2 Instructions for Use Rev 1.0 Page 66 of 101
6.2.2.1.3. Demo Session
A Demo Session doesn’t require entry of a Session ID or patient ID and images are saved to Sessions named
with prefix “000”.
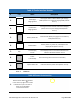
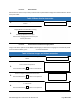
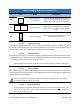
Table 33 Demo Session Instruction
1.
Press “Demo session” to begin a demo
session.
2.
Imaging Mode is initiated after pressing
.
White Light (Section 6.2.2.2.4) or
Fluorescence Imaging (Section 6.2.2.2.5) can
now be performed.
6.2.2.1.4. Review Session and Review Images/Videos
Images and videos captured under White Light Imaging or Fluorescence Imaging are automatically saved.
From the Sessions Menu, press to review saved data.
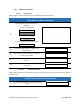
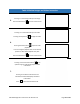
Table 34 Review Images and Videos Instruction
1.
Press “Review sessions” to review saved images and
videos.
2.
All sessions are shown.
Press a session to explore it.
Press the Back button to return to the Session
Menu.
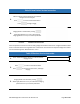
3.
Sessions may be comprised of sub-sessions.
Press the Back button to return to the previous
screen.
4.
Saved images and videos are found within a session
or sub-session
Press the Back button to return to the previous
screen.