Operator Guide 5222/5227 Printer Your document management partner.
When ordering supplies or requesting service for your copier, you will need to provide the model and serial number of your machine. Please take a moment to enter your model and serial numbers here. MODEL NUMBER: __________________________ SERIAL NUMBER: __________________________ To order supplies, call: To request service, call: ( ) ( ) Information Statement: Layout and contents of this document are based on the information available at the time of this CD-ROM production.
Table of Contents Table of Contents Introduction Connecting to the Printer ........................................................................... 1-1 Printer Requirements ..................................................................... 1-1 Connecting the Printer to the Host Using Parallel Interface Cable ........ 1-2 Connecting the Printer Using the Network Interface Board 185 ........... 1-3 Printer Drivers for this Printer .........................................................
Table of Contents Windows 3.1x - Accessing the Printer Setting Dialog Box .................. 5-3 PostScript - Setting Up for Printing ............................................................. 5-5 Windows 95/98 - Accessing the Printer Properties ........................... 5-5 Windows NT 4.0 - Accessing the Printer Properties .......................... 5-6 Windows 3.1x - Accessing the Printer Setting Dialog Box .................. 5-7 Macintosh - Setting Up for Printing ..................................
Chapter 1 Introduction
Chapter Overview This Chapter covers: • “Printer Requirements” on page 1-1 • “Connecting the Printer to the Host Using Parallel Interface Cable” on page 1-2 • “Connecting the Printer Using the Network Interface Board 185” on page 1-3 • “Printer Drivers for this Printer” on page 1-6 • “Message Display” on page 1-9 Introduction
Connecting to the Printer Connecting to the Printer Confirm that the shape and the position of the connector are as shown in the illustration. Parallel Port 10BASE-T/100BASE-TX Printer Requirements Requirements Before using the printer, confirm that all the environmental and electrical requirements have been met. Connect the unit to your host computer using the parallel port, optional Network Interface Board 185, or both.
Connecting to the Printer Network Cable Requirements The optional Network Interface Board 185 can be installed to allow direct connection to an Ethernet network. The Network Interface Board supports 10BASE-T or 100BASE-TX connections. You can use the machine in the following network environments: • • Using the appropriate network management software and printer driver. Attaching the machine to a networks computer set up as a server. Client Windows 95, 98, NT 4.0, 3.
Connecting to the Printer Connecting the Printer Using the Network Interface Board 185 Connect the printer to the network using the Network Interface Board 185. Follow these steps to connect the printer. 1 Confirm that you have the correct cable. 2 Confirm that the machine is turned off. 3 Loop the network cable. The loop should be about 10cm (4”) from the end of the cable on the end closest to the printer. 4 Attach the ferrite core to the loop.
Connecting to the Printer Button and Indicators on the Network Interface Board 1 2 3 4 1 Button: Press this button for more than 2 seconds to print “Network Configuration Page”. Press this button more than 5 seconds to print “System Log Information”. 2 Indicator (orange): Stays on while the network interface board is working. 3 Indicator (green): Stays on while 100BASE-TX is working. Stays off while 10BASE-T is working. 4 Indicator (green): Stays on while the machine is in a network environment.
Connecting to the Printer Variety of Paper Media Support Standard Tray 2 and optional Bypass Tray Type 270 support variety of paper media such as thick paper, transparency and some envelops. For more information on supported paper and other media, see “Copy Reference”. Network Connectivity Your printer is network ready with the optional network interface board. Network Utility PRINTER MANAGER, software consisting of Administration and Client versions, is provided.
Connecting to the Printer Major Specifications Printing Speed 22/27ppm (A4K, 81/2" ¥ 11"L, simplex) 22ppm (A4K, 81/2" ¥ 11"L, duplex) Engine Resolution 600dpi / 300dpi resolution Enhanced resolution with edge smoothing Printer Language PCL 5e, PCL 6 Adobe PostScript Level 3 Memory 16MB Max.
Connecting to the Printer PCL Printer Drivers Printer drivers allow the computer to communicate with the printer via a printer language. Two kinds of PCL printer drivers, PCL 6 and PCL 5e, are included in the CD-ROM that comes with this machine. We recommend the PCL 6 as your first choice. However, some of your applications might require the installation of the PCL 5e printer driver. In this case, you might configure to install and print by using PCL 5e in addition to the PCL 6.
Operation Panel Operation Panel This panel display is for installed Facsimile and Printer. 1 2 3 4 5 6 7 1 8 9 10 {User Tools} key: Press to change the default settings and conditions to meet your requirements. 2 Error Indicator: Lights up whenever a printer error occurs. A message describing the cause of the error also appears on the panel display. 3 Panel Display: Shows the operation status, error messages, and function menus. Press selection keys to select the function on the panel display.
Operation Panel Message Display The Message Display shows operational status, error messages, and function menus. • Do not apply a strong shock or a force of about 30N (about 3kgf) or more to the panel display. Otherwise, the display might be damaged. Ready Q’ty: 1 Auto 11x17 8 1/2x14 8 1/2 x 11 Select with < > 100% 1 2 1 Operation and Error Messages are displayed. 2 Cursor keys. Items can be selected or specified. These keys correspond to the keys that are in the bottom line of the display.
Online and Offline Online and Offline Online Online is the state in which the printer can receive data from the computer. 1 1 (Job Reset) (Online) 2 [Job Reset] key: Press this key when the printer is online to cancel the current print job. 2 [Online] key: Press this key to change the online status, the printer offline conditions. Offline Offline is a state in which the printer cannot receive data from the computer.
Chapter 2 Printer Configuration
Chapter Overview This chapter covers: • “Configuring the Printer for the Network” on page 2-1 • “Subnet Mask” on page 2-5 • “Gateway Address” on page 2-5 • “Access Control Address and Access Control Mask” on page 2-5 Printer Configuration
Configuring the Printer for the Network Configuring the Printer for the Network After installing the optional network interface card, configure it for the network using the printer's Control Panel. The following table shows the operation panel settings and their default settings. These are included in the “Main Menu”. Items Printer Configuration Default 32 IP Address 011.022.033.044 33 Subnet Mask 000.000.000.000 34 Gateway Address 000.000.000.
Configuring the Printer for the Network 5 Select the protocol you want to use. You can select one of the items on the following table.
Configuring the Printer for the Network TCP/IP, you should assign the IP Address to your printer. • • To get the IP Address for your printer, contact your network administrator. The IP Address is shown by Byte on the panel display. 011 . 022 . 033 . 044 Byte 1 Byte 2 Byte 3 Byte 4 1. Press the Up or Down Arrow keys until the following message appears. 2. Press [Enter #]. The current Byte 1 of the IP Address appears on the panel display. 3. Use the Up or Down Arrow keys to specify the IP Address. 4.
Configuring the Printer for the Network Menu item on the panel display Available method ARP+ING RARP_TFTP BOOTP DHCP None (Default Setting) RARP + TFTP X BOOTP RARP & BOOTP X X X DHCP • X You should set up your server, if you want to use “RARP + TFTP”, “BOOTP”, or “DHCP”. 1. Press the Up or Down Arrow keys until the following message appears. 2. Press [Enter #]. The current setting appears on the panel display. 3. Press the Up or Down Arrow keys until the method you want to use appears. 4.
Configuring the Printer for the Network The current setting appears on the panel display. 3. Press the Up or Down Arrow keys until the frame type you want to use appears. 4. Press [Enter #]. 10 Exit from the setup menu to the available function settings. 1. Press [Escape]. 2. Press [Escape]. 3. Press [Exit]. 11 When printing a configuration page, confirm of your printer's configuration. 1. Press {User Tools}. 2. Press {4} on the number keys. 3.
Configuring the Printer for the Network • • When the Access Control Address settings coincide with the masked result of the IP Address of the computer, print jobs from that IP Address can be accepted by the network interface board. For example, if you assign 192.168.15.16 as the Access Control Address to the network interface board, the combination of the Access Control Mask and IP Address that can have access are as follows.
Chapter 3 Installing Printer Driver
Chapter Overview This Chapter covers: • “Auto Run” on page 3-1 • “Software and Utilities Included on the CD-ROM” on page 3-3 • “Installing the PCL 6/5e Printer Driver” on page 3-4 • “Installing the PostScript Printer Driver” on page 3-8 • “Using Adobe PageMaker Version 6.0 or 6.
Auto Run Auto Run You can install the printer driver by using Auto Run. Auto Run is available for the following operating systems: • • Windows 95/98 Windows NT 4.0 If your system is Windows 3.1x or Macintosh, see information on installing the printer driver. See “Windows 95/98 - Installing the PCL 6/5e Printer Driver” on page 3-4. See “Windows 3.1x - Installing the PCL 6/5e Printer Driver” on page 3-6. See “Macintosh - Installing the PostScript Printer Driver” on page 3-12.
Auto Run • • 3-2 If the "plug and play" function is started by Auto Run, click [Cancel] of the [New Hardware Found] dialog box or [Device Driver Wizard], and then insert the CDROM. [New Hardware Found] or [Device Driver Wizard] appears depending on the system version of the Windows 95/98.
Software and Utilities Included on the CD-ROM Software and Utilities Included on the CD-ROM Agfa Font Manager Helps you to install new fonts, or organize and manage fonts already installed on your system. PRINTER MANAGER FOR ADMINISTRATOR A utility for the system administrator to manage printers on the network. For the name of the PRINTER MANAGER FOR ADMINISTRATOR you use, see the “Operating Instruction” for the optional Network Interface Board which is on the CD-ROM.
Installing the PCL 6/5e Printer Driver Installing the PCL 6/5e Printer Driver Windows 95/98 - Installing the PCL 6/5e Printer Driver Installing the Printer Driver Install the driver in accordance with the steps explained. See “Installing by Auto Run” on page 3-1. Setting Up Options • 1 Click [Start] on the task bar, point to [Settings], and then click [Printers]. • 3-4 When setting up options, you should access the Printer Properties from Windows.
Installing the PCL 6/5e Printer Driver Windows NT 4.0 - Installing the PCL 6/5e Printer Driver Installing the Printer Driver • • • • • Installing Printer Driver If your system uses Windows NT 4.0 and Service Pack 4 is installed, you might not install the PCL 6/5e printer driver using Auto Run. In this case, use [Add Printer Wizard] in the [Printers] window to install the printer driver or install Service Pack 5 in the computer before install the printer driver.
Installing the PCL 6/5e Printer Driver Setting Up Options Changing the setting of the printer requires Full Control access permission. Members of the Administrators, Server Operators, Print Operators, and Power Users groups have Full Control permission by default. When you set up options, log on under Full Control permission. When setting up options, you should access the Printer Properties from Windows. You cannot access the Printer Properties from an application.
Installing the PCL 6/5e Printer Driver 10 Double-click “SETUP.EXE”. 11 Follow the instructions on the screen. Setting Up Options When setting up options, you should access the Printer Setting dialog box from Windows. You cannot access the Printer Setting dialog box from an application. 1 From the [Main] group of [Program Manager], double-click [Control Panel]. 2 Double-click the [Printers] icon. 3 In the [Installed Printers:] list, click the name of the printer you want to set up.
Installing the PostScript Printer Driver Installing the PostScript Printer Driver Windows 95/98 - Installing the PostScript Printer Driver Installing the Printer Driver Install the driver in accordance with the steps explained in “Installing by Auto Run” on page 3-1. Setting Up Options When setting up options, you should access the [Device Options] tab from Windows. You cannot set up options when accessing the [Device Options] tab from an application.
Installing the PostScript Printer Driver 1 Click [Start] on the task bar, point to [Settings], and then click [Printers]. • The [Printers] window appears. 2 Click the icon of the printer you want to use. On the [File] menu, click [Properties]. 3 Click the [Device Settings] tab. 4 Use the [Installable Options] group to specify the options. 5 Click [OK] to close the Printer Properties. Windows 3.
Installing the PostScript Printer Driver 3 In the [Installed Printers:] list, click the name of the printer you want to set up. 4 Click [Setup]. 5 Click the [Features] tab. • 3 - 10 The [Printer Features] group appears. 6 Use the [Printer Features] group to specify the options. 7 Click [OK] to close the Printer Setting dialog box. 8 Click [Close] to close the [Printers] dialog box.
Using Adobe PageMaker Version 6.0 or 6.5 Using Adobe PageMaker Version 6.0 or 6.5 If you use the printer under Windows 95/98/NT 4.0 with Adobe PageMaker, you need to copy the PPD file to the PageMaker folder. • • • • • • Installing Printer Driver The PPD file is the file with extension ".ppd". It is in the folder “\PS\WIN95_98\(Language)\DISK1\” on the CD-ROM. The [WIN95_98] folder, inside the [PS] folder is for the Windows 95/98 operating system.
Macintosh Macintosh Macintosh - Installing the PostScript Printer Driver It is necessary to install a printer driver and a PPD file to print from a Macintosh. Follow these steps to install a printer driver and a PPD file into a Macintosh using a system 7.1 or later operating system. • • 3 - 12 You cannot use LaserWriter 8.5.0 or later with Mac OS 8.1 or later until you do the following procedure.
Macintosh Setting Up the PPD File Confirm that the printer is connected to an AppleTalk network before performing the following procedure. 1 On the [Apple] menu, select [Chooser]. 2 Click the [Adobe PS] icon. 3 In the [Select a PostScript Printer:] list, click the name of the printer you want to use. 4 Click [Create]. 5 Click the printer you want to use, and then click [Select]. • The PPD file is set up, and the [Adobe PS] icon appears at the left of the printer name in the list.
Macintosh Notes: 3 - 14 Installing Printer Driver
Chapter 4 Uninstalling the Printer Driver
Chapter Overview This Chapter covers: • “Windows 95/98 - Uninstalling the PCL 6/5e Printer Driver” on page 4-1 • “Windows NT 4.0 - Uninstalling the PCL 6/5e Printer Driver” on page 4-1 • “Windows 3.1x - Uninstalling the PCL 6/5e Printer Driver” on page 42 • “Windows 95/98 - Uninstalling the PostScript Printer Driver” on page 4-3 • “Windows NT 4.0 - Uninstalling the PostScript Printer Driver” on page 4-3 • “Windows 3.
Uninstalling the PCL 6/5e Printer Driver Uninstalling the PCL 6/5e Printer Driver This section describes how to uninstall the printer driver. The actual procedure may differ depending on your operating system. Follow the appropriate procedure. Windows 95/98 - Uninstalling the PCL 6/5e Printer Driver 1 Close all the applications that are currently running. 2 Click [Start] on the task bar, point to [Settings], and then click [Printers]. • The [Printers] window appears.
Uninstalling the PCL 6/5e Printer Driver Windows 3.1x - Uninstalling the PCL 6/5e Printer Driver 1 Close all applications that are currently running. 2 Insert the CD-ROM in the CD-ROM drive. 3 From [Program Manager], select [Run] from the [File] menu. 4 In the [Run] window, click [Browse]. 5 Select the CD-ROM drive in the [Drives:] list. 6 Open [PCL5E] or [PCL6]. 7 Open [WIN31]. 8 Open the folder of the language you use. 9 Open [DISK1]. 10 Double-click “UNSETUP.EXE”. 11 Click [OK].
Uninstalling the PostScript Printer Driver Uninstalling the PostScript Printer Driver This section describes instructions for uninstalling the PostScript printer driver. The actual procedure may differ depending on your operating system. Follow the appropriate one of the following procedures below. Windows 95/98 - Uninstalling the PostScript Printer Driver 1 Close all applications that are currently running. 2 Click [Start] on the task bar, point to [Settings], and then click [Printers].
Uninstalling the PostScript Printer Driver Windows 3.1x - Uninstalling the PostScript Printer Driver 1 Open [Control Panel]. 2 Double-click the [Printers] icon. 3 Select the printer you want to delete and click [Remove]. • A confirmation dialog box appears. 4 Click [Yes] to uninstall the printer driver. 5 Click [Close] to close the [Printers] dialog box.
Chapter 5 Setting Up Printer Driver
Chapter Overview This chapter covers: • “Windows 95/98 - Accessing the Printer Properties” on page 5-1 • “Windows NT 4.0 - Accessing the Printer Properties” on page 5-2 • “Windows 3.1x - Accessing the Printer Setting Dialog Box” on page 53 • “Windows 95/98 - Accessing the Printer Properties” on page 5-5 • “Windows NT 4.0 - Accessing the Printer Properties” on page 5-6 • “Windows 3.
PCL 6/5e - Accessing the Printer Properties PCL 6/5e - Accessing the Printer Properties Windows 95/98 - Accessing the Printer Properties There are two methods you can use to open the Printer Properties. Making Printer Default Settings To make the printer default settings, first open the Printer Properties from the [Printers] window. 1 Click [Start] on the task bar, point to [Settings], and then click [Printers]. • The [Printers] window appears.
PCL 6/5e - Accessing the Printer Properties Windows NT 4.0 - Accessing the Printer Properties Making Printer Default Settings - Printer Properties Changing the settings of the printer requires Full Control access permission. Members of the Administrators, Server Operators, Print Operators, and Power Users groups have Full Control permission by default. When you set up options, log on under Full Control permission. 1 Click [Start] on the task bar, point to [Settings], and then click [Printers].
PCL 6/5e - Accessing the Printer Properties 1 On the [File] menu, click [Print]. • 2 The [Print] dialog box appears. From the [Name:] list, select the printer you want to use, and then click [Properties]. • The Document Properties appears. 3 Set desired settings and click [OK]. 4 Click [OK] to start your printing. Windows 3.1x - Accessing the Printer Setting Dialog Box There are two methods you can use to open the Printer Setting dialog box.
PCL 6/5e - Accessing the Printer Properties 1 On the [File] menu, click [Print Setup]. • 2 From the [Printer] group, select the printer you want to use. • 3 If the printer you want to use is not specified as the default printer, click [Specific Printer:], and then find the printer you want to use in the list box. Click [Options]. • 5-4 The [Print Setup] dialog box appears. The Printer Setting dialog box appears. 4 Set desired settings and click [OK].
PostScript - Setting Up for Printing PostScript - Setting Up for Printing Windows 95/98 - Accessing the Printer Properties There are two methods you can use to open the Printer Properties. Making Printer Default Settings To make the printer default settings, first open the Printer Properties from the [Printers] window. 1 Click [Start] on the task bar, point to [Settings], and then click [Printers]. • The [Printers] window appears.
PostScript - Setting Up for Printing Windows NT 4.0 - Accessing the Printer Properties Making Printer Default Settings - Printer Properties Changing the settings of the printer requires Full Control access permission. Members of the Administrators, Server Operators, Print Operators, and Power Users groups have Full Control permission by default. When you set up options, log on under Full Control permission. 1 Click [Start] on the task bar, point to [Settings], and then click [Printers].
PostScript - Setting Up for Printing Making Printer Settings from an Application To make the printer settings for a specific application, open the Document Properties from that application. The following example describes how to make settings for the WordPad application that comes with Windows NT 4.0. • • 1 On the [File] menu, click [Print]. • 2 The actual procedures you should follow to open the Document Properties may differ depending on the application.
PostScript - Setting Up for Printing Making Printer Settings from an Application To make the printer settings for a specific application, open the Printer Setting dialog box from that application. The following example describes how to make settings for the Write application that comes with Windows 3.1x. • • • 1 On the [File] menu, click [Print Setup].
PostScript - Setting Up for Printing Macintosh - Setting Up for Printing Making Paper Settings from an Application 1 Open the file you want to print. 2 On the [File] menu, click [Page Setup]. 3 [AdobePS Page Setup] appears. 4 Confirm that the printer you want to use is shown in the [Format for:] box. • • If your printer is now shown in the [Format for:] box, use the pop-up menu to display a list of available printers.
Canceling a Print Job Canceling a Print Job Windows 95/98 - Canceling a Print Job 1 Double-click the printer icon on the task bar. • This opens a window that shows all the print jobs that are currently queued for printing. Check the current status of the job you want to cancel. 2 Click the name of the job you want to cancel so that it is highlighted. 3 On the [Document] menu, click [Cancel Printing].
Canceling a Print Job • • • • When your printer is being shared by multiple computers, be careful not to accidentally cancel someone else's print job. You cannot stop printing data that has already been processed internally by the printer. Because of this, printing might continue for a few pages after you press [Job Reset]. A print job that contains a large volume of data might take considerable time to stop.
Canceling a Print Job Macintosh - Canceling a Print Job 1 Double-click the printer icon on the desktop. • 2 Click the name of the job you want to cancel so that it is highlighted. 3 Click the pause icon, and then click the trash icon. 4 Press the printer's [Job Reset] key. • • • • • 5 - 12 This opens a window that shows all the print jobs that are currently queued for printing. Check the current status of the job you want to cancel.
Chapter 6 Troubleshooting
Chapter Overview This chapter covers: • “Error and Status Messages” on page 6-1 • “Printer Does Not Print” on page 6-11 • “Additional Printing Problems” on page 6-14 Troubleshooting
Error and Status Messages Error and Status Messages Error and Status Messages on the Message Display Panel This section describes instructions for error and status message of the printer function. To use the printer function, press [Printer]. Troubleshooting Messages Description Comments Add Staples The stapler is empty. Replace the staple refill with a new one. Cannot Output To Selected Tray The paper can not be printed to the output tray that you selected.
Error and Status Messages 6-2 Messages Description Comments Error 30711 AD370 (duplex unit) cannot be used. Another tray is used to print. Contact your sales or service representative. Error 30721 PS420 (paper feed unit) cannot be used. Another tray is used to print. Contact your sales or service representative. Error 30722 Tray 1 cannot be used. Another tray is used to print. Contact your sales or service representative. Error 30723 Tray 2 cannot be used. Another tray is used to print.
Error and Status Messages Troubleshooting Messages Description Comments Load Bypass xx The bypass tray is out of paper. xx: Paper Size Load paper of the indicated paper size into the bypass tray. Load Tray ** xx There is out of paper. **: Number Tray xx: Paper Size Load paper of the indicated paper size into the paper tray. Load *** XX There is no paper tray of the indicated. ***: Paper Type XX: Paper Size Load paper onto the tray of the indicated. No Files Exist There is no proof print file.
Error and Status Messages Messages Description Comments Remove Paper Standard Tray The standard output tray is full. Remove paper from the output tray. Remove the paper from output tray before it becomes full. If you leave paper in the output tray, it can cause a paper misfeed. Remove Paper 1Bin Tray The PT270 (1bin tray) is full. Remove the paper from the PT270 (1bin tray). Remove the paper from the output tray before it becomes full. If you leave paper in the tray, it can cause a paper misfeed.
Error and Status Messages Getting Printer Information over the Network Printer Current Status You can check the printer's current status using the "Telnet (mshell)". mshell Use status command. Troubleshooting Messages Description Resolution Add Staples The staple is empty. Replace the staple refill with a new one. Add Toner The printer is out of toner. Replace a new toner bottle. Call Service Power Off On The Service Code or SC number identifies the failure.
Error and Status Messages 6-6 Messages Description Resolution Error 30721 PS420 (paper feed unit) cannot be used. Another tray is used to print. Contact your sales or service representative. Error 30722 Tray 1 cannot be used. Another tray is used to print. Contact your sales or service representative. Error 30723 Tray 2 cannot be used. Another tray is used to print. Contact your sales or service representative. Error 30724 Tray 3 cannot be used. Another tray is used to print.
Error and Status Messages Troubleshooting Messages Description Resolution Load *** xx There is no paper tray of the indicated. *** : Paper Type xx : Paper Size Load paper onto the tray of the indicated. Low On Toner The toner bottle is almost empty. Prepare a new toner bottle. If the image density is too light, replace the old toner bottle with a new one. Misfeed:{location} There is a misfeed in the Open Front Cover printer. Remove the misfed paper from {location}. Offline Printer is offline.
Error and Status Messages Messages Description Resolution Remove Paper Standard Tray The standard output tray is full. Remove paper from the standard output tray Remove paper from the output tray before it becomes full. If you leave paper in the output tray, it can cause a paper misfeed. Remove Paper 1Bin Tray The PT270 (1bin tray) is full. Remove the paper from the PT270 (1bin tray). Remove the paper from the output tray before it becomes full.
Error and Status Messages Item Description Output Tray No.. Name Status ID number of the output tray Name of the output tray *4 Current status of the output tray *5 Emulation No. Name Version ID number of the emulation used which the printer Name of the emulation used which the printer Version of the emulation Program No Entries Note: “*” (asterisk) is displayed with the current setting. Regarding *1–*5, see the attached tables.
Error and Status Messages Paper Size Description 5 1/2 x 8 1/2 Statement 8 1/2 x 5 1/2 Statement 8 1/4 x 13 81/4" x 13" 8 1/2 x 13 Foolscap 8 x 13 8" x 13" 4 1/8 x 9 1/2 Com10 Env.(4.125" x 9.5") 3 7/8 x 7 1/2 Monarch Env.(3.875" x 7.5") C6 Env(114 x 162) C6 Env.(114 x 162mm) C5 Env(162 x 229) C5 Env.(162 x 229mm) DL Env(110 x 220) DL Env.
Printer Does Not Print Printer Does Not Print Troubleshooting Possible Cause Solutions Is the power on? If not, confirm that the cord is securely plugged into the power outlet and the machine. Turn on the machine power. Does the On Line indicator stay on? If not, press [Online] to make it light up. Does the Error indicator stay red? Press {Printer}. If not, check the error message on the panel display and take the required action. Is the paper set? Load paper into the paper tray.
Printer Does Not Print Possible Cause Solutions If you print using the PostScript driver in a network, data is received by the printer, but is not printed. Windows 95/98 On the [PostScript] tab of the Printer Properties, click [Advanced] and then clear both [Send CTRL+D before job] and [Send CTRL+D after job]. Windows NT 4.0 Open the [Advanced] tab of the Printer Properties. From [PostScript Options], select [No] for both [Send CTRL-D Before Each job:] and [Send CTRL-D After Each job:]. Windows 3.
Printer Does Not Print Possible Cause Solutions Is the Data In indicator blinking or lit after starting the print job, when using the PCL printer? If not, the data is not being sent to the printer, or the printer may be resetting the print job because there was a long delay in receiving the data from the computer. If the printer is using "I/O Timeout" Increase the value of the "I/O Timeout" setting of the "System" menu of the "Job Control".
Additional Printing Problems Additional Printing Problems 6 - 14 Problem Action It takes a long time for the printer to start printing. The machine might be in Energy Saver mode or Low Power mode, which requires more time for warming up and resuming the print job. If you can't wait, change the settings of Low Power, Shift Time and Low Power Timer. It takes too much time to complete the print job. The data is so large or complex that it takes time to process it.
Chapter 7 Using the Control Panel
Chapter Overview This Chapter covers: • “Proof Print Menu” on page 7-6 • “Job Control Menu” on page 7-7 • “Network Setup Menu” on page 7-10 • “Maintenance Menu” on page 7-11 • “List Print Menu” on page 7-12 • “Specifying the Custom Paper Size for the Bypass Tray” on page 7-13 • “Printer Condition” on page 7-15 • “Printing with the Operation Panel” on page 7-16 Using the Control Panel
Adjusting Printer Features Adjusting Printer Features This section describes the information on adjusting the printer settings using the System Settings and the Printer Features menus. • • After using [User Tools], be sure to return to Printer mode. The settings are not canceled even if the operation switch is turned off or the [Escape] key is pressed. For more information on specifying the network system, see “Configuring the Printer for the Network” on page 2-1.
Adjusting Printer Features Category Function Menu Proof Print Print File Delete File Show Error Log Job Control Paper Input Tray Priority Tray Locking Bypass Size Print Quality Edge Smoothing Resolution Toner Saving System Print PS Errors I/O Timeout I/O Buffer PCL Menu Orientation Form Lines Font Source Font Number Point Size Font Pitch Symbol Set Network Setup IP Address Subnet Mask Gateway Address Access Control Access Mask Network Boot Frame Type(NW) ActiveProtocols Maintenance See“Maint
Adjusting Printer Features Category Function Menu List Print See “List Print Parameters” on page 7-12 Config.
Accessing the Main Menu Accessing the Main Menu 1 Confirm that the printer is offline. If not, take the printer offline. 2 Press [User Tools] and press [4] on the number key to display the “Main Menu” on the panel display. The “Main Menu” has the following five menus, which can be displayed one by one using the Up or Down Arrow keys. • • • • • Proof Print Job Control Network Setup Maintenance List Print • • • [Down Arrow]: Press to go to the next page.
Making Printer Settings with the Operation Panel Making Printer Settings with the Operation Panel 1 Press {User Tools}. 2 Press {4} on the number keys. 3 Search for the desired menu with [Down Arrow] or [UP Arrow] keys. • 4 Press [Enter #]. 5 Search for the desired menu with [Down Arrow] or [UP Arrow] keys. • • 6 7 The desired menu or parameter appears. “p” shown in front of a item indicates that the item is currently selected. Press [Enter #]. • The specified item appears.
Proof Print Menu Proof Print Menu There are 3 menus in the “Proof Print” menu. • • • • Print File Delete File Show Error Log For more information on “Proof Print”, see “Using the Proof Print” on page 7-16. Proof Print Parameters Proof Print 7-6 Menu Description Print File Select a proof print file and print it. Delete File Select a proof print file and delete it. Show Error Log Show the error log in the proof print job.
Job Control Menu Job Control Menu There are 4 menus in the “Job Control” menu. • • • • Paper Input Print Quality System PCL Menu Job Control Parameters Paper Input Menu Description Tray Priority You can specify the default tray. The tray selection specified with the printer driver overrides the one specified here. In DOS printing, the tray specified here is used, when no tray is specified for a print job. Tray1, Tray2, Tray3, Tray4 Default: Tray1 Only the installed trays appear on the panel display.
Job Control Menu Menu Description Resolution You can specify the print resolution in dots per inch. 600 dpi (PCL 5e, PCL 6, PS) 300 dpi (PCL 5e, PS) Default: 600 dpi The resolution specified with the printer driver overrides the one specified here. Toner Saving You can specify whether or not the Toner Saving feature is enabled. Off On Default: Off If "Edge Smoothing" is "On", "Toner Saving" is ignored even if it is "On".
Job Control Menu Menu Description Font Source You can specify the location of the default font. Internal Download Default: Internal When you select “Download”, you can select only downloaded fonts on the RAM. Font Number You can specify the ID for the default font you want to use. 1 to 52 (for Internal) 1 to N (for Download source) Default: 0 “N” depends on how many fonts you have downloaded.
Network Setup Menu Network Setup Menu For more information on “Network Setup”, see “Configuring the Printer for the Network” on page 2-1. Network Setup Menu Description IP Address You can specify the IP Address. Default: All zero Subnet Mask You can specify the Subnet Mask. Default: All zero Gateway Address You can specify the Gateway Address. Default: All zero Access Control You can specify the Access Control Address. Default: All zero Access Mask You can specify the Access Mask.
Maintenance Menu Maintenance Menu There are 3 menus in the “Maintenance” Menu. • • • Restart Printer Menu Reset Hex Dump Maintenance Parameters Restart Printer Menu Description Restart Printer You can restart the printer. Menu Reset Menu Description Menu Reset You can reset the menu settings to the factory default except "I/O Buffer" and "Network Setup" settings. Hex Dump Using the Control Panel Menu Description Hex Dump You can choose to print the Hex Dump or not.
List Print Menu List Print Menu There are 5 menus in the “List Print” Menu. • • • • • Config. Page Menu List PCL Font List PS Font List Disk Directory List Print Parameters List Print 7 - 12 Menu Description Config. Page You can print the current configuration of the printer. For more information on printing a configuration page, see “Printer Condition” on page 7-15. Menu List You can print the Menu List which shows the function menu of this printer.
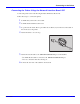
Specifying the Custom Paper Size for the By- pass Tray Specifying the Custom Paper Size for the Bypass Tray 1 Press {User Tools}. 2 Press {4} on the number keys. 3 Press [Up Arrow] or [Down Arrow] keys until “Job Control” appears, and then press [Enter #]. 4 Press [Up Arrow] or [Down Arrow] keys until “Paper Input” appears, and then press [Enter #]. 5 Press [Up Arrow] or [Down Arrow] keys until “Bypass Size” appears, and then press [Enter #]. 6 Specifying the standard size. 1.
Specifying the Custom Paper Size for the Bypass Tray [Enter #]. 2. Press [Up Arrow] or [Down Arrow] to set the vertical value, and then press [Enter #]. • The vertical size and horizontal size are described as follow. 1 1 2 • • 1 Horizontal size 2 Vertical size 3. Press [Up Arrow] or [Down Arrow] to set the horizontal value, and then press [Enter #].
Printer Condition Printer Condition We recommend that you print the configuration page and check its settings, before changing settings of your machine. The following example describes how to print a Configuration Page. 1 Press {User Tools}. 2 Press {4} on the number keys. 3 Press [Up Arrow] or [Down Arrow] until “List Print” appears, and then press [Enter #]. • 4 After confirming that, “Config. Page” on display, press [Enter #]. • • 5 You can specify the Print List items on the panel display.
Printing with the Operation Panel Printing with the Operation Panel Using the Proof Print Use this function to print only one printing of a multiple print job. The other printings are saved on the optional hard disk. The saved job can be printed from the machine's operation panel. • • • • • To use this function, the optional hard disk must be installed. If the application has a collate option, confirm that it is not selected before sending a print job.
Printing with the Operation Panel 5 Press [Up Arrow] or [Down Arrow] to display a file you want to print, and then press [Enter #]. • 6 Press [Up Arrow] or [Down Arrow] to set the number of copy printings. • 7 The following message appears on the panel display. You can set the number up to 999. Press [Enter #]. Deleting a Proof Print File If the printed document is not what you expected, you can delete the proof print file. You can then revise it and print again until the settings become OK.
Printing with the Operation Panel 5 Press [Ø] or [¦] to display the file you want to delete, and then press [Enter #]. • 6 Press [Enter #]. 7 Press [Enter #]. • 7 - 18 The following message appears on the panel display. This starts deleting a proof print file after the following message appears on the panel display. 1 Checking the Error Log 2 Press the {User Tools} key of the machine's operation panel. 3 Press {4} on the number keys.
Printing with the Operation Panel 5 Press [Up Arrow] or [Down Arrow] until “Show Error Log” appears, and then press [Enter #]. • Using the Control Panel The following message appears on the panel display.
Printing with the Operation Panel Notes: 7 - 20 Using the Control Panel
Chapter 8 PostScript3 Kit Type185
Chapter Overview This chapter covers: • “Setting Up Options” on page 8-1 • “Collate, Staple, Print Mode” on page 8-6 • “Proof Print” on page 8-8 PostScript3 Kit Type185
Installable Options Installable Options The following items are installable options. Tray 3 • PS400: 500–sheet paper feed unit. It consists of 1 tray. PS420: 2000–sheet paper feed unit. It consists of 1 tray. Tray 3 and 4 • • PS440: 1000–sheet paper feed unit. It consists of 2 trays. Bypass Tray • Bypass Tray Type 270 Duplex Unit • AD370 (duplex unit) Finisher • • SR720 (finisher) The staple function is available with the finisher.
Installable Options Windows You can set up any of the options with the following tabs. Operating System Tab's name Windows 95/98 [Device Options] tab Windows 3.1x [Features] tab Windows NT 4.0 [Device Settings] tab • • • You should access the printer driver from Windows to set up the options. You cannot set up options when accessing the printer driver from an application. If your system is Windows NT 4.0, changing a printer driver requires Full Control access permission.
Printing a Document Printing a Document This section describes how to print a document using printer specific functions. Paper Source The following table shows the tabs or menus where you can select this function. Windows 95/98 [Paper] tab Windows NT 4.0 [Page Setup] tab Windows 3.1x [Paper] tab Macintosh [General] in the print dialog box Destination Tray The following table shows the tabs or menus where you can select this function. Windows 95/98 [More Options] in the [Paper] tab Windows NT 4.
Printing a Document Collate Use this function to enable the collation feature. With this feature, the printer can efficiently print collated sets of a multiple-page document. The following table shows the tabs or menus where you can select this function. Windows 95/98 [Printer features] in the [Device Options] tab Windows NT4.0 [Collate Copies] in the [Page Setup] tab Windows 3.
Printing a Document • Top Right Slant Places a staple on the top right side of the document. The staple is placed at a 45 degree angle to the left side. Bottom Left Slant Places a staple on the bottom left side of the document. The staple is placed at a 45 degree angle to the left side. Bottom Right Slant Places a staple on the bottom right side of the document. The staple is placed at a 45 degree angle to the left side. The following table shows the tabs or menus where you can select this function.
Printing a Document Proof Printing Use this function to print only the first printing of a multiple print job. The other printings are saved on the optional hard disk. The saved job can be printed or canceled from the operation panel of the printer. • • To use this function, Printer Hard Disk Type 185 is required. This function is not available on computers running Windows 3.1x or Windows NT 4.0. The following table shows the tabs or menus where you can select this function.
Printing a Document Windows NT 4.0 1 From an application, select the menu command to print. • The print dialog box appears. 2 Open the Printer Properties. 3 If you want to collate, select [Collate] from the [Page Setup] tab. 4 Click the [Advanced] tab. 5 From [Document Options], select the function you want to use. • The current setting is displayed in the [Change settings] box in the lower part of the tab. 6 Use the [Change settings] box to select the appropriate setting.
Printing a Document Macintosh 1 From an application, select the menu command to print. • The print dialog box appears. 2 Use the list box to select [Printer Specific Options]. 3 Use the list box to select the appropriate setting. 4 After making all of the settings you want, click [OK]. Proof Print Follow the steps below to print a document using “Proof Print”. To use this function, Printer Feature Expander Type 185 is required. This function is not available on computers running Windows 3.
Printing a Document 8 On the machine's operation panel, press [User Tool]. 9 Press [4] on the number keys. 10 From “Main Menu”, select “Proof Print “and press [Enter #]. 11 From “Proof Print “, select “Print File” and press [Enter #]. 12 Select the file you want to print and press [Enter #]. • 13 You can identify the file you want to print by the User ID you entered in step 4 and the time when the job was saved. Press [Enter #] to start printing.
Printing a Document 10 From “Proof Print”, select “Print File” and press [Enter #]. 11 Select the file you want to print and press [Enter #]. • 12 You can identify the file you want to print by the User ID you entered in step 4 and the time when the job was saved. Press [Enter #] to start printing. Deleting a Proof Print File If the settings are incorrect, you can delete the rest of the print job. Follow these steps. 1 On the operation panel of the printer, press [User Tool].
Chapter 9 Specifications
Chapter Overview This chapter covers: • “Specifications” on page 9-1 • “Memory Capacity and Printer Function” on page 9-2 • “Agency Certifications” on page 9-3 Specifications
Specifications Specifications This section contains the electrical and hardware specifications for the printer, including the information on the options. Component Specification Resolution 600dpi; PCL 5e, PCL 6, PostScript 3 300dpi; PCL 5e, PostScript 3 Printing Speed 22/27 * pages per minute (A4K, 81/2" ¥ 11"K) Parallel Interface Standard 36-pin printer cable and a parallel port on the host computer.
Memory Capacity and Printer Function Memory Capacity and Printer Function The following table shows the typical memory requirements for each printer function. • Memory requirements depend on the complexly of the print data and the printing environment.
Agency Certifications Agency Certifications FCC This equipment has been tested and found to comply with the limits for a Class B digital device, pursuant to Part 15 of the FCC Rules. These limits are designed to provide reasonable protection against harmful interference in a residential installation. This equipment generates, uses and can radiate radio interference to radio communications. However, there is no guarantee that interference will not occur in a particular installation.
Agency Certifications Notes: 9-4 Specifications
Index
Chapter Overview Use the index to quickly locate specific information about different topics.
Index of Scanner Topics Index of Scanner Topics A I Access Control Address 2-1, 2-5 Access Control Mask 2-1, 2-5 ActiveProtocols 2-1 Agency certifications 9-3 Auto Run 3-1 IP Address 2-1 Operation Switch 1-8 Operational Panel 1-8 options, setting up Macintosh 3-13 J P Job Control 7-7 FormFeed key 1-10 Job Reset key 1-10 PageMaker 6.0 or 6.5 3-11 Panel Display 1-8, 1-9 Paper Input 7-7 Parallel Cable 1-1, 1-2 PCL 5e 1-7, 5-1 Windows 3.1x, uninstalling 4-2 Windows 95/98, uninstalling 4-1 Windows NT 4.
Index of Scanner Topics toner saver 8-4 tonersaver 8-5 PostScript Macintosh - Install 3-12 PPD 3-13 Print File 7-6 Print Quality 7-7 Printer Driver 3-4, 3-5, 3-6, 3-8, 3-9 printer driver 1-6 Printer Features 7-1 Printing Problems 6-14 Proof Print 7-6, 7-16 PS Font List 7-12 R W Restart Printer 7-11 Windows 3.1x 5-3, 5-7, 5-11 PCL 5e, uninstalling 4-2 PCL 6, uninstalling 4-2 Windows 95/98 5-1, 5-5, 5-10 PCL 5e, uninstalling 4-1 PCL 6, uninstalling 4-1 PostScript, uninstalling 4-3 Windows NT 4.
Warranty New Machine Warranty and Limitation of Liability Warranty — 90 days Lanier warrants that its equipment and accessories will be free from defective parts and workmanship for a period of ninety (90) days from the date of first installation by Lanier’s Authorized Dealer. Customers must notify a Lanier servicing dealer or Lanier of a warranty claim within the warranty period. For a listing of authorized Lanier servicing dealers or to notify Lanier of a warranty claim, write to Lanier Worldwide, Inc.
Customer Vision® _ our commitment to your complete satisfaction ;; ;; next level document solutions www.lanier.com Lanier Worldwide, Inc. | 2300 Parklake Drive, N.E.