2020 we/wi 1970-EPA 1970-ISO
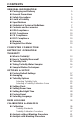
CONTENTS GENERAL INFORMATION Packaging and Delivery General Precautions Safety Precautions Limits of Liability Specifications Statistical & Technical Definitions Contents and Accessories EPA Compliance ISO Compliance CE Compliance IP67 Compliance Warranty Register Your Meter 5 5 5 6 6 7 9 10 10 10 10 10 10 COMPUTER CONNECTION 11 BATTERY/AC OPERATION 11 TURBIDITY What is Turbidity? How is Turbidity Measured? Turbidity Units Taking Turbidity Water Samples Sample Dilut
Dilution Procedure Preparation of Turbidity-Free Water Testing Tips 46 47 48 TROUBLESHOOTING GUIDE Troubleshooting Stray Light 50 50 GENERAL OPERATING INFORMATION Overview The Keypad The Display and Menus Negative Results Tubes and Chambers 51 52 52 54 54 MAINTENANCE Cleaning Repairs Meter Disposal 55 55 56 Refer to the Quick Start Guide for simplified Calibration and Analysis procedures.
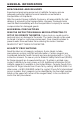
GENERAL INFORMATION PACKAGING AND DELIVERY Experienced packaging personnel at LaMotte Company assure adequate protection against normal hazards encountered in transportation of shipments. After the product leaves LaMotte Company, all responsibility for safe delivery is assured by the transportation company. Damage claims must be filed immediately with the transportation company to receive compensation for damaged goods.
LIMITS OF LIABILITY Under no circumstances shall LaMotte Company be liable for loss of life, property, profits, or other damages incurred through the use or misuse of their products. SPECIFICATIONS - 2020we/wi Instrument Type: Nephelometer Standard: EPA 180.
Operation Humidity Range: 0–90 % RH, non-condensing Auto Shut-off: 5, 10, 30 min, disabled Waterproof: IP67 with USB port plug in place. Power Source†: USB wall adapter, USB computer connection or Lithium ion rechargeable battery 2200 mAH, 3.7V Battery: Charge Life: Approximately 380 tests with backlight on to 1000 tests with backlight off. (Signal averaging disabled). Battery Life: Approximately 500 charges. Electrical Ratings: Provided on nameplate label Dimensions: (W x L x H) 8.84 x 19.
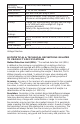
be very bad! This is not a useful measure of the performance of a test method. Repeatability: Repeatability is the within-run precision.5 A run is a single data set, from set up to clean up. Generally, one run occurs on one day. However, for meter calibrations, a single calibration is considered a single run or data set, even though it may take 2 or 3 days. Reproducibility: Reproducibility is the between-run precision.
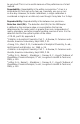
CONTENTS & ACCESSORIES 2020we Kit 2020wi Kit EPA Version ISO Version Code 1970-EPA Code 1970-ISO Contents Code Code 0 NTU Standard, 60 mL 1480 1480 1 NTU/FNU Standard, 60 mL 1450 1453 10 NTU/FNU Standard, 60 mL 1451 1454 Water Sample Bottle, 60 mL 0688 0688 Tubes, 6 — — Cable, USB, 3 ft.
EPA COMPLIANCE The 2020we meter meets or exceeds EPA design specifications for NPDWR and NPDES turbidity monitoring programs as specified by the USEPA method 180.1. ISO Compliance This 2020wi meter meets or exceeds ISO design criteria for quantitative methods of turbidity using optical turbidimeters as specified by ISO 7027. CE COMPLIANCE The 2020we and 2020wi meters have been independently tested and have earned the European CE Mark of compliance for electromagnetic compatibility and safety.
COMPUTER CONNECTION PC LINK The 2020we/wi may be interfaced with any Windows-based computer by using the LaMotte SMARTLink 3 Program and USB Cable. The program will store test information and results in a database. To transfer data from the meter to a computer, plug the smaller end of the USB cable (USB mini B connector) into the meter and the larger end of the USB cable (USB Type A connector) into a USB port on a computer.
To extend the battery life: • Shut down the unit with the power switch when not taking measurements or use the power save option to have the unit automatically turn off after 5 minutes. • Store the unit in a cool dry place. • Fully charge the battery before storing the unit for extended periods of time. • Limit backlight use. The unit consumes 3X normal power with the backlight on. Set the backlight time option to 10 seconds, or select “Button Control” and keep the backlight off.
TURBIDITY WHAT IS TURBIDITY? Turbidity is an aggregate property of the solution, which is water in most cases. Turbidity is not specific to the types of particles in the water. The particles could be suspended or colloidal matter, and they can be inorganic, organic or biological. At high concentrations, turbidity is perceived as cloudiness, haze or an absence of clarity in the water. Turbidity is an optical property that results when light passing through a liquid sample is scattered.
reported as Jackson Turbidity Units (JTU). The lowest turbidity that can be determined with this method is about 25 NTU. There are two common methods for instruments to measure turbidity. Instruments can measure the attenuation of a light beam passing through a sample and they can measure the scattered light from a light beam passing through a sample.
TURBIDITY UNITS Traditionally, turbidimeters designed for use in the United State were made to the specifications of EPA Method 180.1. This method defined the NTU, nephelometric turbidity unit, as a unit to measure turbidity in the range of 0 – 40 NTU using a nephelometer. According to the EPA a nephelometer was a turbidimeter that measured turbidity with a 90° detector. Also, if the turbidity was greater than 40 NTU, a dilution was necessary to bring the sample into the 0 – 40 NTU range.
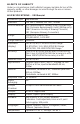
Options/Set Up Regulatory Method Acronyms Definitions Notes NTU Nephelometric Turbidity Units Incandescent white light between 400 and 600 nm, 90° detection, 2020we FNU Formazin Nephelometric Units IR LED (usually) 860 ISO 7027 nm, bandwidth less than 60 nm, 90° detection, 2020wi AU Attenuation Units Incandescent white light between 400 and 600 nm, 180° detection, 2020we FAU Formazin Attenuation Units IR LED (usually) 860 ISO 7027 nm, bandwidth less than 60 nm, 180° detection, 2020wi ASBC
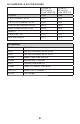
Amount of Sample Deionized Water to Bring Final Volume to 10 mL Multiplication Factor 10 mL 0 mL 1 5 mL 5 mL 2 2.5 mL 7.5 mL 4 1 mL 9 mL 10 0.5 mL 9.5 mL 20 All dilutions are based on a final volume of 10 mL, so several dilutions will require small volumes of the water sample. Graduated pipets should be used for all dilutions. If volumetric glassware is not available, dilutions can be made with the colorimeter tube.
Options/Set Up AVERAGING The averaging option allows the user to average multiple readings. This option will improve the accuracy of samples with readings that may tend to drift with time. When the two, five or ten measurement option has been selected the final average is displayed. The default setting is disabled. To change the setting: 1. Press and briefly hold to turn the meter on. The LaMotte logo screen will appear for about 3 seconds and the Main Menu will appear.
Averaging Menu Disabled 2 Measurements 5 Measurements 10 Measurements 12:00:00 6. Press ENTER to save the selection. The screen will display Storing... for about 1 second and return to the Options Menu. 001/500 Options Menu Averaging Turbidity Options Set Clock Set PWR Save 12:00:00 001/500 NOTE: When the Averaging option is enabled, more time will be required to display a reading and more power will be used. 19 Options/Set Up 5. Press or to scroll to the desired option.
Options/Set Up TURBIDITY OPTIONS The default units are NTU and FNU and the default calibration curve is formazin. NTU will be used in this example. To change the settings: Selecting Turbidity Units 1. Press and briefly hold to turn the meter on. The LaMotte logo screen will appear for about 3 seconds and the Main Menu will appear. Main Menu Measure Data Logging Options Run PC Link 12:00:00 2. Press Options.
Set Turbidity Units NTU ASBC EBC 12:00:00 001/500 Available units are: NTU (Nephelometric Turbidity Units)( 2020we only) FNU (Formazin Nephelometric Units) (2020wi only) ASBC (American Society of Brewing Chemists) EBC (European Brewery Convention) NOTE: The meter will automatically switch to the attenuation mode above 600 NTU or FNU. In Attenuation mode, measurements will be made with the 180° detector only, as indicated by AU (attenuation units) or FAU (formazin anttenuation units) on the display.
Options/Set Up Selecting a Turbidity Calibration Curve 1. Press and briefly hold to turn the meter on. The LaMotte logo screen will appear for about 3 seconds and the Main Menu will appear. Main Menu Measure Data Logging Options Run PC Link 12:00:00 2. Press Options. to scroll to 001/500 Main Menu Measure Data Logging Options Run PC Link 12:00:00 001/500 Options Menu 3. Press ENTER to select Options. Press to scroll Averaging to Turbidity Options.
Turbidity Calibration Formazin Japan Standard 12:00:00 7. Scroll to the desired calibration option. Select a calibration option based on the composition of the standards that will be used to calibrate the meter. 001/500 Turbidity Calibration Formazin Japan Standard 12:00:00 001/500 NOTE: Stablcal® standards below 50 NTU should not be used to calibrate the 2020we/wi. The diluent has a different refractive index than traditional formazin standards and will affect the results. 8.
Options/Set Up SETTING THE CLOCK 1. Press and briefly hold to turn the meter on. The LaMotte logo screen will appear for about 3 seconds and the Main Menu will appear. Main Menu Measure Data Logging Options Run PC Link 12:00:00 2. Press Options. 001/500 Main Menu to scroll to Measure Data Logging Options Run PC Link 12:00:00 001/500 Options Menu 3. Press ENTER to select Options. Press to scroll Averaging to Set Clock. Turbidity Options Set Clock Set PWR Save 12:00:00 001/500 Set Time 4.
Options Menu Averaging Turbidity Options Set Clock Set PWR Save 12:00:00 25 001/500 Options/Set Up 5. Press ENTER to select the final character. The time and date will be saved and the screen will return to the Options Menu.
Options/Set Up SETTING POWER SAVE The power saving Auto Shutoff feature will turn the meter off when a button has not been pushed for a set amount of time. The default setting is 5 minutes. To change the setting: 1. Press and briefly hold to turn the meter on. The LaMotte logo screen will appear for about 3 seconds and the Main Menu will appear. Main Menu Measure Data Logging Options Run PC Link 12:00:00 2. Press Options.
ENTER to select PWR Auto Shutoff Disable 5 Minutes 15 Minutes 30 Minutes 12:00:00 6. Press or to desired setting. 001/500 Auto Shutoff to scroll Disable 5 Minutes 15 Minutes 30 Minutes 12:00:00 7. Press ENTER to save the selection. The screen will display Storing... for about 1 second and return to the Options Menu. 001/500 Options Menu Averaging Turbidity Options Set Clock Set PWR Save 12:00:00 27 001/500 Options/Set Up 5. Press Save.
Options/Set Up SETTING THE BACKLIGHT TIME The backlight illuminates the display for enhanced viewing. If Button Control is chosen the backlight button on the key pad will act as an on/off switch and the backlight will remain on or off when the meter is being used. When one of the other settings – 10, 20 or 30 seconds – is chosen, the display will be illuminated for the specified amount of time after any button is pressed.
Options Menu Turbidity Options Set Clock Set PWR Save Set Backlight Time 12:00:00 5. Press ENTER to select Set Backlight Time. 001/500 Backlight Time Button Control 10 Seconds 20 Seconds 30 Seconds 12:00:00 6. Press or to desired setting. 001/500 Backlight Time to scroll Button Control 10 Seconds 20 Seconds 30 Seconds 12:00:00 7. Press ENTER to save the selection. The screen will display Storing... for about 1 second and return to the Options Menu.
Options/Set Up FACTORY RESET Performing a Factory Reset will restore the factory default settings. All user-level calibrated settings will be lost. 1. Press and briefly hold to turn the meter on. The LaMotte logo screen will appear for about 3 seconds and the Main Menu will appear. Main Menu Measure Data Logging Options Run PC Link 12:00:00 2. Press Options. to scroll to 001/500 Main Menu Measure Data Logging Options Run PC Link 12:00:00 3. Press ENTER to select Options.
7. Press ENTER to return to the Options Menu. Options Menu Done Continue 12:00:00 001/500 Options Menu Set Clock Set PWR Save Set Backlight Time Factory Reset 12:00:00 31 001/500 Options/Set Up 6. Press ENTER to complete the Factory Reset. The screen will momentarily display Writing. The screen will display Done and return to the Options Menu. To retain the current user level calibration settings, press EXIT to abort the Factory Reset.
Options/Set Up SELECTING A LANGUAGE There are seven languages available in the 2020we/wi: English, Spanish, French, Portuguese, Italian, Chinese, and Japanese (Kana). 1. Press and briefly hold to turn the meter on. The LaMotte logo screen will appear for about 3 seconds and the Main Menu will appear. Main Menu Measure Data Logging Options Run PC Link 12:00:00 2. Press Options. to scroll to 001/500 Main Menu Measure Data Logging Options Run PC Link 12:00:00 3. Press ENTER to select Options.
Select Language English Spanish French Portuguese 12:00:00 7. Press ENTER to select desired language. The screen will momentarily display, Storing...for about 1 second and return to the Options Menu. 001/500 Options Menu Set PWR Save aging Set Backlight Time Factory Reset Select Language 12:00:00 001/500 NOTE: If the meter unintentionally switches to another language, use the procedure above to reset the meter to the desired language. For example, to reset the meter to English: 1. Turn the meter on. 2.
Options/Set Up DATA LOGGING The default setting for the data logger is enabled. The meter will log the last 500 data points. The counter in the center bottom of the display will show how many data points have been logged. The display will show 500+ when the data logger has exceeded 500 points and the data points are being overwritten. 1. Press and briefly hold to turn the meter on. The LaMotte logo screen will appear for about 3 seconds and the Main Menu will appear.
5. Press or to scroll through the data points in the log. Record Number 1 Turbidity - WB (F) 95.4 NTU 12:26:44 PM 08-03-2010 12:00:00 Logging Display Test Log Enable Logging Disable Logging Erase Log 12:00:00 35 001/500 Calibration 6. Press EXIT to return to the Logging menu. Press or to scroll to disable the logging options or erase the log. Press ENTER to select the option. The screen will display Storing... for about 1 second and return to the Logging Menu.
CALIBRATION & ANALYSIS Calibration CALIBRATION Turbidity Standards Only use AMCO or formazin standards with the 2020we/wi. StablCal® standards below 50 NTU should not be used to calibrate the 2020we/wi. The diluent used in the StablCal® standards has a different refractive index than traditional formazin standards and will affect the results. The concentration of the calibration standard should be similar to the expected concentration of sample that will be tested.
retain the old calibration data for the other ranges. It is recommended that the meter be calibrated for each range that will be used. The value of the standards chosen for the calibration should not be at the extremes of the ranges (11, 110, 300, 600 NTU/FTU). The meter is auto-ranging and will automatically select the appropriate range for the sample being tested. It is recommended that the meter be calibrated daily. Main Menu Measure Data Logging Options Run PC Link 12:00:00 2.
Calibration 5. Rinse a clean tube (0290) three times with the blank. If samples are expected to read below 1 NTU the meter should be blanked with a 0 NTU Primary Standard or prepared turbidity-free (<0.1 NTU) water. For the most accurate results, use the same tube for the blank and the sample. l 6. Fill the tube to the fill line with the blank. Pour the blank down the inside of the tube to avoid creating bubbles. Cap the tube. 7. Wipe the tube thoroughly with a lint-free cloth. 8. Open the meter lid.
Turbidity WB (F) 9. Press ENTER to scan the blank. The screen will display Blank Done for about 1 second and then return to the Turbidity Scan Blank With Blank Menu. Scan Sample 12:00:00 001/500 10. Rinse a clean tube (0290), or the same tube, three times with the standard. 11. Fill the tube to the fill line with the standard. Pour the standard down the inside of the tube to avoid creating bubbles. Cap the tube. 12. Wipe the tube thoroughly with a lint-free cloth. 13. Open the meter lid.
Turbidity WB (F) 14. Press ENTER to scan the standard. The screen will display Reading for about 1 second. The result will appear Scan Blank on the screen. Scan Sample 0.99 NTU 12:00:00 Calibration 15. Press to scroll to Calibrate. 001/500 Turbidity WB (F) 0.99 NTU Scan Sample Calibrate 12:00:00 16. Press ENTER to select Calibrate. A reverse font (dark background with light characters) will appear to indicate that the reading can be adjusted. 001/500 Turbidity WB (F) 0.
Turbidity WB (F) 19. Press ENTER to select Set Calibration and save the calibration. Press or to scroll and select Scan Blank Factory Setting to revert to the factory calibration. The Scan Sample meter will momentarily display 12:00:00 001/500 Storing... and return to the Turbidity -Without Blank menu. The calibration has now been saved and the meter can be used for testing.
Turbidity NB (F) 3. Press ENTER to select Turbidity - No Blank. Scan Blank Scan Sample 12:00:00 4. Rinse a clean tube (0290) three times with the sample. l Analysis 5. Fill the tube to the fill line with the sample. Pour the sample down the inside of the tube to avoid creating bubbles. Cap the tube. 6. Wipe the tube thoroughly with a lint-free cloth. 7. Open the meter lid. Insert the tube into the chamber. Align the index line on the tube with the index arrow on the meter. Close the lid.
Turbidity NB (F) 8. Press ENTER to select Scan Sample. The screen will display Reading for about 1 second. The result will appear Scan Blank on the screen. Scan Sample 10.22 NTU 12:00:00 001/500 ANALYSIS WITH BLANKING PROCEDURE To obtain the most accurate results the meter should be blanked before measuring a sample. The blanking step is not as critical for samples above 10 NTU. The meter should always be blanked before reading samples below 10 NTU. 1. Press and briefly hold to turn the meter on.
Turbidity WB (F) 4. Press ENTER to select Turbidity - With Blank. Scan Blank Scan Sample 12:00:00 Analysis 5. Rinse a clean tube (0290) three times with the blank. If samples are expected to read below 1 NTU the meter should be blanked with a 0 NTU Primary Standard or prepared turbidity-free (<0.1 NTU) water. For the most accurate results, use the same tube for the blank and the sample. l 6. Fill the tube to the fill line with the blank.
8. Open the meter lid. Insert the tube into the chamber. Align the index line on the tube with the index arrow on the meter. Close the lid. Turbidity WB (F) 9. Press ENTER to scan the blank. The screen will display Blank Done for about 1 second and then return to the Turbidity Scan Blank With Blank menu. Scan Sample 12:00:00 001/500 10. Rinse a clean tube (0290), or the same tube, three times with the sample. l Analysis 11. Fill the tube to the fill line with the standard.
13. Open the meter lid. Insert the tube into the chamber. Align the index line on the tube with the index arrow on the meter. Close the lid. Turbidity WB (F) 14. Press ENTER to scan the standard. The screen will display Reading for about 1 second. The result will appear Scan Blank on the screen. Scan Sample 0.99 NTU 12:00:00 001/500 Analysis NOTE: The meter will remember the last scanned blank reading. It is not necessary to scan a blank each time the test is performed.
be the same whether it is called 0.00 NTU or 0.02 NTU. For design simplicity the 2020we/wi uses the term turbidity-free water and the value of 0.00 NTU. PREPARATION OF TURBIDITY-FREE WATER A 0 NTU/FNU Standard (Code 1480) is included with the meter. An accessory package (Code 4185) is available for preparing turbidity-free water for blanking the meter and dilution of high turbidity samples. The preparation of turbidity-free water requires careful technique.
3. Remove the filter from the syringe. Remove the plunger from the barrel. (This step is required to prevent rupturing the filter by the vacuum that would be created when the plunger is removed.) Analysis 4. Replace the filter and repeat step 2 for a second rinse of the syringe and storage container. 5. Remove the filter from the syringe. Remove the plunger from the barrel. Replace the filter and fill the syringe with approximately 50 mL of deionized water.
5. 6. 7. 8. 9. 10. 11. 12. 13. 14. 15. 16. 17. 18. 19. for wiping a filled tube before placing it in the meter chamber. Invert tube very slowly and gently three times to mix the sample. Surround the tube with a clean, lint-free cloth. Press the cloth around the tube. Rotate the tube in the cloth three times to assure that all areas of the tube have been wiped. Discard tubes that have significant scratches and imperfections in the light pass zones. (Central zone between bottom and fill line).
TROUBLESHOOTING GUIDE TROUBLESHOOTING PROBLEM REASON SOLUTION “Blank?” Sample is reading lower than the blank. With samples of very low concentration reblank or record as zero. On samples of higher concentration reblank and read again. Flashing Low battery. Readings Charge battery or use are reliable. USB wall/computer charger. “Low Battery” Battery voltage is very Charge battery or use low. Readings are not USB wall/computer reliable. charger.
GENERAL OPERATING INFORMATION OVERVIEW The 2020we/wi is a portable, microprocessor controlled, direct reading nephelometer. Turbidity is measured directly by either EPA Method 180.1 or ISO Method 7027. It has a graphical liquid crystal display and six button keypad. These allow the user to select options from the menu driven software, to directly read test results or to review stored results of previous tests in the data logger. The menus can be displayed in seven different languages.
The Keypad This button will scroll up through a list of menu selections. ENTER The button is used to select choices in a menu viewed in the display. This button controls the backlight on the display. This button will scroll down through a list of menu selections. EXIT This button exits to the previous menu. This button turns the meter on or off. ENTER EXIT THE DISPLAY & MENUS The display allows menu selections to be viewed and selected.
Header Menu Title Main Selection Window First Choice Second Choice Third Choice Another Footer 12:00:00 001/500 And Another And So On A black bar will indicate the menu choice. As the menu is scrolled through, the black bar will highlight different menu choices. Pressing the ENTER button will select the menu choice that is indicated by the black bar. In the second format the menu choice window takes advantage of the graphical capabilities of the display.
The display may show the following messages: Battery Status More choices are available and can be viewed by scrolling up and/or down through the display. Header Identifies the current menu and information on units and reagent systems if applicable. Footer In the data logging mode the number of the data point is displayed and the total number of data points in the memory will be shown.
detergent prior to use to remove dirt or fingerprints. The tubes should be allowed to air-dry in an inverted position to prevent dust from entering the tubes. Dry tubes should be stored with the caps on to prevent contamination. After a tube has been filled and capped, it should be held by the cap and the outside surface should be wiped with a clean, lint-free absorbent cloth until it is dry and smudge-free. Handling the tube only by the cap will avoid problems from fingerprints.
including phone and FAX numbers to the shipping carton. This information will enable the service department to make the required repairs more efficiently. METER DISPOSAL Waste Electrical and Electronic Equipment (WEEE) Natural resources were used in the production of this equipment. This equipment may contain materials that are hazardous to health and the environment. To avoid harm to the environment and natural resources, the use of appropriate take-back systems is recommended.
802 Washington Ave • Chestertown • Maryland • 21620 • USA 410-778-3100 • 800-344-3100 www.lamotte.com 1970-MN • 02.01.