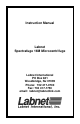
Instruction Manual Labnet Spectrafuge 16M Microcentrifuge Labnet International PO Box 841 Woodbridge, NJ 07095 Phone: 732 417-0700 Fax: 732 417-1750 email: labnet@labnetlink.
Safety Precautions NEVER use the centrifuge in any manner not specified in these instructions. NEVER operate the centrifuge without a rotor properly attached to the shaft. NEVER fill tubes while they are in the rotor. Liquid spillage may harm unit. NEVER put hands in the rotor area unless the rotor is completely stopped. NEVER move the centrifuge while the rotor is spinning. NEVER use solvents or flammables near this or other electrical equipment.
Table of Contents 1. General Information Description Safety precautions Technical data Accessories supplied with unit Warranty 1 2. Installation Unpacking the centrifuge Required space Installing the centrifuge 2 3. Installing the Rotor Rotors and accessories Rotor maintenance Mounting and securing the angle rotors Removing the rotor Overloading rotors 3 4. Operation Closing the lid Lid release Lid lock Speed selection Selection of operating time and momentary operation 6 5.
1. General Information This manual provides important safety information for the Spectrafuge laboratory microcentrifuge. It should be kept near the centrifuge for quick and easy reference. 1.1 Description The Spectrafuge is a small benchtop centrifuge designed for separation of various research samples. The motor is brushless and requires no routine maintenance. The Spectrafuge is supplied with an 18 x 1.5ml rotor for micro samples. Adapters are available for tubes smaller than 1.5ml.
1.3 Technical data Dimensions Width Depth Height 8.25 inches 8.9 inches 7.6 inches Maximum speed 14,000rpm Maximum RCF 16,000 x g Maximum volume 18 x 1.5/2.0ml Admiss. density 1.2kg/dm3 Electrical/fuse rating 120V~, 50-60Hz, 1.0A/2.5AT 230V~, 50-60Hz, 0.6A/1.25AT 1.4 Accessories supplied with centrifuge Each unit is supplied with 1 instruction manual, 1 warranty card and 1 power cord. Some models are supplied with a rotor screw wrench. 1.
carrier. Any claims for damage must be filed within 48 hours. The accessories supplied with the centrifuge should be kept with the instruction manual near the centrifuge’s place of installation. 2.2 Required space The centrifuge should be installed on a rigid, even surface such as a stable laboratory bench, cabinet, etc. To guarantee sufficient ventilation, ensure that the centrifuge has at least 15cm (6 inches) of free space on all sides, including the rear.
Adapter for 0.4ml tubes Order no. Tube measurement Max. speed Centrifuging radius RCF (g-value) C-1206 6 x 47mm 14,000rpm 7.3cm 16,000 x g Adapter for 0.2ml tubes Order no. Tube measurement Max. speed Centrifuging radius RCF (g-value) C-1222 6 x 21mm 14,000rpm 6.1cm 13,366 x g 3.2 Rotor maintenance The rotor should be cleaned thoroughly after each use. Thorough cleaning must be performed when spinning samples containing phenol or phenol chloroform.
Figure 1. Chamber and motor shaft Figure 2. Bottom of angle rotor Figure 3.
3.4 Removing the rotor Using an adjustable or 1/4 inch wrench (some units are supplied with a wrench) loosen the screw and remove the rotor retaining screw/washer assembly by turning it counterclockwise. Lift the rotor directly upward in a straight vertical motion. Caution: Be sure to secure the rotor screw and tighten with a wrench before further operation. 3.5 Overloading rotors The maximum load of the rotor and the maximum speed have been established by the manufacturer.
Figure 4. Spectrafuge control panel layout 4.2 Lid release Once the run has been completed and the rotor come to a stop, the lid will open automatically. If the lid does not open automatically, press the lid button. Note that the lid button will not operate while the rotor is spinning. WARNING: Do not attempt to open the lid of any centrifuge until the rotor has come to a complete stop. In the event of a power failure or malfunction, it may be necessary to open the lid manually. 1.
4.5 Selection of operating time and momentary operation Operation of the centrifuge begins when the timer knob is turned clockwise to set a run time. For run times less than 5 minutes, turn the knob clockwise past the halfway point and then counterclockwise to the desired time. For run times longer than 5 minutes, turn the knob clockwise to the desired time. When the preselected time expires, the centrifuge will stop automatically.
samples containing phenol or phenol chloroform, the rotor should be cleaned immediately after use. 5.4 Disinfection Should a spill of infectious materials occur within the rotor or chamber, the unit should be disinfected. This should be performed by qualified personnel with proper protective equipment. 5.5 Replacing fuses Check the fuse when it is recommended in the Troubleshooting Guide located in this manual. The fuse holder is located in the power inlet on the rear of the unit.
Possible reason: Solution: Centrifuge is not receiving power See “Centrifuge will not start” Centrifuge cannot be started, although power is on Possible reason: Solution Lid not closed correctly Close lid correctly Possible reason: Solution: No speed or time has been selected Set speed and/or time 7. Where to call Should you have any questions about the Spectrafuge or its accessories, please call Labnet’s Customer Service Department at 732 4170700.
To use this chart, find the radius value on the radius scale. Place the edge of a ruler on the value. Place the right side edge of the ruler on the speed scale at the desired speed. The estimated RCF can then be read from the RCF scale where the ruler edge passes through it. This chart can also be used to determine the proper speed for the desired RCF value.
Notes