User’s Manual Protector® XLE Laboratory Fume Hoods Models 9970400, 9970401, 9970500, 9970501, 9970600, 9970601, 9970700, 9970701, 9970800, 9970801 To receive important product updates, complete your product registration card online at register.labconco.com Labconco Corporation 8811 Prospect Avenue Kansas City, MO 64132-2696 800-821-5525, 816-333-8811 FAX 816-363-0130 E-MAIL labconco@labconco.com HOME PAGE www.labconco.com Please read the User’s Manual before operating the equipment.
Copyright © 2006, 2007 Labconco Corporation. All rights reserved. The information contained in this manual and the accompanying products are copyrighted and all rights reserved by Labconco Corporation. Labconco Corporation reserves the right to make periodic design changes without obligation to notify any person or entity of such change. Warranty Labconco provides a warranty on all parts and factory workmanship.
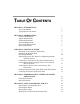
TABLE OF CONTENTS CHAPTER 1: INTRODUCTION About This Manual Typographical Conventions 1 2 3 CHAPTER 2: PREREQUISITES Location Requirements Support Requirements Exhaust Requirements Electrical Requirements Service Line Requirements Space Requirements 5 6 6 6 7 7 7 CHAPTER 3: GETTING STARTED Unpacking Your Laboratory Fume Hood Removing the Shipping Skid Sash Weight Release Install the Protector XLE Hood on a Supporting Structure and Work Surface Connecting to the Protector XLE Hood Exhaust System Connecti
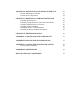
CHAPTER 6: MAINTAINING YOUR PROTECTOR XLE Routine Maintenance Schedule Routine Service Operations 23 23 24 CHAPTER 7: MODIFYING YOUR PROTECTOR XLE Installing Work Surfaces Installing Ceiling Enclosures Above the Fume Hood Installing Additional Service Fixtures Installing Airflow Monitors Distillation Grids – Field Installation Installing an Electrical Duplex Receptacle 25 25 26 26 27 27 28 CHAPTER 8: TROUBLESHOOTING 29 APPENDIX A: PROTECTOR XLE COMPONENTS 32 APPENDIX B: PROTECTOR XLE DIMENSIONS 35
Chapter 1: Introduction Congratulations on your purchase of a Labconco Protector® XLE Laboratory Fume Hood. Your Protector XLE Fume Hood is designed to protect you. It is the result of Labconco’s more than 50 years experience in manufacturing fume hoods, and users like you suggested many of its features to us. The Labconco Protector XLE Fume Hood has been engineered to provide maximum visibility in a laboratory, and effectively contain toxic, noxious, or other harmful materials when properly installed.
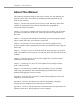
Chapter 1: Introduction About This Manual This manual is designed to help you learn how to install, use, and maintain your laboratory fume hood. Instructions for installing optional equipment on your hood are also included. Chapter 1: Introduction provides a brief overview of the laboratory fume hood, explains the organization of the manual, and defines the typographical conventions used in the manual.
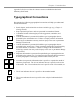
Chapter 1: Introduction Appendix D: References lists the various resources available that deal with laboratory fume hoods. Typographical Conventions Recognizing the following typographical conventions will help you understand and use this manual: • • • ! • • Book, chapter, and section titles are shown in italic type (e.g., Chapter 3: Getting Started). Steps required to perform a task are presented in a numbered format. Comments located in the margins provide suggestions, reminders, and references.
Chapter 1: Introduction Your Next Step If your Fume Hood needs to be installed, proceed to Chapter 2: Prerequisites to ensure your installation site meets all of the requirements. Then, go to Chapter 3: Getting Started for instructions on how to install your laboratory fume hood and make all of the necessary connections. If you would like to review how laboratory fume hoods operate, go to Chapter 4: Performance Features and Safety Precautions.
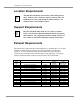
Chapter 2: Prerequisites Before you install your laboratory fume hood, you need to prepare your site for installation. Carefully examine the location where you intend to install your hood. You must be certain that the area is level and of solid construction. In addition, a dedicated source of electrical power must be located near the installation site. Carefully read this chapter to learn the requirements for your installation site: • • • • • • The location requirements. The support requirements.
Chapter 2: Prerequisites Location Requirements ! The fume hood should be located away from traffic patterns, doors, windows, fans, ventilation registers, and any other airhandling device that could disrupt its airflow patterns. All windows in the room should be closed. Support Requirements ! DO NOT install the fume hood on a cart, dolly, or mobile bench. ALL Protector Hood installations must be permanent and stationary.
Chapter 2: Prerequisites Hood Size 4' Standard Model Description 48" Protector XLE Hood 5' 60" Protector XLE Hood 6' 72" Protector XLE Hood 7' 84" Protector XLE Hood 8’ 96" Protector XLE Hood Self-Closing 60% Sash Opening 18" Exhaust Static Face Velocity Volume Pressure Loss 60 fpm 310 CFM 0.03" H2O 80 fpm 420 CFM 0.06" H2O 100 fpm 520 CFM 0.09" H2O 60 fpm 410 CFM 0.04" H2O 80 fpm 550 CFM 0.08" H2O 100 fpm 690 CFM 0.12" H2O 60 fpm 510 CFM 0.06" H2O 80 fpm 680 CFM 0.10" H2O 100 fpm 850 CFM 0.
Chapter 3: Getting Started Now that the site for your laboratory fume hood is properly prepared, you are ready to unpack, inspect, install, and certify your unit. Read this chapter to learn how to: • Unpack and move your Protector Hood. • Set up the fume hood with the supporting structure and work surface. • Connect to an exhaust system. • Connect the electrical supply source. • Connect the service lines. • Sealing the Protector Hood to the work surface. • Arrange certification of your Protector Hood.
Chapter 3: Getting Started Unpacking Your Laboratory Fume Hood Carefully remove the shrink-wrap or carton on your fume hood and inspect it for The United States Interstate damage that may have occurred in transit. If your unit is damaged, notify the delivery carrier immediately and retain the entire shipment intact for inspection Commerce Commission by the carrier. rules require that claims be DO NOT RETURN GOODS WITHOUT THE PRIOR filed with the AUTHORIZATION OF LABCONCO.
Chapter 3: Getting Started 2. Find the hardware (bolts, washers, nuts) that attach the fume hood to the skid and remove the hardware. Some hardware is on the sides and some is on the back. Sash Weight Release To protect the fume hood from damage in shipment, the sash weight has been secured to the back of the fume hood with four (4) screws. Simply remove the screws and make sure the sash cables are on their respective pulleys before operation of the sash or damage could occur to the sash cable.
Chapter 3: Getting Started The work surface should be smooth and durable, such as a chemically-resistant epoxy resin. The surface should be nonporous and resistant to the acids, solvents, and chemicals used in conjunction with the Protector Fume Hood. The work surface should also contain a dished recessed area for containing primary spills.
Chapter 3: Getting Started The exhaust connection should be installed by a qualified HVAC contractor. The exhaust connection on your hood has been designed for 12" nominal pipe (12.75" OD) to allow for minimum static pressure loss with proper transport velocities away from the hood. Consult Labconco Customer Service should you require help sizing your blower for the exhaust volume and total system static pressure loss.
Chapter 3: Getting Started Internal Junction Box Figure 3-2 All wiring for the fume hood SHOULD be performed by a licensed electrician and conform to all local codes. In most cases, the hood will require the use of shielded conduit to protect the wiring into the hood. The grounding connection shall not be made to the terminal box cover. The fluorescent light has been mounted outside the top liner panel and is sealed from vapors inside the hood structure.
Chapter 3: Getting Started Connecting the Service Lines to the Protector XLE Fume Hood The hoods with service fixtures have been plumbed from the valve to the hose connector or gooseneck for your installation convenience. Supply tubing shall be provided by the qualified installer. Tubing can enter the hood from above, through the back, or through the work surface to make these connections to the service fixtures. ! NOTE: Inspect all fittings for leakage. Tighten the fittings slightly if needed.
Chapter 3: Getting Started Sealing the Protector XLE Fume Hood to the Work Surface When the hood has been set in place, ducted, wired, and plumbed, it should be sealed at the work surface to prevent spilled materials from collecting under the walls of the hood. Materials such as silicone sealants are recommended to seal the hood structure.
Chapter 4: Performance Features and Safety Precautions Performance Features The Protector® XLE Laboratory Fume Hood is designed to meet the needs of the laboratory scientist. The laboratory fume hood has been designed to effectively contain toxic, noxious, or other harmful materials when properly installed. A fully featured by-pass hood with baffle and air foil, this hood maintains safe airflow. Optional energy saving A-Style Combination Sash models are also available.
Chapter 4: Performance Features and Safety Precautions 4. Baffle (not shown) directs airflow to the rear of the interior to provide efficient airflow. The baffle may be removed for cleaning purposes only. 5. Exterior access cover plates are removable for easy access to plumbing valves when access through the sides is not available. 6. Lift-Away™ front panel provides easy access to electrical wiring, sash weights, and lighting fixtures. 7.
Chapter 4: Performance Features and Safety Precautions 7 16 6 5 11 1 2 9 17 8 12 10 18 Product Service 1-800-522-7658
Chapter 4: Performance Features and Safety Precautions Safety Precautions ! ) Although the laboratory hood has been engineered to maintain optimum operator safety, caution should always be used while working in the hood. Prior to using the hood, check to make sure that the exhaust blower is operating and that air is entering the hood at its specified face velocity. USE GOOD HOUSEKEEPING IN THE HOOD AT ALL TIMES. CLEAN UP SPILLS IMMEDIATELY WITH A MILD DETERGENT.
Chapter 4: Performance Features and Safety Precautions Do not work with chemicals in this hood without the exhaust system running. Do not store chemicals in a fume hood. Perchloric acid use in this hood is prohibited. High level radioisotope materials are prohibited for usage in this hood. ) ! DO NOT PLACE ITEMS ON THE AIRFOIL AS THEY WILL EFFECT THE HOODS ABILITY TO CONTAIN. AVOID CROSS DRAFTS AND LIMIT TRAFFIC IN FRONT OF THE HOOD. AIR DISTURBANCES CREATED MAY DRAW FUMES OUT OF THE HOOD.
Chapter 5: Using Your Protector XLE S Operating the Vertical-Rising Sash Because of the Protector XLE Hood counterbalanced sash mechanism, it will take only a few pounds of force to move the sash up or down between the fully closed position and the 18" open position. You can operate the sash smoothly with one or two hands positioned any where along the handle.
Chapter 5: Using Your Protector XLE Start-up • Turn on fluorescent light and hood blower. • Slowly raise the sash to the 18" sash height position. • Check the baffle air slots for obstructions. • Allow the hood to operate unobstructed for 5 minutes. • Wear a long sleeved lab coat and rubber gloves. Use protective eyewear. Wear a protective mask if appropriate. Loading Materials and Equipment • Lock the sash in the upper position to load materials. Do not overload the hood.
Chapter 6: Maintaining Your Protector XLE Now that you have an understanding of how to work in the fume hood, please review the suggested maintenance schedule and the common service operations necessary to maintain your fume hood for peak performance. ! Only trained and experienced certification technicians should perform some of the service operations after the fume hood has been properly decontaminated. DO NOT attempt to perform these operations if you are not properly trained.
Chapter 6: Maintaining Your Protector XLE • • The hood baffles should be checked for blockages behind them to ensure that the hood is maintaining proper airflow. All weekly activities. Annually • Replace the fluorescent lamps. • Have the fume hood recertified by a qualified certification technician. See Certifying the Protector XLE Fume Hood in Chapter 3. • All monthly activities.
Chapter 7: Modifying Your Protector XLE There are several ways to modify the fume hood for your individual requirements. These include the addition of work surfaces, service fixtures, air monitor, distillation grids, electrical duplex receptacles and ceiling enclosures. Installing Work Surfaces Your Protector XLE Fume Hood requires a work surface to work properly. Contact Labconco Customer Service for ordering information.
Chapter 7: Modifying Your Protector XLE Installing Ceiling Enclosures Above the Fume Hood Your Protector XLE Fume Hood has mounting holes to accept a ceiling enclosure to close off the area between the top of the hood and the ceiling. Contact Labconco Customer Service for ordering information. Figure 7-2 Installing Additional Service Fixtures Additional service fixtures can be installed in the available service fixture holes in both sidewalls and corner posts.
Chapter 7: Modifying Your Protector XLE Installing Guardian™ 1000 Digital Airflow Monitor or Guardian™ Jr. Airflow Monitor The Guardian Digital Airflow Monitor P/N 9743211 continuously monitors face velocity through the fume hood opening. The Guardian Jr. Airflow Monitor P/N 9743202 continuously monitors airflow through the exhaust. The fume hood right corner post is factory prepared to mount either monitor. Contact Labconco Customer Service to order.
Chapter 7: Modifying Your Protector XLE Installing an Electrical Duplex Receptacle Your Protector Fume Hood can be ordered with duplex outlets, however, if you ordered a model without an electrical duplex outlet you can have one installed in the field by a qualified electrician. Contact Labconco Customer Service for ordering information. (Not acceptable on explosion-proof hoods).
Chapter 8: Troubleshooting Refer to the following table if your fume hood fails to operate properly. If the suggested corrective actions do not solve your problem, contact Labconco for additional assistance. PROBLEM CAUSE CORRECTIVE ACTION Remote blower and lights won’t operate Wires not connected at junction boxes or switches. Check connection of switches. Check connection to control box on top of unit.
Chapter 8: Troubleshooting PROBLEM CAUSE CORRECTIVE ACTION Contaminants outside of fume hood Improper user techniques for the fume hood. See “Certifying the Hood” Chapter 3 and “Safety Precautions” Chapter 4 sections in the manual. (Ref. Appendix D) Restriction of the baffle air slots or – blockage of the exhaust outlet. Remove baffles to check that all air slots, and the exhaust outlet are unobstructed. Replace baffles.
Chapter 8: Troubleshooting PROBLEM CAUSE CORRECTIVE ACTION Service valves no longer operate Faulty building supply. Inspect building supply shut off valves and appropriate pressures below 40 PSI. Valve no longer operates. Replace valve and check for leaks. Supply line or outlet line has leaks. Inspect line for leaks and fix any leaking plumbing connections.
Appendix A: Protector XLE Components Illustration A-1 indicates the location of the following service parts: Protector XLE Replacement Parts Item Quantity Part No.
Appendix A: Protector XLE Components Item 8A 8B 10A 11A 11B 12B 12D 12E 13A 13B 13C 13D 13E 14 15 16 17 18 19 20A 21 Quantity 1 1 1 1 1 1 4 4 1 1 1 1 1 4 2 2 4 4 2 1 1 Part No.
Appendix A: Protector XLE Components 21 8 20 11 1 12 2 3 5 6 13 10 7 Figure A-1 34 Product Service 1-800-522-7658
Appendix B: Protector XLE Dimensions XLE Model Widths A B Duct Spacing 4' 48.00 38.25 C/L One Duct 5' 60.00 50.25 C/L One Duct Product Service 1-800-522-7658 6' 72.00 62.25 C/L One Duct 7' 84.00 74.25 42.00 Two Ducts 8' 96.00 86.25 48.
Appendix C: Protector XLE Specifications Environmental Conditions • • • • • • • 36 Indoor use only. Maximum altitude: 10,000 feet (3,048 meters). Ambient temperature range: 41° to 104°F (5° to 40°C). Maximum relative humidity: 80% for temperatures up to 88°F (31°C), decreasing linearly to 50% relative humidity at 104°F (40°C). Main supply voltage fluctuations not to exceed ±10% of the nominal voltage. Transient over-voltages according to Installation Categories II (Overvoltage Categories per IEC 1010).
Appendix C: Protector XLE Specifications Product Service 1-800-522-7658 37
Appendix D: References Many excellent reference texts and booklets are currently available. The following is a brief listing: Laboratory Ventilation Standards Federal Register 29 CFR Part 1910 Non-mandatory recommendations from “Prudent Practices.” • Fume hoods should have a continuous monitoring device • Face velocities should be between 60-100 linear feet per minute (lfpm) • Average 2.5 linear feet of hood space per person Occupational Health and Safety U.S. Department of Labor 200 Constitution Avenue N.
Appendix D: References ASHRAE 110-1995 Method of Testing Performance of Fume Hoods Evaluates fume hood’s containment characteristics • Three part test: Smoke generation, Face velocity profile, Tracer gas release @ 4 liters per minute • Rated As Manufactured (AM), As Installed (AI) and As Used (AU) American Society of Heating, Refrigerating, and Air Conditioning Engineers 1791 Tullie Circle N.E. Atlanta, GA 30329 (404) 636-8400 ANSI Z9.5-2003 Laboratory Standard Covers entire laboratory ventilation system.
Appendix D: References General References ASHRAE Standard Committee. ASHRAE Standard Atlanta: ASHRAE Publications Sales Department, 1995 British Standards Institution, Laboratory Fume Cupboards. Parts 1, 2 and 3, London: 1990 Department of Labor, Occupational Safety and Health Administration, 29 CFR Part 1910, Occupational Exposures to Hazardous Chemicals in Laboratories, Final Rule. Vol. 55, No. 21. Washington D.C.:1990 DiBerardinis. L. et al. Guides for Laboratory Design, Health and Safety Considerations.
DECLARATION OF CONFORMITY Application Council Directive(s): 73/23/EEC, 89/336/EEC, 2002/95/EC (ROHS), 2002/96/EC (WEEE), 2004/108/EC Standard(s) to which conformity is declared: EN61010-1, EN61326-1, EN55022, EN61000-3-2/3 Manufacturer’s Name: Labconco Corporation Manufacturer’s Address: 8811 Prospect Avenue Kansas City, MO 64132 USA Importer’s Name: See Shipping/Customs Documents Importer’s Address: See Shipping/Customs Documents for your equipment Type of Equipment: Laboratory Equipment Protect