
Install Instructions

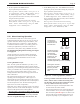


Table Of Contents
- Cover
- Table of Contents
- Table of Contents, Page 2
- Section 1 -GENERAL INFORMATION
- Section 2 -LOCATING THE APPLIANCE
- Section 3 -VENTING AND COMBUSTION AIR
- Section 4 -GAS SUPPLY AND PIPING
- Section 5 -PUMP REQUIREMENTS
- Section 6 -WATER CONNECTIONS -NTH BOILER
- Section 7 -ELECTRICAL AND WIRING DIAGRAMS
- Section 8 -THE USER INTERFACE
- 8.1 About the User Interface
- 8.2 Navigating the User Interface
- 8.3 The Home Display
- 8.4 Customizing your Home Display
- 8.5 Entering/Changing Control Settings
- 8.6 Quick Start
- Configuration and Setup
- 8.7 24 VAC Transformerwith Integral Circuit Breaker
- 8.8 Hydronic Heating Demand
- 8.9 Anti-Short-Cycle (ASC)
- 8.10 Outdoor Air Temperature Sensor
- 8.11 Outdoor Reset
- 8.12 Warm Weather Shutdown
- 8.13 Domestic Hot Water
- 8.14 About Lead Lag Operation
- 8.15 Adjusting CO2
- Section 9 -FIRST START-UP AND ADJUSTMENTINSTRUCTIONS
- Section 10 -MAINTENANCE
- Section 11 -OPERATING DETAILS AND TROUBLESHOOTING
- Section 12 -REPLACEMENT PARTS
- Appendix A -SOFTWARE CONTROL FUNCTIONS. Next 5 pages
- Appendix B -ERROR MESSAGES. Next 8 pages
- Back Cover. Contact information. Product and Service Videos

Page 39
NEOTHERM Residential Boilers
be used for both functions.)
Here are instructions for setting up the Warm Weather
Shutdown function. Notice that these instructions will be
different, depending on whether your system has a single
boiler or more than one boiler (using Lead Lag operation).
Wiring Connections -
Connect the outdoor temperature sensor.:
If your system has just one boiler –
Connect the sensor across terminals 1 and 2 on TB-7.
See Figure 31 on page 37.
If your system has more than one boiler, and is controlled
using the Lead/ Lag function –
Connect the sensor across terminals 1 and 2 on TB-7 on the
boiler which will be used as the Lead Lag Master.
Setting Up the Control Functions -
1. Enable the Warm Weather Shutdown function:
If your system has just one boiler –
How to get there: From the “Home” screen, press “I”
to go to “Info/ Install.” Choose “Advanced Setup,”
then go to “CH Conguration.” Select “Warm Weather
Shutdown.” On the line for “Warm Weather Shutdown,”
select “Immediately.”
If your system has more than one boiler, and is controlled
using the Lead/ Lag function –
How to get there: On the unit used as the Lead/ Lag
Master only - From the “Home” screen, press “I” to go
to “Info/ Install.” Choose “Advanced Setup,” then go to
“CH Conguration.” Select “Warm Weather Shutdown.”
On the line for “Warm Weather Shutdown,” select
“Immediately.”
2. Enter the setpoint for this feature:
If your system has just one boiler –
How to get there: From the “Home” screen, press “I”
to go to “Info/ Install.” Choose “Advanced Setup,”
then go to “CH Conguration.” Select “Warm Weather
Shutdown.” Go to the line for “Warm Weather Shutdown
Setpoint”, and set the value.
If your system has more than one boiler, and is controlled
using the Lead/ Lag function –
How to get there: On the unit used as the Lead/ Lag
Master only - From the “Home” screen, press “I” to go
to “Info/ Install.” Choose “Advanced Setup,” then go to
“CH Conguration.” Select “Warm Weather Shutdown.”
On the line for “Warm Weather Shutdown Setpoint,” and
set the value.
8.13 DomesticHotWater
A NeoTherm unit can be congured to supply domestic hot
water (DHW) as a stand-alone “volume” unit (DHW models)
or as a secondary function while the unit also provides
hydronic heating. The piping used to supply domestic hot
water (DHW) can be set up in several different ways. See
Section 6 for details. In this section, we will describe the
wiring and control setup for several different types of DHW
supplies.
DHW Temperature Setting -
Regardless of the type of DHW setup, the setpoint adjustment
is made the same way.
How to get there: From the “Home” screen, press “I” to
go to “Info/ Install.” Choose “Advanced Setup,” then go
to “DHW Setpoint.”
Hydronic Heating with
Domestic Hot Water (DHW) Priority -
When using the NeoTherm for hydronic heating with
domestic hot water priority, a call for heat must be supplied
to the “T-T or Interlock” terminal. Once the call is supplied,
the control starts the Boiler and System pumps and begins the
ignition process. Once in Run, the NeoTherm monitors the
ame signal, call for heat, safeties, and water temperatures
modulating as needed between 100% and 20% of rate to
satisfy the call for heat. When a DHW demand is applied
during a hydronic call for heat, the priority feature forces the
boiler to switch to the DHW demand for the priority time.
DANGER
• Water temperature over 125°F (52°C) can cause
severe burns instantly or death from scalds.
• Children, disabled and elderly are at hightest risk of
being scalded.
• Set the water temperature carefully as described
below.
• Feel the water before
bathing or showering.
• If this appliance is used to
produce water that could
scald if too hot, such
as domestic hot water
use, adjust the outlet
control (limit) or use temperature limiting valves to
obtain a maximum water temperature of 125°F (52°C).