
FAQ

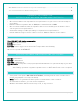
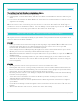
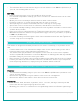

Table Of Contents
- V22-WRTHV2 FAQS
- V22-WRTHV2 FAQS
- Contents
- Contents
- General Information
- BATTERIES: What do I need to know about batteries?
- HARDWARE: Sensors and Station
- What are the power requirements for this station?
- POWER INPUT: Will this station work in other countries??
- SETUP: How do I setup my station?
- MOUNTING: Where do I mount/position my sensors?
- Where to I place my station?
- What is Distance | Resistance | Interference?
- READINGS: How do I interpret the current Wind Readings?
- How do I interpret the Wind History Readings?
- How do I reset the Wind History Readings?
- How do I interpret the Rain Readings?
- How do I reset the Rain Readings?
- How do I view my HI and LO Temperature/Humidity Readings?
- How do I reset the Temperature/Humidity Readings?
- What is Feels Like and Dew Point Temperature?
- Where does the HI | LO reading next to the Feels Like Temperature come from?
- TIME: Does this station have Atomic Time?
- How do I manually set the time?
- Why do “SEE APP TO CONNECT” or “LOST WIFI” show on my station?
- BACKLIGHT: Does this station have a backlight?
- Can I operate My station on battery power only?
- BATTERY: What do the battery icons mean?
- WEEKDAY: How do I correct the day of the week?
- Does this station have 12 hour and 24 hour time options?
- Why does the station show different color trees?
- FORECAST ICONS: What do the forecast icons mean?
- TROUBLESHOOTING
- How do I change batteries in my sensors without losing data?
- BAR CODE: What are the barcodes and ID Numbers on my sensors and on my station?
- How do I delete sensor ID numbers?
- FACTORY RESET: How do I factory reset my station?
- DASHES TEMP/HUMIDITY: Why does my thermo-hygro sensor show dashes on the station?
- Why don’t my temperature/humidity readings on my station match the weather report?
- TEMP ACCURACY: Why does my thermo-hygro sensor read inaccurately?
- What does a reading of “HI” or “LO” mean?
- TEMP INTERMITTANT: Why does my temp/humidity reading come and go?
- Why am I going through batteries quickly?
- How do I change between Fahrenheit and Celsius?
- Why are my wind cups not spinning?
- Can I replace my wind cups?
- WIND READING 0.00: Why do I only see 0.00 for wind speed?
- WIND DASHES: Why are there dashes for wind readings?
- WIND INTERMITTANT: Why do my wind readings come and go?
- WIND ACCURACY: Why is my wind speed inaccurate?
- RAIN DASHES: Why are there dashes for Rain readings?
- RAIN INTERMITTANT: Why do my Rain readings come and go?
- RAIN LOW: Why is my rainfall reading low?
- RAIN HIGH: Why is my rainfall reading high?
- How can I clean the rain sensor?
- GET CONNECTED: Your La Crosse View™ App
- Where do I find the La Crosse View™ App?
- How do I connect?
- What are the requirements to connect?
- What are the benefits of using an app?
- MESSAGES: What is the meaning of these messages on my station?
- Can I move my station to a new house?
- Why can’t I see my outdoor sensors in the app?
- ADD SENSOR: How can I add sensor to my La Crosse View™ app?
- Can I connect this station to Weather Underground?

9 | Page
WHERE DOES THE HI | LO READING NEXT TO THE
FEELS LIKE TEMPERATURE COME FROM?
Your station provides a daily HI | LO temperature reading, as well and the historical records with
time and date stamp listed above. This is shown continually on your station. No button press is
necessary.
• Standalone station: The daily HI | LO temperature comes from your thermo-hygro sensor
when you operate as a standalone station.
• Connected to the La Crosse View™ app: When you connect to the La Crosse View™ app.
The daily HI | LO reading will come from the Weather Service, as a forecasted HI and LO.
TIME: DOES THIS STATION HAVE ATOMIC TIME?
• Standalone station: When operating as a standalone station, the time needs to be set
manually on this station.
• Connected to the La Crosse View™ app: When operating as a connected station the time
will update from the Internet Weather Service.
HOW DO I MANUALLY SET THE TIME?
When operating as a standalone station, you can manually adjust your station’s settings:
1. Hold the SET button for 3 seconds to enter settings menu.
2. Press and release the + or - buttons to adjust the flashing values. Hold to adjust quickly.
3. Press and release the SET button to confirm and move to the next item.
Note: Press and release the LIGHT button any time to exit settings
Settings order:
•Beep ON/OFF
•12H/24H Time
•Hour
•Minutes
•Year
•Month
•Date
•Temperature Fahrenheit/Celsius
•SEE APP (connection prompt for app, no actual function)
Full Program Menu:
1. Hold the SET button for 3 seconds to enter settings. BEEP SOUND ON will show. Press and
release the PLUS or MINUS button if you want the Beep sound OFF.
2. Press and release the SET button to confirm and move to select 12/24 hour time format.
12/24 TIME FORMAT will show. Press and release the PLUS or MINUS button if you want 24
hour time format.