4 Copying Functions This chapter explains the functions available for copying. • • • • • • • • • • • • • • Original Size ................................................................. 4-2 Paper Selection ............................................................ 4-4 Original Orientation....................................................... 4-8 EcoPrint ...................................................................... 4-10 Combine Mode ...........................................................
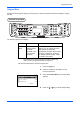
Copying Functions Original Size Specify the size of originals being scanned. Be sure to select the original size before starting the copying process. Part that is operated The following options are available. Item Standard Sizes * How to Select Select from standard sizes, envelope, postcard or the custom sized originals*.
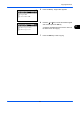
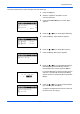
Copying Functions Original Size: a b 1 *Letterq ********************* 2 Legalq 3 Statementq Original Size: a b 1 *ISO B5q ********************* 2 Envelope #10 3 Envelope #9 5 Press the OK key. Original Size appears. 6 Press the U or V key to select the desired original size and then press the OK key. Completed. is displayed and the screen returns to the basic screen for copying. 7 4-3 Press the Start key to start copying.
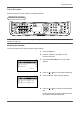
Copying Functions Paper Selection Select the paper source that contains the required paper size. Part that is operated NOTE: Specify in advance the size and type of the paper loaded in the cassette (refer to Original/Paper Settings on page 8-8). Selecting the Cassette Use the procedure below to select the paper supply cassette.
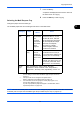
Copying Functions 7 Press the OK key. Completed. is displayed and the screen returns to the basic screen for copying. 8 Press the Start key to start copying. Selecting the Multi Purpose Tray Change the paper size and media type. The available paper sizes and media types are shown in the table below.
Copying Functions Use the procedure below to select the paper size and media type. Function Menu: a b 1 Paper Selection g ********************* 2 Collate T T 3 Duplex [ Exit ] Paper Selection: a b 1 * Auto ********************* 2 A A4a Plain 3 B A5a Plain MP Tray Set.: a b 1 *Standard Size ********************* 2 Size Entry 1 Press the Copy key. 2 Place the originals on the platen or in the document processor. 3 Press the Function Menu key. Function Menu appears.
Copying Functions 10 Place paper in the multi purpose tray. 11 Press the Start key to start copying. If Add paper in MP tray. is displayed during the copying process, add paper in the multi purpose tray, and then press the OK key. Copying then resumes.
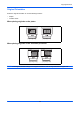
Copying Functions Original Orientation Select the original orientation to use the following functions. • Duplex • Combine mode When placing originals on the platen [Top Edge Top] [Top Edge Left] When placing originals on the document processor [Top Edge Left] [Top Edge Top] NOTE: To change the default setting for the original orientation, refer to Orig.Orientation on page 8-30.
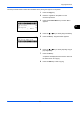
Copying Functions Use the procedure below to select the orientation when placing the originals on the platen. Function Menu: a b 1 Paper Selection g ********************* 2 Collate T T 3 Duplex [ Exit ] Orig.Orientation: a b 1 c Top Edge Top 2 *d Top Edge Left ********************* 1 Press the Copy key. 2 Place the originals on the platen or in the document processor. 3 Press the Function Menu key. Function Menu appears. 4 4 Press the U or V key to select [Orig.Orientation]. 5 Press the OK key.
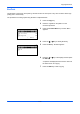
Copying Functions EcoPrint Use EcoPrint to save toner when printing. Use this function for test copies or any other occasion where high quality print is unnecessary. The procedure for making copies using EcoPrint is explained below. Function Menu: a b 1 Paper Selection g ********************* 2 Collate T 3 Duplex T [ Exit ] EcoPrint: a b 1 *Off ********************* 2 On 1 Press the Copy key. 2 Place the originals on the platen or in the document processor. 3 Press the Function Menu key.
Copying Functions Combine Mode This mode allows you to copy 2 or 4 originals combined onto a single page. 2-in-1 mode or 4-in-1 mode. The page boundary of each original can be indicated. Part that is operated 4 NOTE: Combine mode is available for the copy paper sizes of Folio, A4, B5, Legal, Oficio II, Letter, Statement and 16K. 2-in-1 Mode For copying two originals onto a single sheet. This mode can be used with Duplex mode to copy four originals onto one sheet.
Copying Functions 4-in-1 Mode For copying four originals onto a single sheet. This mode can be used with Duplex mode to copy eight originals onto one sheet. The following 4-in-1 options and output orientations are available. Original Copy Orientation of Original Platen Document processor NOTE: When placing the original on the platen, be sure to copy the originals in page order. Types of Page Boundary Lines The following types of the boundary lines are available.
Copying Functions Function Menu: a b 1 Paper Selection g ********************* 2 Collate T 3 Duplex T [ Exit ] Combine: a b 1 *Off ********************* 2 2 in 1 3 4 in 1 [ Detail ] 2 in 1 Layout: a b 1 *g L to R f T to B ********************* 2 e R to L Border Line: a b 1 * None ********************* 2 l Solid Line 3 m Dotted Line Orig.Orientation: a b 1 c Top Edge Top 2 *d Top Edge Left ********************* 2 Place the originals on the platen or in the document processor.
Copying Functions Continuous Scan When a large number of originals cannot be placed in the document processor at one time, the originals can be scanned in separate batches and then copied as one job. With this function, originals are scanned until you press [End Scan] (the Right Select key). The procedure for making copies using Continuous Scan is explained below.
Copying Functions Job Finish Notice Sends a notice by E-mail when a copy job is complete. User can be notified of the completion of a copy job while working at a remote desk, saving the time spent waiting beside the machine for copying to finish. NOTE: PC should be configured in advance so that E-mail can be used. Example of Job Finish Notice To: h_pttr@owl-net.net Subject: 1234 Job end report mail Job No.
Copying Functions JobFinish Notice: a b 1 *Off ********************* 2 On a b Destination: 1 *Address Book ********************* 2 Address Entry Address Book: a b p Fiala ********************* p Maury p Morgan [ Menu ] 5 Press the OK key. JobFinish Notice appears. 6 Press the U or V key to select [On] and then press the OK key. 7 Press the U or V key to select [Address Book] or [Address Entry], and then press the OK key.
Copying Functions File Name Entry Names a copy job. Add other information such as date and time or job number as necessary. You can check a job history or job status using the job name, date and time, or job number specified here. Use the procedure below to assign a name to your copy job. Function Menu: a b 1 Paper Selection g ********************* 2 Collate T 3 Duplex T [ Exit ] File Name Entry: A b File_2010* S ABC [ Text ] 1 Press the Copy key.
Copying Functions Print Override This function allows you to suspend the current print job when you need to make copies immediately. When the interrupt copy job is completed, the machine resumes the suspended print job. Function Menu: a b 1 Paper Selection g ********************* 2 Collate T 3 Duplex T [ Exit ] Print Override: a b 1 *Off ********************* 2 On 1 Press the Function Menu key. Function Menu appears. 2 Press the U or V key to select [Print Override]. 3 Press the OK key.
Copying Functions Color Selection Select the color mode for copying. To select the color mode, you can also select from the Auto Color key, Full Color key or Black & White key. Function Menu: a b 1 Paper Selection g ********************* 2 Collate T T 3 Duplex [ Exit ] Color Selection: a b 1 *Auto Color ********************* 2 Full Color 3 Black & White 1 Press the Copy key. 2 Place the originals on the platen or in the document processor. 3 Press the Function Menu key. Function Menu appears.
Copying Functions Color Balance Adjust the strength of cyan, magenta, yellow, and black to make fine hue adjustments. NOTE: This feature is used with full color copying. This feature can not be used together with Adjusting Density (see page 3-8). Refer to the sample image in Color balance adjustment on Appendix-20. Follow the steps below to adjust color balance.
Copying Functions 10 Press the U or V key to select the color intensity. A larger negative value makes the color fainter, and a larger positive value makes the color more intense. 11 Press the OK key. Completed. is displayed and the screen returns to the basic screen for copying. 12 Press the Start key to start copying.
Copying Functions Sharpness Adjust the sharpness of image outlines. When copying penciled originals with rough or broken lines, clear copies can be taken by adjusting sharpness toward [Sharpen]. When copying images made up of patterned dots such as magazine photos, in which moire* patterns appear, edge softening and weakening of the moire effect can be obtained by setting the sharpness toward [Unsharpen]. * Patterns that are created by irregular distribution of halftone dots.
Copying Functions Background Density Lightens the background of color originals with dark backgrounds. NOTE: This feature is used with full color and auto color copying. Background Density Adjust is disabled during auto color copying when the a black & white original has been detected. 4 Original Copy Follow the steps below to use background density adjust.
Copying Functions 8 Press the U or V key to select the density of the ground color. A smaller value decreases the density of the ground color, and a larger value increases the density. 9 Press the OK key. Completed. is displayed and the screen returns to the basic screen for copying. 10 Press the Start key to start copying.
Copying Functions Saturation Adjust the color saturation of the image. The procedure for adjusting the color saturation is explained below. Function Menu: a b 1 Paper Selection g ********************* 2 Collate T 3 Duplex T [ Exit ] Saturation: a b 1 *-3(Grayish) ********************* 2 -2 3 -1 4 0 1 Press the Copy key. 2 Place the originals on the platen or in the document processor. 3 Press the Function Menu key. Function Menu appears. 4 Press the U or V key to select [Saturation].
Copying Functions 4-26
5 Sending Functions This chapter explains the functions available for sending originals. • • • • • • • • • • • • • • • • • • • • • Original Size ................................................................. 5-2 Sending Size ................................................................ 5-4 Zoom ............................................................................ 5-6 Duplex Sending ............................................................ 5-8 Original Orientation............................
Sending Functions Original Size Select the size of originals that will serve as the basis for scanning. Be sure to select the original size before starting the sending process. Part that is operated Choose the original size from the following groups of original size. Item Detail Size Standard Sizes Select from standard sizes, Hagaki and Custom Original Size *.
Sending Functions Original Size: a b 1 *Letterq ********************* 2 Legalq 3 Statementq Original Size: a b = *ISO B5q ********************* > Envelope #10 ? Envelope #9 5 Press the OK key. Original Size appears. 6 Press the U or V key to select the desired original size and then press the OK key. Completed. is displayed and the screen returns to the basic screen for sending. 5 7 5-3 Specify the destination, and press the Start key to start sending.
Sending Functions Sending Size Select the sending size (the size of image to be sent). Part that is operated The table below lists the sizes. Item Detail Size Standard Sizes Select from Same as Original Size, Standard Size, envelope, postcard or the custom sized originals*.
Sending Functions Function Menu: a b 1 Color Selection g ********************* 2 Original Size T 3 Original Image T [ Exit ] Sending Size: a b 1 *Same as OrigSize ********************* 2 Letter 3 Legal Sending Size: a b = *ISO B5 ********************* > Envelope #10 ? Envelope #9 1 Press the Send key. 2 Place the originals on the platen or in the document processor. 3 Press the Function Menu key. Function Menu appears. 4 Press the U or V key to select [Sending Size]. 5 Press the OK key.
Sending Functions Zoom Scans the original by automatically zooming it depending on the sending size. Part that is operated The table below lists the available options. Item Detail 100% No Zoom (to be scanned at actual size) Auto Zoomed automatically according to the specified sending size. NOTE: When zooming in or out, see Sending Size on page 5-4 when selecting the sending size.
Sending Functions Zoom: a b 1 *100% ********************* 2 Auto 6 Press the OK key. Zoom appears. 7 Press the U or V key to select [100%] or [Auto] and then press the OK key. Completed. is displayed and the screen returns to the basic screen for sending. 8 5-7 Specify the destination, and press the Start key to start sending.
Sending Functions Duplex Sending Select the type and binding of original depending on the original. Part that is operated The table below lists the binding directions for each original type. Original Type Binding 1-sided Sheet Original 1-sided — 2-sided Sheet Original 2-sided Binding Left/Right, Binding Top Use the procedure below to select the original type and binding direction when sending scanned originals.
Sending Functions 6 Press the U or V key to select [1-sided] or [2sided]. If you select [2-sided], press [Detail] (the Right Select key), select the binding edge and press the OK key, and then select the original setting orientation on the next screen. 7 Press the OK key. Completed. is displayed and the screen returns to the basic screen for sending. 8 5-9 Specify the destination, and press the Start key to start sending.
Sending Functions Original Orientation To send the document in the orientation that can be read properly, specify the upper orientation of original. To use the functions below, select the orientation in which the original is set on the platen.
Sending Functions Orig.Orientation: a b 1 c Top Edge Top 2 *d Top Edge Left ********************* 5 Press the OK key. Orig.Orientation appears. 6 Press the U or V key to select [Top Edge Top] or [Top Edge Left]. 7 Press the OK key. Completed. is displayed and the screen returns to the basic screen for sending. 8 5-11 Specify the destination, and press the Start key to start sending.
Sending Functions File Format Select the file format of the image to send. Part that is operated The table below lists the file formats and their details. File Format PDF Adjustable range of image quality Color mode Full Color, Grayscale 1 Low Quality (High Comp.) to 5 High Quality (Low Comp.) Black and White PDF/A-1a - Full Color, Grayscale 1 Low Quality (High Comp.) to 5 High Quality (Low Comp.) Black and White PDF/A-1b - Full Color, Grayscale 1 Low Quality (High Comp.
Sending Functions Function Menu: a b 1 Color Selection g ********************* 2 Original Size T 3 Original Image T [ Exit ] File Format: a b 1 *PDF ********************* 2 TIFF 3 XPS [ Detail ] 2 Place the originals on the platen or in the document processor. 3 Press the Function Menu key. Function Menu appears. 4 Press the U or V key to select [File Format]. 5 Press the OK key. File Format appears. 6 Press the U or V key to select the file format from [PDF], [TIFF], [XPS] or [JPEG].
Sending Functions File Separation Create several files by dividing scanned original data page by page, and send the files. Use the procedure below to split scanned original data into separate files when sending scanned originals. Function Menu: a b 1 Color Selection g ********************* 2 Original Size T 3 Original Image T [ Exit ] File Separation: a b 1 *Off ********************* 2 Each Page 1 Press the Send key. 2 Place the originals on the platen or in the document processor.
Sending Functions Original Image Select image quality suitable to the type of original. The table below shows the quality options. Item Detail Text+Photo Text and photos together. Photo For photos taken with a camera. Text Only text, no photos. OCR For documents to be read by OCR. Use the procedure below to select the quality when sending scanned originals.
Sending Functions Adjusting Density Use the procedure below to adjust the density when scanning the originals. Part that is operated The table below shows the available settings. Item Detail Manual Adjust density using 7 levels. Auto Optimum density is selected according to the density of the original. The procedure for adjusting the density is explained below.
Sending Functions 7 Press the OK key. Completed. is displayed and the screen returns to the basic screen for sending. 8 Specify the destination, and press the Start key to start sending.
Sending Functions Scan Resolution Select the fineness of scanning resolution. The finer the scanning becomes (the larger the number becomes), the better the image quality becomes. However, better resolution also results in larger file size (file capacity) and longer scanning and sending times. The selectable resolution is 200x100dpi Normal, 200x200dpi Fine, 200x400dpi Super Fine, 300x300dpi, 400x400dpi Ultra Fine, or 600x600dpi.
Sending Functions Color / Grayscale / Black and White Selection This feature allows you to select the select the color mode used for scanning when sending images. You can select from Auto(Color/Gray), Auto(Color/B&W), Full Color, Grayscale or Black & White. Use the procedure below to select the color mode when sending scanned images.
Sending Functions Continuous Scan When the multi-page originals cannot be placed in the document processor at one time, the originals can be scanned in separate batches and then sent as one job. With this function, originals can be scanned one after another until you press [End Scan] (the Right Select key). The procedure for using continuous scanning when sending scanned images is explained below.
Sending Functions File Name Entry This setting allows you to assign a document name to scanned images. You can specify a default for the document name. Use the procedure below to assign names to scanned documents that you are sending. Function Menu: a b 1 Color Selection g ********************* 2 Original Size T 3 Original Image T [ Exit ] File Name Entry: A b File_2010* S ABC [ Text ] 1 Press the Send key. 2 Place the originals on the platen or in the document processor.
Sending Functions Subject and Body Entry When sending E-mail, enter the subject and body of the E-mail. Use the procedure below to enter the subject and body for an E-mail message and then send the E-mail. NOTE: Refer to Character Entry Method on Appendix-7 for details on entering characters. Function Menu: a b 1 Color Selection g ********************* 2 Original Size T 3 Original Image T [ Exit ] B b Subject Entry: * [ ABC Text 1 Press the Send key. 2 Press the Function Menu key.
Sending Functions Sharpness Adjust the sharpness of image outlines. When scanning penciled originals with rough or broken lines, clear scanning data can be taken by adjusting sharpness toward [Sharpen]. When scanning images made up of patterned dots such as magazine photos, in which moire* patterns appear, edge softening and weakening of the moire effect can be obtained by setting the sharpness toward [Unsharpen]. * Patterns that are created by irregular distribution of halftone dots.
Sending Functions Background Density Lightens the background of color originals with dark backgrounds. NOTE: This feature is used with full color and auto color copying. Background Density Adjust is disabled during auto color sending when the a black & white original has been detected. Original Scanning Image Follow the steps below to use background density adjust.
Sending Functions 8 Press the U or V key to select the density of the ground color. A smaller value decreases the density of the ground color, and a larger value increases the density. 9 Press the OK key. Completed. is displayed and the screen returns to the basic screen for sending. 10 Specify the destination, and press the Start key to start sending.
Sending Functions WSD Scan WSD Scan saves images of originals scanned on this machine as files on a WSD-compatible computer. NOTE: For information on operating the computer, refer to the operating system help for your computer. To use WSD Scan, WSD Scan Setup (page 8-150) must be set to [On] in the network settings. Procedure using computer 1 Install the WIA driver on your computer in the custom mode from the supplied CD-ROM (Product Library).
Sending Functions WSD Scan: a b 1 From Computer 2 From Oper. Panel ********************* [ Exit 4 Press the OK key. WSD Scan appears. 5 Press the U or V key to select [From Oper. Panel]. 6 Select the destination computer from the computer list. ] Select Computer: a b P Computer01 ********************* P Computer02 P Computer03 [ Cancel ] [ Detail ] Press [Detail] (the Right Select key) to see the information of the selected computer. 7 Press Start Key.
Sending Functions Job Finish Notice This feature sends an e-mail providing notification that transmission has been completed. Use the procedure below to specify the Job Finish Notice settings.
Sending Functions If you select [Address Entry], enter the address of the notice destination. Address Entry: A b ******@abcdefg.jp* [ ABC Text NOTE: Refer to Character Entry Method on Appendix-7 for details on entering characters. ] 9 Press the OK key. Completed. is displayed and the screen returns to the basic screen for sending. 10 Specify the destination, and press the Start key to start sending. When the sending is completed, the finish notice is sent to the specified E-mail address.
Sending Functions FTP Encrypted TX This allows you to encrypt documents when you send them. If you select [On] in this option, you can then select the encryption method in the basic send screen. Use the procedure below to scan and send originals as encrypted files. Function Menu: a b 1 Color Selection g ********************* 2 Original Size T 3 Original Image T [ Exit ] FTP Encrypted TX: a b 1 *Off ********************* 2 On 1 Press the Send key.
Sending Functions Scanning Image using Application Be sure that you connect your PC with the machine using the USB cable and install the Kyocera TWAIN or WIA Driver. The scan can be carried out from any TWAIN or WIA compatible application program. For details of installation for TWAIN or WIA driver, refer to Setup Guide. The following procedure is an example for scan operation using the TWAIN Driver. Operate the WIA Drivers in the same manner. 1 Connect your computer to the machine using a USB cable.
Sending Functions 5-32
6 Document Box This chapter explains the typical procedure for utilizing Document Box. • • • • Printing Documents Stored in USB Memory................. 6-2 Saving Documents to USB Memory (Scan to USB) ..... 6-5 Removing USB Memory ............................................... 6-7 Printing from a Job Box ................................................
Document Box Printing Documents Stored in USB Memory Plugging USB memory directly into the machine enables you to quickly and easily print the files stored in the USB memory without having to use a computer. Limitations • The following file types can be printed: • PDF file (Version 1.5) • TIFF file (TIFF V6/TTN2 format) • XPS file • PDF files you wish to print should have an extension (.pdf). • Files to be printed should be saved no further down than the top 3 folder levels.
Document Box Select a folder and press the OK key to view the files in the folder. Documents in the top 3 folder levels including the root directory can be viewed. USB Memory: a b N Store File i Folder-1 j File-1 g ********************* [ Menu ] [ Select ] 6 Press [Select] (the Right Select key). The selected file name is indicated by a checkmark next to it. When you want to print additional files, repeat steps 5 to 6 to select them.
Document Box JPEG/TIFF Print: a b 1 *Paper Size g ********************* 2 Image Resolution T 3 Print Resolution T 4 Press the OK key. JPEG/TIFF Print appears. 5 Press the U or V key to select the the desire print mode. The print modes are as follows: Paper Size (scaled to fit the paper size) Image Resolution (matched to the image resolution) Print Resolution (matched to the print resolution) 6 Press the OK key. Completed. is displayed and the screen returns to the basic screen.
Document Box Saving Documents to USB Memory (Scan to USB) This function allows you to store scanned image files in USB memory connected to the machine. You can store files in PDF, TIFF, JPEG or XPS format. NOTE: The maximum number of the storable files is 100. Storing Documents The procedure for storing documents in removable USB memory is explained below. 1 Plug the USB memory into the USB memory slot .
Document Box 6 Press the OK key. The basic screen appears. Change the original type, file format, etc., as necessary. For changing scan settings, refer to Sending Functions on page 5-1. 7 Press the Start key. The original is scanned and the data is stored in the USB memory. Ready to scan. A4q 1-sided 300x300dpi [2-sided ] [ScanRes.] IMPORTANT: When removing the USB memory, ensure that you use the correct removal procedure, as described in Removing USB Memory on page 6-7.
Document Box Removing USB Memory Remove the USB memory. IMPORTANT: Be sure to follow the proper procedure to avoid damaging the data or USB memory. Document Box: a b 1 USB Memory ********************* 2 Polling Box 3 Job Box USB Memory: a b N Store File ********************* i Folder-1 j File-1 T [ Menu ] [ Select ] Menu(Folder): 1 Memory Detail 2 Remove Memory a b 1 Press the Document Box key. The Document Box menu appears. 2 Press the U or V key to select [USB Memory]. 3 Press the OK key.
Document Box Printing from a Job Box When optional memory is installed and RAM Disk Mode is enabled, you can use a Job Box to print. Job Box is a function that stores print data on the set RAM disk in the machine, enabling the data to be printed as needed from the operation panel of the machine. If an ID (4-digit number) is set when printing is executed from the computer, the data can be kept more confidential. When an ID is set, the ID must be entered in order to print the stored data from the machine.
Document Box l Fiala: a b o Data01 ********************* o Data02 o Data03 [ Menu ] [ Select ] 7 Press the OK key. The print file selection menu appears. 8 Press the U or V key to select the file to be printed, and then press [Select] (the Right Select key). The selected file will be marked. If you need to add another file, repeat this procedure to select the file.
Document Box Copies: a b (1 - 999) --- copies x ******** 12 The number of copies screen appears. Set the number of copies and press the OK key. 13 The file print confirmation screen appears. Press [Yes] (the Left Select key). Accepted appears and printing begins. Quick Copy mode This mode is used to print an additional copy of a document that has already been printed. If a document is printed with Quick Copy selected in the printer driver, the document will be simultaneously stored on the RAM disk.
Document Box l Fiala: a b o Data01 ********************* o Data02 o Data03 [ Menu ] [ Select ] 7 Press the OK key. The print file selection menu appears. 8 Press the U or V key to select the file to be printed, and then press [Select] (the Right Select key). The selected file will be marked. If you need to add another file, repeat this procedure to select the file.
Document Box 6-12
7 Status / Job Cancel This chapter explains how to check the status and history of jobs and cancel the jobs being processed or waiting to be printed. This chapter also explains how to check the remaining amount of toner and paper and the status of devices, and how to cancel the fax communication. • • • • • • Checking Job Status..................................................... 7-2 Checking Job History.................................................... 7-8 Sending the Job Log History ...................
Status / Job Cancel Checking Job Status Check the status of jobs being processed or waiting to be printed. Available Status Screens The processing and waiting statuses of jobs are displayed as a list on the Message Display in four different screens - Print Job, Send Job, Store Job, and Scheduled Job. The following job statuses are available.
Status / Job Cancel 0009 Detail: Status: Processing Press the OK key to check detailed information of the selected job. C b 1/9 NOTE: You can also check the job information by pressing [Menu] (the Right Select key) and selecting [Detail] in the menu that appears. Press the Y or Z key to switch the display to other information items.
Status / Job Cancel No.
Status / Job Cancel When complete job name not displayed in detailed information Press [Detail] (the Right Select key) in Job Name to see the complete job name. Press the OK key to return to the original screen. When complete destination name not displayed in detailed information When there is only one destination, press [Detail] (the Right Select key) in Destination to see the complete destination name. Press the OK key to return to the original screen.
Status / Job Cancel Store Job Status screen Status: a b 1 Print Job Status ********************* 2 Send Job Status 3 Store Job Status [ Pause ] Store Job Status: a b r 0008 N Scan 0009 b maury’s data 0010 b aaaa [ Cancel ] [ Menu ] 1 2 3 0009 Detail: Status: Processing 1 Press the Status/Job Cancel key. The Status menu appears. 2 Press the U or V key to select [Store Job Status]. 3 Press the OK key. Store Job Status appears. Press the U or V key to check the store queue.
Status / Job Cancel When complete job name not displayed in detailed information Press [Detail] (the Right Select key) in Job Name to see the complete job name. Press the OK key to return to the original screen. When complete destination information not displayed in detailed information Press [Detail] (the Right Select key) in Sender Info. to see the complete destination information. Press the OK key to return to the original screen.
Status / Job Cancel Checking Job History Check the history of completed jobs. NOTE: Job history is also available by COMMAND CENTER or KMnet Viewer from the computer. Available Job History Screens The job histories are displayed separately in three screens - Print Jobs, Send Jobs, Store Jobs, and Scheduled Jobs. The following job histories are available.
Status / Job Cancel A job result icon is displayed on the extreme right of each job. u : Job completed normally v : Job error t : Job aborted NOTE: For details of other items, refer to Print Job Status Screen on page 7-2. 0006 Detail: Result: Error 00100 Press the OK key or [Detail] (the Right Select key) to check the detailed information of the selected print log. C b 1/9 Press the Y or Z key to switch the display to other information items.
Status / Job Cancel Displaying Send Job Log Status: a b 1 Print Job Status ********************* 2 Send Job Status 3 Store Job Status [ Pause ] Send 0004 0003 0002 a Job Log: p Broadcast b 0756545865 p Morgan@kyocN [ Detail b u u v ] 1 Press the Status/Job Cancel key. The Status menu appears. 2 Press the U or V key to select [Send Job Log]. 3 Press the OK key. Send Job Log appears. Press the U or V key to check the send log. A job result icon is displayed on the extreme right of each job.
Status / Job Cancel When complete job name not displayed in detailed information Press [Detail] (the Right Select key) in Job Name to see the complete job name. Press the OK key to return to the original screen. When complete destination name not displayed in detailed information When there is only one destination, press [Detail] (the Right Select key) in Destination to see the complete destination name. Press the OK key to return to the original screen.
Status / Job Cancel 0009 Detail: Result: Error 10200 Press the OK key or [Detail] (the Right Select key) to check the detailed information of the selected job. C b 1/9 Press the Y or Z key to switch the display to other information items. The items displayed are as follows: Result Accepted Time End Time Job Name Job Type User Name Original Pages (number of pages of the original) Color/B & W (color mode of the original) Sender Info.
Status / Job Cancel Sending the Job Log History You can send the job log history by e-mail. You can either send it manually as needed or have it sent automatically whenever a set number of jobs is reached. Displaying Job Log History Menu Sys. Menu/Count.: a b 1 Report ********************* 2 Counter 3 System [ Exit ] 1 Press the System Menu/Counter key on the main unit operation panel. The Sys. Menu/Count. menu appears.
Status / Job Cancel Report: a b 2 Admin Rpt Set. 3 Result Rpt Set. 4 Job Log History ********************* [ Exit ] Job Log History: a b 1 Auto Sending ********************* 2 Send History 3 Destination [ Exit ] 4 Press the U or V key to select [Job Log History]. 5 Press the OK key. The Job Log History menu appears. 1 In the Job Log History menu, press the U or V key to select [Destination]. 2 Press the OK key. The Destination menu appears.
Status / Job Cancel Dest. Confirm.: a b p Morgan@kyoceramita *********************N 2 Press the OK key. Dest. Confirm. appears. NOTE: Press the OK key to edit/delete the current destination.Refer to Character Entry Method on Appendix-7 for details on entering characters. [ Exit ] 3 Press [Exit] (the Right Select key). The basic screen reappears. 1 In the Destination menu, press the U or V key to select [Register]. 2 Press the OK key. Register appears.
Status / Job Cancel NOTE: If the address of the selected destination has Register: a b 1 Address Book ********************* 2 *Address Entry been changed after you selected the destination from the address book, [*] is displayed before [Address Entry]. Refer to Confirming Current Destination on page 7-14 and reconfirm the destination address.
Status / Job Cancel Job Log History: a b 1 Auto Sending 2 Send History ********************* 3 Destination [ Exit ] 1 In the Job Log History menu, press the U or V key to select [Send History]. 2 Press the OK key. A confirmation screen appears. Send the job log history. Are you sure? [ Yes ] [ No ] IMPORTANT: If no destination is registered, Enter destination is displayed. Refer to Registering Destination on page 7-15 and register the desired destination Enter destination.
Status / Job Cancel 4 7-18 Press the OK key. Completed. is displayed and the screen returns to the Job Log History menu.
Status / Job Cancel Pause and Resumption of Jobs Pause /resume all printing jobs in printing/waiting. The procedure for pausing and resuming jobs is explained below.
Status / Job Cancel Device/Communication Configure the devices/lines installed or connected to this machine or check their status. You can also control devices depending on their status. Check of Device Status Status: a b 7 Store Job Log 8 Scanner ********************* 9 Printer [ Pause ] b Scanner: 1 Press the Status/Job Cancel key. The Status menu appears. 2 Press the U or V key to select [Scanner], [Printer] or [FAX]. 3 Press the OK key.
Status / Job Cancel FAX The information (sending, waiting, etc.) is displayed. Log: a b 1 Outgoing FAX Log ********************* 2 Incoming FAX Log 3 Outgoing FAX Rpt If you press [Log] (the Right Select key), the Log menu appears. From this screen, you can check or print the transmission/reception history. NOTE: If you are using a user management function, the menu for printing the transmission/reception history appears only when you have logged in as an administrator.
Status / Job Cancel When you press [Remove] (the Left Select key), a confirmation screen appears and you can remove the USB memory. USB memory can be safely removed. [ OK ] 4 Press the OK key. The screen returns to the Status menu. USB keyboard This appears when a USB keyboard is connected to the machine, and indicates whether the keyboard can be used.
8 Default Setting (System Menu) This chapter explains how to configure various settings of the machine using the menus on the operation panel. • • • • • • • • • • • • • • • Common Settings ......................................................... 8-2 Copy Settings ............................................................. 8-61 Sending Settings ........................................................ 8-69 Document Box Settings .............................................. 8-73 Printer Settings .........
Default Setting (System Menu) Common Settings Common settings include; • How to display the Sys. Menu/Count. menu …8-2 • Switching the Language for Display [Language] …8-3 • Default Screen …8-5 • Sound …8-6 • Display Bright. …8-7 • Original/Paper Settings …8-8 • Switching Unit of Measurement …8-27 • Error Handling …8-28 • Function Defaults …8-30 • Login Operation …8-59 • RAM Disk Mode …8-60 How to display the Sys. Menu/Count.
Default Setting (System Menu) Switching the Language for Display [Language] You can select the language of the message display by following the procedure given below. You can optionally download messages in other languages. Contact your service technician for information. Sys. Menu/Count.
Default Setting (System Menu) Optional language Message display Swedish Svensk Danish Dansk Norwegian Norsk Romanian Korean Simplified Chinese Traditional Chinese If you are using one of the optional languages, it is displayed in place of Portugues. 5 Press the U or V key to select a language. 6 Press the OK key. Completed. is displayed and the screen returns to the Common Settings menu.
Default Setting (System Menu) Default Screen Select the screen appearing right after start-up (default screen). The options are as follows. The table below lists the available screens. Item Description Status The Status/Job Cancel screen (the screen shown when the Status/Job Cancel key is pressed) appears. Copy The Copy screen (the screen shown when the Copy key is pressed) appears. Send The Send screen (the screen shown when the Send key is pressed) appears.
Default Setting (System Menu) 6 Press the OK key. Completed. is displayed and the screen returns to the Common Settings menu. Sound Set options for buzzer sound during the machine operations. The table below lists the buzzer types and their settings and details. The asterisk in the table is a default setting. Item Value Description Key Confirmation Off, On * Emit a sound when the control panel are pressed. Job Finish Off*, On Emit a sound when a print job is normally completed.
Default Setting (System Menu) Buzzer: a b 1 Key Confirmation ********************* 2 Job finish 3 Ready [ Exit ] Key Confirmation: a b 1 *Off ********************* 2 On 6 Press the OK key. Buzzer appears. 7 Press the U or V key to select [Key Confirmation]. 8 Press the OK key. Key Confirmation appears. 9 Press the U or V key to select [On] or [Off]. 10 Press the OK key. Completed. is displayed and the screen returns to the Buzzer menu. 8 Display Bright. Set the brightness of the display.
Default Setting (System Menu) 5 Press the U or V key to select the display brightness from [Darker -3] to [Lighter +3]. 6 Press the OK key. Completed. is displayed and the screen returns to the Common Settings menu. Original/Paper Settings Register additional types and sizes of originals and paper. Custom Original Size Setup Set up frequently-used custom original size. The dimensions available are as follows. The table below lists the sizes that can be registered.
Default Setting (System Menu) Size Entry(Y): (1.97 - 8.50) x ***7.00*" Size Entry(X): (1.97 - 14.02) J **11.23*" D b D b 6 Press the OK key. Size Entry(Y) appears. 7 Use the numeric keys to enter the paper length (Y). 8 Press the OK key. Size Entry(X) appears. 9 Use the numeric keys to enter the paper width (X). 10 Press the OK key. Completed. is displayed and the screen returns to the Orig./Paper Set. menu.
Default Setting (System Menu) Default Original Size Setup In the screen for setting the paper size for the paper feed cassette or multi purpose tray, select the paper size to be used as the default value. Use the procedure below to select the paper size to be used as the default value. Sys. Menu/Count.: a b 4 User/Job Account 5 User Property 6 Common Settings ********************* [ Exit ] Common Settings: a b 1 Language ********************* 2 Default Screen 3 Sound [ Exit ] Orig./Paper Set.
Default Setting (System Menu) Adding a Custom Size and Media Type for Paper to Print Set up a frequently-used custom paper size. The custom size options are displayed on the screen to select paper. The table below lists the sizes that can be registered. Input units Inch models Metric models Dimensions Cassette: X: 4.13 to 8.50" (in 0.01" increments) Y: 5.83 to 14.02" (in 0.01" increments) Paper Feeder: X: 5.83 to 8.50" (in 0.01" increments) Y: 8.27 to 14.02" (in 0.01" increments) MP Tray: X: 2.
Default Setting (System Menu) Orig./Paper Set.: a b 1 Custom Orig.Size ********************* 2 Def. Orig. Size 3 Custom PaperSize [ Exit ] Custom PaperSize a b 1 Cassette 1 Size ********************* 2 Cassette 2 Size 3 Cassette 3 Size Size Entry(Y): D b (5.83 - 14.02) x ***11.49*" Size Entry(X): Db (4.13 - 8.50) J ***6.00*" 3 Press the U or V key to select [Orig./Paper Set.]. 4 Press the OK key. The Orig./Paper Set. menu appears. 5 Press the U or V key to select [Custom PaperSize].
Default Setting (System Menu) Paper Size and Media Type Setup for Cassettes Select the size and type of paper used when cassette 1 and the optional paper feeder (cassettes 2 and 3) are used. A paper size setting can be specified for a cassette when the Paper Size Dial is set to "Other". The available paper sizes and media types are shown in the table below.
Default Setting (System Menu) Follow the steps below when you select the main unit cassette ([Cassette 1]). Operate in a similar fashion when you select an optional cassette ([Cassette 2 or 3]) Cassette 1 Set.: a b 1 Cassette 1 Size ********************* 2 Cassette 1 Type [ Exit 6 The Cassette 1 Set. menu appears. 7 Press the U or V key to select [Cassette 1 Size]. ] NOTE: This item does not appear when the Paper Size Dial on the cassette is set to other than "Other".
Default Setting (System Menu) Paper Size and Media Type Setup for Multi Purpose Tray Select size and media type for multi purpose tray. Set up frequently-used size and media type before use. The available paper sizes and media types are shown in the table below.
Default Setting (System Menu) Common Settings: a b 1 Language ********************* 2 Default Screen 3 Sound [ Exit ] Orig./Paper Set.: a b 1 Custom Orig.Size ********************* 2 Def. Orig. Size 3 Custom PaperSize [ Exit ] MP Tray Set.: a b 1 MP Tray Size ********************* 2 MP Tray Type [ Exit 2 Press the OK key. The Common Settings menu appears. 3 Press the U or V key to select [Orig./Paper Set.]. 4 Press the OK key. The Orig./Paper Set. menu appears.
Default Setting (System Menu) If you select [Size Entry], you can register a custom size. In the screen that appears, set the vertical size (Y) and horizontal size (X) of the paper using the numeric keys. Size Entry(Y): D b (5.83 - 14.02) x ***11.49*" MP Tray Set.: a b 1 MP Tray Size 2 MP Tray Type ********************* [ Exit 10 Press the OK key. The screen returns to the MP Tray Set. menu. ] 11 Press the U or V key to select [MP Tray Type].
Default Setting (System Menu) Light Normal 1 Normal 2 Normal 3 Heavy 1 Heavy 2 Heavy 3 Extra Heavy Bond z Cardstock z Color z Prepunched z Letterhead z Thick z Envelope z High Quality z Custom 1-8 z Paper Weight For Custom 1-8, settings for duplex printing and media type name can be changed.
Default Setting (System Menu) Orig./Paper Set.: a b 1 Custom Orig.Size ********************* 2 Def. Orig. Size 3 Custom PaperSize [ Exit ] Media type Set.: K b 1 Plain ********************* 2 Transparency 3 Vellum [ Exit ] Plain: a b 1 Paper Weight ********************* 2 Print Density [ Exit 4 Press the OK key. The Orig./Paper Set. menu appears. 5 Press the U or V key to select [Media Type Set.]. 6 Press the OK key. Media Type Set. menu appears.
Default Setting (System Menu) Print Density: a b 2 Medium Dark 3 *Normal ********************* 4 Medium Light 14 Press the OK key. The Print Density menu appears. 15 Press the U or V key to select the print density. Plain: a b 1 Paper Weight 2 Print Density ********************* [ Exit 16 Press the OK key. Completed. is displayed and the screen returns to the menu for the selected paper type.
Default Setting (System Menu) Name Entry: C b Osaka SD Kyocer*S [ ABC Text 22 Press the OK key. Name Entry is displayed. Enter the name of the custom paper type. NOTE: Refer to Character Entry Method on ] Custom 1: a b 1 Paper Weight ********************* 2 Print Density 3 Duplex [ Exit ] Appendix-7 for details on entering characters. 23 Press the OK key. Completed. is displayed and the screen returns to the menu for the selected custom paper type.
Default Setting (System Menu) Default Paper Source Select the default paper source from Cassette 1-3 and Multi Purpose Tray. NOTE: [Cassette 2] and [Cassette 3] are displayed when the optional paper feeder is installed. Use the procedure below to select the default paper source. Sys. Menu/Count.: a b 4 User/Job Account 5 User Property 6 Common Settings ********************* [ Exit ] Common Settings: a b 1 Language ********************* 2 Default Screen 3 Sound [ Exit ] Orig./Paper Set.
Default Setting (System Menu) Media for Auto Selection When [Auto] is selected in Paper Selection, the paper source that is automatically selected can be limited by media types.If Plain is selected, the paper source with plain paper loaded in the specific size is selected. Select [All Media Types] for the paper source with any kind of paper loaded in the specific size. Use the procedure below to select the paper size and media type used by Auto Selection. Sys. Menu/Count.
Default Setting (System Menu) 9 Press the U or V key to select [All Media Type] or the paper type to be used for paper selection. 10 Press the OK key. Completed. is displayed and the screen returns to the Orig./Paper Set. menu. Special Paper Action When printing on Prepunched, Preprint, and Letterhead, punch-holes might not be aligned or the print direction might be upside-down depending on how originals are set and the combination of copying functions. In such a case, select [Adj.
Default Setting (System Menu) Use the procedure below to specify the actions performed for special paper types. Sys. Menu/Count.: a b 4 User/Job Account 5 User Property 6 Common Settings ********************* [ Exit ] Common Settings: a b 1 Language ********************* 2 Default Screen 3 Sound [ Exit ] Orig./Paper Set.: a b 1 Custom Orig.Size ********************* 2 Def. Orig. Size 3 Custom PaperSize [ Exit ] SpcialPaper Act.: a b 1 *Adj.
Default Setting (System Menu) Preset Limit Restrict the number of copies that can be made at one time. Options are 1-999 copies. Use the procedure below to set the limit on the number of copies. Sys. Menu/Count.: a b 4 User/Job Account 5 User Property 6 Common Settings ********************* [ Exit ] Common Settings: a b 1 Language ********************* 2 Default Screen 3 Sound [ Exit ] Preset Limit: D b (1 - 999) **999* 1 In the Sys. Menu/Count. menu, press the U or V key to select [Common Settings].
Default Setting (System Menu) Switching Unit of Measurement Select inch or metric for the unit for paper dimensions. Use the procedure below to change the input units. Sys. Menu/Count.: a b 4 User/Job Account 5 User Property 6 Common Settings ********************* [ Exit ] Common Settings: a b 1 Language ********************* 2 Default Screen 3 Sound [ Exit ] Measurement: a b 1 *inch ********************* 2 mm 1 In the Sys. Menu/Count. menu, press the U or V key to select [Common Settings].
Default Setting (System Menu) Error Handling Select whether to cancel or continue the job when error has occurred. The possible errors and what to do for the errors are as follows. Duplexing Error Select what to do when duplex printing is not possible for the selected paper size and media type. Item Description 1-sided Printed in 1-sided Display Error Error message to cancel printing is displayed.
Default Setting (System Menu) Error Handling: a b 1 DuplexPaperError ********************* 2 PaperMismatchErr [ Exit Error Handling: a b 1 DuplexPaperError 2 PaperMismatchErr ********************* Exit Press the OK key. The Error Handling menu appears. 5 Press the U or V key to select [DuplexPaperError]. 6 Press the OK key. DuplexPaperError appears. 7 Press the U or V key to select the method to handle if duplex is disabled. 8 Press the OK key. Completed.
Default Setting (System Menu) Function Defaults Defaults are the values automatically set after the warm-up is completed or the Reset key is pressed. Set the defaults for available settings such as copying and sending. Setting the frequently-used values as defaults makes subsequent jobs easier. Orig.Orientation Set the original orientation defaults. The available default settings are shown below. Item Description c Top Edge Top Select the original's top edge at the top.
Default Setting (System Menu) Orig.Orientation: a b 1 c Top Edge Top 2 *d Top Edge Left ********************* 6 Press the OK key. Orig.Orientation appears. 7 Press the U or V key to select [c Top Edge Top] or [d Top Edge Left] . 8 Press the OK key. Completed. is displayed and the screen returns to the Function Default menu. Continuous Scan Set the continuous scan defaults. The available default settings are shown below.
Default Setting (System Menu) Continuous Scan: a b 1 *Off ********************* 2 On 5 Press the U or V key to select [Continuous Scan]. 6 Press the OK key. Continuous Scan appears. 7 Press the U or V key to select [Off] or [On]. 8 Press the OK key. Completed. is displayed and the screen returns to the Function Default menu. Original Image Set the default original document type. The available default settings are shown below. Item Description Text+Photo Text and photos together.
Default Setting (System Menu) Function Default: a b 1 Color Selection ********************* 2 Scan Resolution 3 FAX Resolution [ Exit ] a b Original Image: 1 *Text+Photo ********************* 2 Photo 3 Text 4 Press the OK key. The Function Default menu appears. 5 Press the U or V key to select [Original Image]. 6 Press the OK key. Original Image appears. 7 Press the U or V key to select [Text+Photo], [Photo], [Text] or [for OCR]. 8 Press the OK key. Completed.
Default Setting (System Menu) Function Default: a b 1 Color Selection ********************* 2 Scan Resolution 3 FAX Resolution [ Exit ] Scan Resolution: a b 1 *200x100dpi Norm. ********************* 2 200x200dpi Fine 3 200x400dpi S.Fin 4 Press the OK key. The Function Default menu appears. 5 Press the U or V key to select [Scan Resolution]. 6 Press the OK key. Scan Resolution appears. 7 Press the U or V key to select [200x100dpi Norm.], [200x200dpi Fine], [200x400dpi S.
Default Setting (System Menu) Color mode Description Auto(Color/B&W) Color and black & white originals are automatically detected. Color originals are scanned in full color, and black & white originals are scanned in binary black & white. Full Color Scan document in full color. Grayscale Scan document in grayscale for smoother and finer finish. Black & White Scan document in black and white. Use the procedure below to select the default color mode setting. Sys. Menu/Count.
Default Setting (System Menu) Color Selection: a b 1 *Auto Color ********************* 2 Full Color 3 Black & White 7 Press the U or V key to select [Copy] or [Send/ Store]. 8 Press the OK key. Color Selection appears. 9 If the U or V key was pressed to select Copy, select [Auto Color], [Full Color], or [Black & White]. If Send or Save was selected, select [Auto (Color/Gray)], [Auto (Color/B&W)], [Full Color], [Grayscale], or [Black & White]. 10 Press the OK key. Completed.
Default Setting (System Menu) File Format Select the default file type to send the scanned originals. The available default settings are shown below. File Format Description PDF Send files in PDF format. TIFF Send files in TIFF format. XPS Send files in XPS format. JPEG Send files in JPEG format. NOTE: Refer to page 5-12 for file formats. Use the procedure below to select the default file format. Sys. Menu/Count.
Default Setting (System Menu) File Format: a b 1 *PDF ********************* 2 TIFF 3 XPS 6 Press the OK key. File Format appears. 7 Press the U or V key to select [PDF], [TIFF], [XPS] or [JPEG]. 8 Press the OK key. Completed. is displayed and the screen returns to the Function Default menu. Density Set the default density. The available default settings are shown below. Item Description Manual (Normal 0) Set to (Normal 0) in the Manual density. Auto Set to Auto density.
Default Setting (System Menu) Density: a b 1 Auto 2 *Manual ********************* 6 Press the OK key. Density appears. 7 Press the U or V key to select [Auto] or [Manual]. 8 Press the OK key. Completed. is displayed and the screen returns to the Function Default menu. Zoom Select the enlarged/reduced default when paper size/sending size changed after the originals set. The available default settings are shown below. Item Description 100% Copy (send/save) at actual size (100%).
Default Setting (System Menu) Zoom: a b 1 *100% ********************* 2 Auto 6 Press the OK key. Zoom appears. 7 Press the U or V key to select [100%] or [Auto]. 8 Press the OK key. Completed. is displayed and the screen returns to the Function Default menu. File Name Entry Set an automatically entered name (default) for jobs. Additional information such as Date and Time and Job No. can also be set. The table below lists the additional information available.
Default Setting (System Menu) Function Default: a b 1 Color Selection ********************* 2 Scan Resolution 3 FAX Resolution [ Exit ] File name Entry: A b doc 1* S ABC [ Text ] Additional Info.: a b 1 *None ********************* 2 Date 3 Job No. 3 Press the U or V key to select [Function Default]. 4 Press the OK key. The Function Default menu appears. 5 Press the U or V key to select [File Name Entry]. 6 Press the OK key. File Name Entry appears. Enter the document name (up to 32 characters).
Default Setting (System Menu) Common Settings: a b 1 Language ********************* 2 Default Screen 3 Sound [ Exit ] Function Default: a b 1 Color Selection ********************* 2 Scan Resolution 3 FAX Resolution [ Exit ] Subject Entry: K b abcdefghijklmnopqrstu vwxyzABCDEFGHIJKLMNOP QRSTUVWXYZ* S ABC [ Text ] Body Entry: a b abcdefghijklmnopqrstu vwxyzABCDEFGHIJKLMNOP QRSTUVWXYZ* ABC [ Text ] 2 Press the OK key. The Common Settings menu appears.
Default Setting (System Menu) Collate Set the defaults for Collate. The table below shows the available settings. Item Collate Description Off Collate not performed. On Collate performed. NOTE: Refer to page 3-17 for Collate/Offset. Use the procedure below to set the default Collate/Offset settings. Sys. Menu/Count.
Default Setting (System Menu) 8 Press the OK key. Completed. is displayed and the screen returns to the Function Default menu. EcoPrint EcoPrint conserves toner when printing. This is recommended for test copies where faded printing is not a problem. Select the EcoPrint default. The table below shows the available settings. Item Description Off No EcoPrint performed. On EcoPrint performed. NOTE: Refer to page 4-10 for EcoPrint. Use the procedure below to set the default EcoPrint setting. Sys.
Default Setting (System Menu) EcoPrint: a b 1 *Off ********************* 2 On 6 Press the OK key. EcoPrint appears. 7 Press the U or V key to select [Off] or [On]. 8 Press the OK key. Completed. is displayed and the screen returns to the Function Default menu. JPEG/TIFF Print Select the JPEG/TIFF Print default. The table below shows the available settings. Item Description Paper Size Scaled to fit the paper size. Image Resolution Matched to the image resolution.
Default Setting (System Menu) Function Default: a b 1 Color Selection ********************* 2 Scan Resolution 3 FAX Resolution [ Exit ] JPEG/TIFF Print: a b 1 *Paper Size g ********************* 2 Image Resolution T 3 Print Resolution T 4 Press the OK key. The Function Default menu appears. 5 Press the U or V key to select [JPEG/TIFF Print]. 6 Press the OK key. JPEG/TIFF Print appears. 7 Press the U or V key to select [Paper Size], [Image Resolution] or [Print Resolution]. 8 Press the OK key.
Default Setting (System Menu) Function Default: a b 1 Color Selection ********************* 2 Scan Resolution 3 FAX Resolution [ Exit ] a b XPS FitTo Page: 1 *Off ********************* 2 On 4 Press the OK key. The Function Default menu appears. 5 Press the U or V key to select [XPS FitTo Page]. 6 Press the OK key. XPS FitTo Page appears. 7 Press the U or V key to select [Off] or [On]. 8 Press the OK key. Completed. is displayed and the screen returns to the Function Default menu.
Default Setting (System Menu) File Separation: a b 1 *Off ********************* 2 Each Page 5 Press the U or V key to select [File Separation]. 6 Press the OK key. File Separation appears. 7 Press the U or V key to select [Off] or [Each Page]. 8 Press the OK key. Completed. is displayed and the screen returns to the Function Default menu. 2 in 1 Layout Select the default value for layout when [2 in 1 Layout] is selected for Combine.
Default Setting (System Menu) Detail Setting: a b 1 2 in 1 Layout ********************* 2 4 in 1 Layout 3 Border Line [ Exit ] 2 in 1 Layout a b 1 *g L to R f T to B ********************* 2 e R to L 5 Press the U or V key to select [Detail Setting]. 6 Press the OK key. The Detail Setting menu appears. 7 Press the U or V key to select [2 in 1 Layout]. 8 Press the OK key. 2 in 1 Layout appears. 9 Press the U or V key to select [g L to R f T to B] or [e R to L]. 10 Press the OK key. Completed.
Default Setting (System Menu) Common Settings: a b 1 Language ********************* 2 Default Screen 3 Sound [ Exit ] Function Default: a b 1 Color Selection ********************* 2 Scan Resolution 3 FAX Resolution [ Exit ] Detail Setting: a b 1 2 in 1 Layout ********************* 2 4 in 1 Layout 3 Border Line [ Exit ] a b 4 in 1 Layout: 1 *h Right then Down ********************* 2 i Down then Right 3 j Left then Down 2 Press the OK key. The Common Settings menu appears.
Default Setting (System Menu) Border Line Select the default value for border line when [2 in 1 Layout] is selected for Combine. Items available for the default value are as follows: Item Description None No border line. l Solid Line Draws solid border lines. m Dotted Line Draws dotted border lines. n Positioning Mark Puts a mark on the border line position. Use the procedure below to select the default value for border line. Sys. Menu/Count.
Default Setting (System Menu) Border Line: a b 1 * None ********************* 2 l Solid Line 3 m Dotted Line 8 Press the OK key. Border Line appears. 9 Press the U or V key to select [ None], [l Solid Line], [m Dotted Line] or [n Positioning Mark]. 10 Press the OK key. Completed. is displayed and the screen returns to the Detail Setting menu. Orig. Binding Select the default value for the binding edge of the original when [2-sided>>1-sided] or [2-sided>>2-sided] is selected for Duplex.
Default Setting (System Menu) Function Default: a b 1 Color Selection ********************* 2 Scan Resolution 3 FAX Resolution [ Exit ] a b Detail Setting: 1 2 in 1 layout ********************* 2 4 in 1 Layout 3 Border Line [ Exit ] Orig. Binding: a b 1 *o Left/Right ********************* 2 p Top 4 Press the OK key. The Function Default menu appears. 5 Press the U or V key to select [Detail Setting]. 6 Press the OK key. The Detail Setting menu appears. 7 Press the U or V key to select [Orig.
Default Setting (System Menu) Finish Binding Select the default value for the binding edge of the finished copies when [1-sided>>2-sided] or [2-sided>>2sided] is selected for Duplex. Items available for the default value are as follows: Item Description o Left/Right Left/right binding p Top Top binding Use the procedure below to select the default value for the binding edge of the finished copies. Sys. Menu/Count.
Default Setting (System Menu) Finish.. Binding: a b 1 *o Left/Right ********************* 2 p Top 8 Press the OK key. Finish Binding appears. 9 Press the U or V key to select [ o Left/Right] or [p Top]. 10 Press the OK key. Completed. is displayed and the screen returns to the Detail Setting menu. Image Quality Select the default value for image quality when File Format is selected.
Default Setting (System Menu) Detail Setting: a b 1 2 in 1 layout ********************* 2 4 in 1 Layout 3 Border Line [ Exit ] a b Image Quality: 1 *1 Low(High Comp) ********************* 2 2 3 3 6 Press the OK key. The Detail Setting menu appears. 7 Press the U or V key to select [Image Quality]. 8 Press the OK key. Image Quality appears. 9 Press the U or V key to select from [1 Low(High Comp)] to [5 High(Low Comp)]. 10 Press the OK key. Completed.
Default Setting (System Menu) Function Default: a b 1 Color Selection ********************* 2 Scan Resolution 3 FAX Resolution [ Exit ] a b Detail Setting: 1 2 in 1 layout ********************* 2 4 in 1 Layout 3 Border Line [ Exit ] Color TIFF Comp.: a b 1 *TIFF V6 ********************* 2 TTN2 4 Press the OK key. The Function Default menu appears. 5 Press the U or V key to select [Detail Setting]. 6 Press the OK key. The Detail Setting menu appears.
Default Setting (System Menu) Common Settings: a b 1 Language ********************* 2 Default Screen 3 Sound [ Exit ] Function Default: a b 1 Color Selection ********************* 2 Scan Resolution 3 FAX Resolution [ Exit ] Detail Setting: a b 1 2 in 1 layout ********************* 2 4 in 1 Layout 3 Border Line [ Exit ] PDF/A: a b 1 *Off ********************* 2 PDF/A-1a 3 PDF/A-1b 2 Press the OK key. The Common Settings menu appears. 3 Press the U or V key to select [Function Default].
Default Setting (System Menu) Login Operation Specify the character entry method in the login screen that appears when user management is enabled. Item Description Use Numeric Key Use the numeric keys to select and enter characters. Select Character Enter characters by selecting them from the character palette that appears. Use the procedure below to adjust the Login Operation. Sys. Menu/Count.
Default Setting (System Menu) RAM Disk Mode When optional memory is installed, a RAM disk can be created and its size can be set. Creating a RAM disk makes it possible to print from a Job Box. The procedure for setting the login method is explained below. Sys. Menu/Count.
Default Setting (System Menu) Copy Settings The following settings are available for copying functions. • Photo Processing …8-61 • Paper Selection …8-62 • Auto Paper Selection …8-63 • Auto % Priority …8-64 • DP Read Action …8-65 • Select Key Set …8-67 NOTE: If user login administration is enabled, you can only change the settings by logging in with administrator privileges. Photo Processing Set the resolution for copying a photo.
Default Setting (System Menu) Photo Processing:a b 1 *Dithering(Normal) ********************* 2 Dithering(Rough) 4 Press the OK key. Photo Processing appears. 5 Press the U or V key to select [Dithering(Normal)] or [Dithering(Rough)]. 6 Press the OK key. Completed. is displayed and the screen returns to the Copy menu. Paper Selection Set the default paper selection. The table below shows the available settings.
Default Setting (System Menu) Paper Selection: a b 1 *Auto ********************* 2 Def. PaperSource 4 Press the OK key. Paper Selection appears. 5 Press the U or V key to select [Auto] or [Def. Paper Source]. 6 Press the OK key. Completed. is displayed and the screen returns to the Copy menu. Auto Paper Selection If [Auto] is selected for Paper Selection, set the paper size selection method when the zoom changes. The table below shows the available settings.
Default Setting (System Menu) AutoPaperSelect.:a b 1 *MostSuitableSize ********************* 2 Same as OrigSize 4 Press the OK key. AutoPaperSelect. appears. 5 Press the U or V key to select [MostSuitableSize] or [Same as OrigSize]. 6 Press the OK key. Completed. is displayed and the screen returns to the Copy menu. Auto % Priority When a paper source of different size from the original is selected, select whether automatic zoom (reduce/ zoom) is performed.
Default Setting (System Menu) Auto % Priority: a b 1 *Off ********************* 2 On 4 Press the OK key. AutoPaperSelect. appears. 5 Press the U or V key to select [Off] or [On]. 6 Press the OK key. Completed. is displayed and the screen returns to the Copy menu. DP Read Action You can set whether priority is given to speed or image quality when scanning an original on the document processor. The table below shows the available settings. The default setting is Speed Priority.
Default Setting (System Menu) 5 Press the U or V key to select [Speed Priority] or [Quality Priority]. 6 Press the OK key. Completed. is displayed and the screen returns to the Copy menu.
Default Setting (System Menu) Select Key Set If you register a function to the Left Select key or Right Select key, you can quickly set the function when using copy functions. You can register one of the following functions to each key. • None • Paper Selection • Collate • Duplex • Zoom • Combine • Original Size • Orig.
Default Setting (System Menu) Select Key Set.: a b 1 Left ********************* 2 Right [ Exit Press the OK key. Select Key Set. appears. 5 Press the U or V key to select [Left] or [Right]. 6 Press the OK key. This displays the function selection screen for the flexible key selected in step 5. The screen shown is the one when [Left] is selected. 7 Press the U or V key to select the function you want to register to the flexible key. 8 Press the OK key. Completed.
Default Setting (System Menu) Sending Settings The sending settings allow you to specify the following sending function options. • Select Key Set …8-69 • Destination confirmation screen before transmission …8-71 NOTE: If user login administration is enabled, you can only change the settings by logging in with administrator privileges. Select Key Set If you register a function to the Left Select key or Right Select key, you can quickly set the function when using sending functions.
Default Setting (System Menu) Use the procedure below to set Select Key Set. Sys. Menu/Count.:a b 7 Copy 8 Printer 9 Send ********************* [ Exit ] Send: a b 1 Select Key Set. ********************* 2 DestinationCheck [ Exit Exit 2 Press the OK key. The Send menu appears. 3 Press the U or V key to select [Select Key Set.]. 4 Press the OK key. Select Key Set. appears. 5 Press the U or V key to select [Left] or [Right]. 6 Press the OK key.
Default Setting (System Menu) Destination confirmation screen before transmission You can specify whether or not the destination confirmation screen appears after the Start key is pressed or after a destination is added or edited before transmission. The table below shows the available settings.. Item Detail Check beforeSend Specify whether or not the destination confirmation screen appears before transmission. Check New Dest.
Default Setting (System Menu) Check beforeSend:a b 1 *OFF ********************* 2 On 6 Press the OK key. The menu of the selected function appears. The screen when the Check before Send menu is selected is shown. 7 Press the U or V key to select the function you want to register to the flexible key. 8 Press the OK key. Completed. is displayed and the screen returns to the Send menu.
Default Setting (System Menu) Document Box Settings The following settings are available for Document Box. • Select Key Set …8-73 • Job Box …8-75 Select Key Set If you register a function to the Left Select key or Right Select key, you can quickly set the function when printing from or saving to a document box. You can register one of the following functions to each key for either of printing from and saving to a document box.
Default Setting (System Menu) • Sharpness • Backgrnd Density Use the procedure below to set Select Key Set. Sys. Menu/Count.:a b ; Document Box ********************* < Edit Destination = Adjust/Maint. [ Exit ] Document Box: a b 1 Sub Address Box ********************* 2 Select Key Set. 3 Polling Box [ Exit ] Select Key Set.: a b 1 Print ********************* 2 Store [ Exit Exit In the Sys. Menu/Count. menu, press the U or V key to select [Document Box]. 2 Press the OK key.
Default Setting (System Menu) 10 Press the OK key. Completed. is displayed and the screen returns to the Document Box menu. This function is already registered. IMPORTANT: If you try to set the function that is registered to the other flexible key, you cannot set it and This function is already registered. is displayed. Job Box Job Box settings can be set. Select settings for Quick Copy Jobs and Job Retention Deletion. Quick Copy Jobs sets the number of files that can be saved using Quick Copy. Job Ret.
Default Setting (System Menu) Quick Copy Jobs: D b (1 - 50) ****0* job(s) 6 Press the OK key. The Quick Copy Jobs screen appears. 7 Enter the number of Quick Copy Jobs that can be saved with the numeric keys. 8 Press the OK key. Completed appears and you return to the Common Settings menu. Job Retention Deletion The procedure for setting Job Retention Deletion is explained below. Sys. Menu/Count.:a b ; Document Box ********************* < Edit Destination = Adjust/Maint.
Default Setting (System Menu) 7 Press the U or V key to select the period that jobs are retained. 8 Press the OK key. Completed appears and you return to the Common Settings menu.
Default Setting (System Menu) Printer Settings Printing from computers, settings are generally made on the application software screen. However, the following settings are available for configuring the defaults to customize the machine.
Default Setting (System Menu) Printer: a b 1 Emulation Set. ********************* 2 Color Setting 3 EcoPrint [ Exit ] Emulation Set.: a b 1 PCL6 2 KPDL 3 *KPDL(Auto) ********************* 2 Press the OK key. The Printer menu appears. 3 Press the U or V key to select [Emuration Set.]. 4 Press the OK key. Emuration Set. appears. 5 Press the U or V key to select the printer you want to emulate. 6 Press the OK key. Completed. is displayed and the screen returns to the Printer menu.
Default Setting (System Menu) 3 Press the U or V key to select [Off] or [On]. 4 Press the OK key. Completed. is displayed and the screen returns to the Printer menu. When KPDL(Auto) Is Selected for Emulation When you select [KPDL(Auto)], set whether or not to output KPDL error reports. The default setting is Off. Use the procedure below to make the setting. Emulation Set.
Default Setting (System Menu) Color Setting You can select whether status reports are printed in color or black & white. Use the procedure below to select the Color Setting. Sys. Menu/Count.:a b 7 Copy 8 Printer ********************* 9 Send [ Exit ] a b Printer: ********************* 1 Emulation Set. 2 Color Setting 3 EcoPrint [ Exit ] Color Setting: a b ********************* 1 *Color 2 Black & White 1 In the Sys. Menu/Count. menu, press the U or V key to select [Printer]. 2 Press the OK key.
Default Setting (System Menu) Printer: a b ********************* 1 Emulation Set. 2 Color Setting 3 EcoPrint [ Exit ] a b EcoPrint: 1 *Off ********************* 2 On 2 Press the OK key. The Printer menu appears. 3 Press the U or V key to select [EcoPrint]. 4 Press the OK key. EcoPrint appears. 5 Press the U or V key to select [Off] or [On]. 6 Press the OK key. Completed. is displayed and the screen returns to the Printer menu.
Default Setting (System Menu) Printer: a b ********************* 1 Emulation Set. 2 Color Setting 3 EcoPrint [ Exit ] Override A4/LTR: a b 1 Off 2 *On ********************* 2 Press the OK key. The Printer menu appears. 3 Press the U or V key to select [Override A4/LTR]. 4 Press the OK key. Override A4/LTR appears. 5 Press the U or V key to select [Off] or [On]. 6 Press the OK key. Completed. is displayed and the screen returns to the Printer menu.
Default Setting (System Menu) Printer: a b ********************* 1 Emulation Set. 2 Color Setting 3 EcoPrint [ Exit ] a b Duplex: 1 *Off ********************* 2 Bind Long Edge 3 Bind Short Edge 2 Press the OK key. The Printer menu appears. 3 Press the U or V key to select [Duplex]. 4 Press the OK key. Duplex appears. 5 Press the U or V key to select [Off], [Bind Long Edge] or [Bind Short Edge]. 6 Press the OK key. Completed. is displayed and the screen returns to the Printer menu.
Default Setting (System Menu) Copies: D b (1 - 999) *****999*copies 4 Press the OK key. Copies appears. 5 Press the U or V key or the numeric keys to set the default number of copies. 6 Press the OK key. Completed. is displayed and the screen returns to the Printer menu.
Default Setting (System Menu) Orientation Set the default orientation, Portrait or Landscape. Portrait Landscape Printer Printer Use the procedure below to set the default orientation for printing. Sys. Menu/Count.:a b 7 Copy 8 Printer ********************* 9 Send [ Exit ] a b Printer: ********************* 1 Emulation Set. 2 Color Setting 3 EcoPrint [ Exit ] Orientation: a b 1 *Portrait ********************* 2 Landscape 1 In the Sys. Menu/Count. menu, press the U or V key to select [Printer].
Default Setting (System Menu) Gloss Mode Gloss Mode, when set to High, increases the effect of glossiness in printing by reducing the printing speed by half. IMPORTANT: Gloss Mode is not available when Labels and Transparency is selected as the paper type setting. Depending on the paper used, printing in gloss mode may cause wrinkle in paper. To reduce wrinkle, try using thicker paper. Use the procedure below to select Gloss mode. Sys. Menu/Count.
Default Setting (System Menu) Wide A4 Turn this to On to increase the maximum number of characters that can be printed in a line for an A4 page (78 characters at 10 pitch) and Letter size page (80 characters at 10 pitch). This setting is only effective in PCL 6 emulation. Use the procedure below to select Wide A4. Sys. Menu/Count.:a b 7 Copy 8 Printer ********************* 9 Send [ Exit ] a b Printer: ********************* 1 Emulation Set.
Default Setting (System Menu) Printer: a b ********************* 1 Emulation Set. 2 Color Setting 3 EcoPrint [ Exit ] FormFeed TimeOut: D b (5 - 495) ******30*Sec. 2 Press the OK key. The Printer menu appears. 3 Press the U or V key to select [FormFeed Timeout]. 4 Press the OK key. FormFeed Timeout appears. 5 Press the U or V key to set the Form Feed Timeout. You can set the timeout delay in seconds. You cannot use the numeric keys to enter this value. 6 Press the OK key. Completed.
Default Setting (System Menu) Printer: a b 1 Emulation Set. ********************* 2 EcoPrint 3 Override A4/LTR [ Exit ] M b LF Action: 1 *LF Only ********************* 2 LF and CR 3 Ignore LF 2 Press the OK key. The Printer menu appears. 3 Press the U or V key to select [LF Action]. 4 Press the OK key. LF Action appears. 5 Press the U or V key to select [LF Only], [LF and CR] or [Ignore LF]. 6 Press the OK key. Completed. is displayed and the screen returns to the Printer menu.
Default Setting (System Menu) Printer: a b 1 Emulation Set. ********************* 2 EcoPrint 3 Override A4/LTR [ Exit ] a b CR Action: 1 *CR Only ********************* 2 LF and CR 3 Ignore CR 2 Press the OK key. The Printer menu appears. 3 Press the U or V key to select [CR Action]. 4 Press the OK key. 5 Press the U or V key to select [CR Only], [LF and CR] or [Ignore CR]. 6 Press the OK key. Completed. is displayed and the screen returns to the Printer menu.
Default Setting (System Menu) Print Offset(V): D b (-76.0 - +76.0) ****76.0*mm. Print Offset(H): D b (-76.0 - +76.0) ****76.0*mm. 4 Press the OK key. The vertical print range correction menu appears. 5 Press the U or V key to set the vertical range correction value. 6 Press the OK key. The horizontal print range correction menu appears. 7 Press the U or V key to set the horizontal range correction value. 8 Press the OK key. Completed. is displayed and the screen returns to the Printer menu.
Default Setting (System Menu) Paper Feed Mode: a b 1 *Auto ********************* 2 Fixed 3 Press the U or V key to select [Paper Feed Mode]. 4 Press the OK key. Paper Feed Mode appears. 5 Press the U or V key to select [Auto] or [Fixed]. 6 Press the OK key. Completed. is displayed and the screen returns to the Printer menu.
Default Setting (System Menu) Printing Reports/Sending Notice Print reports to check the machine settings and status. Default settings for printing the result reports can also be configured. NOTE: If user login administration is enabled, you can only print by logging in with administrator privileges. Printing Reports Printable reports are as follows. Menu map Outputs a menu map of this machine.
Default Setting (System Menu) Font List Check the font samples installed in the machine. Use the procedure below to print a Menu Map / Status Page / Font List. Sys. Menu/Count.:a b 1 Report ********************* 2 Counter 3 System [ Exit ] Report: a b 1 Report Print ********************* 2 Admin Rpt Set. 3 Result Rpt Set. [ Exit ] Report Print: a b 1 Menu Map ********************* 2 Status Page 3 Font List [ Exit ] 1 In the Sys. Menu/Count. menu, press the U or V key to select [Report].
Default Setting (System Menu) 6 Print. Are you sure? z Status Page [ Yes ] [ Press the OK key. A confirmation screen appears. The screen shown is the one when Status Page is selected. No ] 7 Press [Yes] (the Left Select key). The selected report is output. Accepted. is displayed and the screen returns to the Report Print menu. NOTE: When acceptance of jobs is prohibited, Now, the machine is prohibited to be used. is displayed and the output is canceled.
Default Setting (System Menu) Adjust/Maint.: a b 1 Copy Denst. Adj. ********************* 2 Send/Box Density 3 Correct. Bk Line [ Exit ] Service Setting: a b 1 Service Status ********************* 2 Network Status 3 New Developer [ Exit ] 2 Press the OK key. The Adjust/Maint. menu appears. 3 Press the U or V key to select [Service Setting]. 4 Press the OK key. Service Setting appears. 5 Press the U or V key to select [Service Status] or [Network Status]. 6 Press the OK key.
Default Setting (System Menu) Send Result Report Automatically print a report of transmission result when a transmission is complete. The table below shows the available settings. The default setting is Error Only. Item Description Off No result report printed. On Result report automatically printed. Transmitted images can also be attached. Error Only Result report printed only when a transmission ends in an error.
Default Setting (System Menu) Send Result: a b 1 E-mail/Folder ********************* 2 FAX 3 CancelBeforeSend [ Exit ] E-mail/Folder: a b 1 Off 2 On 3 *Error Only ********************* 5 Press the U or V key to select [Send Result]. The Send Result menu appears. 6 Press the U or V key to select [E-mail/Folder], [FAX] or [CancelBeforeSend]. Selected menu appears. NOTE: Selecting [CancelBeforeSend] can be specified whether the machine prints the report when canceling the operation before sending.
Default Setting (System Menu) Adjustment/Maintenance Adjust printing quality and conduct machine maintenance. • Copy Denst. Adj. …8-100 • Send/Box Density …8-101 • AutoColorCorrect …8-102 • ColorCalibration …8-103 • Color Regist. …8-103 • Correct. Bk Line …8-110 • New Developer...8-111 NOTE: If user login administration is enabled, you can only change the settings by logging in with administrator privileges. Copy Denst. Adj. Adjust copy density.
Default Setting (System Menu) Manual: a b 3 -1 4 * 0 Normal ********************* 5 +1 6 Press the OK key. This displays the density selection screen for the mode selected in step 5. The screen shown is the one when [Manual] is selected. 7 Press the U or V key to select the density from [3 Lighter] to [+3 Darker]. 8 Press the OK key. Completed. is displayed and the screen returns to the Adjust/Maint. menu. Send/Box Density Adjust scan density when sending or storing the data in Document Box.
Default Setting (System Menu) Manual: a b 3 -1 4 * 0 Normal ********************* 5 +1 6 Press the OK key. This displays the density selection screen for the mode selected in step 5. The screen shown is the one when [Manual] is selected. 7 Press the U or V key to select the density from [3 Lighter] to [+3 Darker]. 8 Press the OK key. Completed. is displayed and the screen returns to the Adjust/Maint. menu.
Default Setting (System Menu) ColorCalibration This machine contains a calibration function that automatically makes adjustments to compensate for changes that occur over time due to variations in the ambient temperature and humidity. So that the highest quality color printing can be maintained, this color calibration operation is carried out automatically each time the power to the machine is turned on.
Default Setting (System Menu) IMPORTANT: Before performing color registration, be sure to perform color calibration (see page 103). If color drift remains, perform color registration.By performing color registration without performing color calibration, the color drift will be resolved once, however, it may cause the serious color drift later. Normal Registration Follow the steps below to correct normal color drift. Sys. Menu/Count.:a b ; Document Box < Edit Destination = Adjust/Maint.
Default Setting (System Menu) 8 Press [Yes] (the Left Select key) to execute chart printing. After the charts are printed, you will return to the standard menu of color print position correction. Three charts, H-L (left), V (center), and H-R (right) are printed on one sheet of paper for each of the colors M (magenta), C (cyan), and Y (yellow).
Default Setting (System Menu) Normal: a b 1 Print Chart ********************* 2 Adjust Magenta 2 Adjust Cyan 9 Press the U or V key to select [Adjust Magenta]. Press the OK key. The magenta correction menu appears. 10 In the color registration correction chart printed in Print Registration Chart above, note the numbers of the sections in the magenta H and V charts where the lines most closely coincide as a single straight line. In the left example, the value would be B.
Default Setting (System Menu) Adjust/Maint.: a b 1 Copy Denst. Adj. ********************* 2 Send/Box Density 3 AutoColorCorrect [ Exit ] a b Color Regist.: 1 Normal ********************* 2 Detail [ Exit 2 Press the OK key. The Adjust/Maint. menu appears. 3 Press the U or V key to select [Color Regist.]. 4 Press the OK key. Color Regist. appears. 5 Press the U or V key to select [Detail]. 6 Press the OK key. The normal registration appears. Press the U or V key to select [Print Chart].
Default Setting (System Menu) Normal: a b 1 Print Chart ********************* 2 Adjust Magenta 2 Adjust Cyan 9 8-108 Press the U or V key to select [Adjust Magenta]. Press the OK key. The magenta correction menu appears.
Default Setting (System Menu) 10 In the color registration correction chart printed in Print Registration Chart above, note the numbers of the sections in the magenta H and V charts where the lines most closely coincide as a single straight line. In the left example, the value would be B. Normal: a b 1 Print Chart ********************* 2 Adjust Magenta 2 Adjust Cyan 11 Press Y or Z key to change items (H-1 to H-5, V3). Press U or V key to enter the value read from the chart and press [OK].
Default Setting (System Menu) Correct. Bk Line Correct fine black lines (black streaks caused by contamination), which may appear on the copies, when the document processor is used. K Paper feed direction The table below shows the available settings. Item Description Off No correction performed. On(Low) Correction performed. The reproduction of the image becomes lower when using Off. On(High) Correction performed. Select this item if black streak remains after using On (Low).
Default Setting (System Menu) Adjust/Maint.: a b 1 Copy Denst. Adj. ********************* 2 Send/Box Density 3 Correct. Bk Line [ Exit ] Correct. Bk Line: a b 1 *Off ********************* 2 On(Low) 3 On(High) 2 Press the OK key. The Adjust/Maint. menu appears. 3 Press the U or V key to select [Correct. Bk Line]. 4 Press the OK key. Correct. Bk Line appears. 5 Press the U or V key to select [Off], [On(Low)] or [On(High)]. 6 Press the OK key. Completed.
Default Setting (System Menu) 5 Press the U or V key to select [New Developer]. 6 Press the OK key. A confirmation screen appears. 7 Press [Yes] (the Left Select key). Completed. is displayed and the screen returns to the Adjust/ Maint. menu. New Developer.
Default Setting (System Menu) Date/Timer Date/Timer settings include: • Date/Time …8-113 • Date Format …8-115 • Time Zone …8-116 • Summer Time …8-117 • Auto Error Clear …8-118 • Sleep Timer …8-121 • Sleep Level …8-122 • Auto Panel Reset …8-124 • Unusable Time …8-126 NOTE: If user login administration is enabled, you can only change the settings by logging in with administrator privileges. Date/Time Set the date and time for the location where you use the machine.
Default Setting (System Menu) When you are performing user management and have not logged in, a login screen will appear. Then, enter the user ID and password to log in. Login User Name: L b ******************* Login Password: [ Login ] Date Setting: a b 1 Date/Time ********************* 2 Date Format 3 Time Zone [ Exit ] Date/Time: a b Year Month Day *2009* 01 01 (Time Zone:Tokyo ) 4 The Date Settings menu appears. 5 Press the U or V key to select [Date/Time]. 6 Press the OK key.
Default Setting (System Menu) NOTE: If you try to change the date/time when a trial application (page 8-170) is running, the If you change Date/Time setting, trial functions will be unavailable. Are you sure? message is displayed. To change the date/time, press [Yes](the Left Select key). Date Format Select the display format of year, month, and date. The year is displayed in Western notation. Use the procedure below to select the date format. Sys. Menu/Count.
Default Setting (System Menu) . Date Format: a b 1 *Month/Day/Year ********************* 2 Day/Month/Year 3 Year/Month/Day 6 Press the OK key. Date Format appears. 7 Press the U or V key to select [Month/Day/Year], [Day/Month/Year] or [Year/Month/Day]. 8 Press the OK key. Completed. is displayed and the screen returns to the Date Settings menu. Time Zone Set the time difference in the location you are from GMT. Use the procedure below to set the time difference. Sys. Menu/Count.
Default Setting (System Menu) Time Zone: a b 1 -12:00 Internati ********************* 2 -11:00 Midway 3 -10:00 Hawaii 5 Press the U or V key to select [Time Zone]. 6 Press the OK key. Time Zone appears. 7 Press the U or V key to select your location. 8 Press the OK key. Completed. is displayed and the screen returns to the Date Settings menu. NOTE: If you select a region that does not utilize summer time, the summer time setting screen will not appear.
Default Setting (System Menu) Date Setting: a b 2 Date Format ********************* 3 Time Zone 4 Summer Time [ Exit ] a b Summer Time: 1 *Off ********************* 2 On 4 The Date Settings menu appears. 5 Press the U or V key to select [Summer Time]. 6 Press the OK key. Summer Time appears. 7 Press the U or V key to select [Off] or [On]. 8 Press the OK key. Completed. is displayed and the screen returns to the Date Settings menu.
Default Setting (System Menu) Sys. Menu/Count.:a b 4 User/Job Account 5 User Property 6 Common Settings ********************* [ Exit ] Common Settings: a b 1 Language ********************* 2 Default Screen 3 Sound [ Exit ] 1 In the Sys. Menu/Count. menu, press the U or V key to select [Common Settings]. 2 Press the OK key. The Common Settings menu appears. 3 Press the U or V key to select [Timer Setting], and press the OK key.
Default Setting (System Menu) If you set 0 as the time, errors are not displayed. NOTE: If you select [Off] for Auto Error Clear, the time display does not appear. Use the procedure below to set the automatic error clear delay. Sys. Menu/Count.:a b 4 User/Job Account 5 User Property 6 Common Settings ********************* [ Exit ] Common Settings: a b 1 Language ********************* 2 Default Screen 3 Sound [ Exit ] 1 In the Sys. Menu/Count. menu, press the U or V key to select [Common Settings].
Default Setting (System Menu) seconds. You cannot use the numeric keys to enter this value. 8 Press the OK key. Completed. is displayed and the screen returns to the Timer Settings menu. Sleep Timer Set the amount of time to wait before Auto Sleep. Options are between 1 and 240 minutes (every one minute) Use the procedure below to set the Auto Sleep time. The default setting is 1 minutes. Sys. Menu/Count.
Default Setting (System Menu) Sleep Timer: D b (1 - 240) ******15*min. 6 Press the OK key. Sleep Timer appears. 7 Press the U or V key to set the Sleep Timer. Set the amount of time before entering the sleep state in minutes. You cannot use the numeric keys to enter this value. 8 Press the OK key. Completed. is displayed and the screen returns to the Timer Settings menu. Sleep Level Detailed settings can be selected for sleep mode. Detailed settings for sleep mode are called Energy Saver mode.
Default Setting (System Menu) When you are performing user management and have not logged in, a login screen will appear. Then, enter the user ID and password to log in, and press [Login] (the Right Select key). Login User Name: L b ******************* Login Password: [ Login ] Timer Setting: a b 1 Err. Clear Timer ********************* 2 Sleep Timer 3 PanelReset Timer [ Exit ] Sleep Action: a b 1 Quick Recovery ********************* 2 Energy Saver 4 The Timer Settings menu appears.
Default Setting (System Menu) 11 Press the U or V key to select [Off] or [On]. When [On] is set for a function and that function sends data to the machine when the machine is in Energy Saver mode, the machine will not execute the function. 12 Press the OK key. Completed. is displayed and the screen returns to the Timer Settings menu. Auto Panel Reset If no jobs are run for a certain period of time, automatically reset settings and return to the default setting.
Default Setting (System Menu) Timer Setting: a b 1 Err. Clear Timer ********************* 2 Sleep Timer 3 PanelReset Timer [ Exit ] Auto Panel Reset: a b 1 Off 2 *On ********************* 4 The Timer Settings menu appears. 5 Press the U or V key to select [Auto Panel Reset]. 6 Press the OK key. Auto Panel Reset appears. 7 Press the U or V key to select [Off] or [On]. 8 Press the OK key. Completed. is displayed and the screen returns to the Timer Settings menu.
Default Setting (System Menu) When you are performing user management and have not logged in, a login screen will appear. Then, enter the user ID and password to log in, and press [Login] (the Right Select key). Login User Name: L b ******************* Login Password: [ Login ] Timer Setting: a b 1 Err. Clear Timer ********************* 2 Sleep Timer 3 PanelReset Timer [ Exit ] PanelReset Timer:D b (5 - 495) ******90*sec. 4 The Timer Settings menu appears.
Default Setting (System Menu) Common Settings: a b 1 Language ********************* 2 Default Screen 3 Sound [ Exit ] 2 Press the OK key. The Common Settings menu appears. 3 Press the U or V key to select [Timer Setting], and press the OK key. When you are performing user management and have not logged in, a login screen will appear. Then, enter the user ID and password to log in, and press [Login] (the Right Select key).
Default Setting (System Menu) End Time: a b Hour Min. ***07*: 00 (Current Time 11:45) 10 Press the OK key. Start Time appears. 11 Press the U or V key or numeric keys to set the End Time. Unlock Code: a b (0000 - 0000) ********99*** 12 Press the OK key. Unlock Code appears. 13 Press the U or V key or numeric keys to set the unlock code. 14 Press the OK key. Completed. is displayed and the screen returns to the Timer Settings menu.
Default Setting (System Menu) Editing Destination (Address Book/Adding One-Touch Keys) Save frequently used destinations to Address Book or One-touch keys. The saved destinations can be changed. The destinations are available for Send as E-mail, Send to Folder, and Fax Transmission. Adding an Individual Destination A maximum of 100 individual addresses can be registered.
Default Setting (System Menu) Add Address: a b 1 Contact ********************* 2 Group Detail: Contact Name Sally [ C b 1/7 6 Press the U or V key to select [Add Address]. 7 Press the OK key. Add Address appears. 8 Press the U or V key to select [Contact]. 9 Press the OK key. This displays the screen for editing destinations. NOTE: If the maximum number of destinations has Edit ] already been registered, the screen will display Registered numbers exceeded. and return to the Address Book.
Default Setting (System Menu) Entering E-mail Address Detail: C b p E-mail Address: 4/7 t_maury@kyoceramita.N [ Edit Address Entry: * [ Press the Y or Z key to display E-mail Address. 2 Press [Edit] (the Right Select key). An entry screen appears. 3 Enter the e-mail address. ] B b ABC Text 1 ] NOTE: Destination can be specified using the Address Book or the One-touch keys. Refer to Specifying Destination on page 3-39. 4 Press the OK key. The e-mail address is registered.
Default Setting (System Menu) Folder (FTP) Address The table below explains the items to be entered. Item Description Max. No. of Characters Host Name* Host name or IP address of the sending computer 64 chars Path Path to the folder used to save files E.g. "\User\ScanData" 128 chars Login User Name User name for folder access For example, abcdnet\james.
Default Setting (System Menu) A b Path: SD3\report* ABC [ Text Login Password: OOOOOOOOOOO* [ 5 Enter the path name. 6 Press the OK key. Login User Name appears. 7 Enter the login user name. 8 Press the OK key. Login Password appears. ] A b ABC Text Press the OK key. Path appears. ] Login User Name: A b Maury* S ABC [ Text 4 8 ] 9 Enter the login password. 10 Press the OK key. A confirmation screen appears. Check the connection.
Default Setting (System Menu) Dest. Confirm.: a b p Morgan@kyoceramitaN b 0667640000********* b 0667741234 [ Exit ] 11 Press [Yes] (the Left Select key). This makes a connection with the entered destination. If the connection is successful, Connected. is displayed on the screen. Press [OK] (the Right Select key). Completed. is displayed and the folder (SMB/FTP) address is registered. If the connection failed, Cannot connect. is displayed. Press [OK] (the Right Select key).
Default Setting (System Menu) Adding a Group Compile two or more individuals into a group. Designations in the group can be added at the same time. When adding a group, a maximum of 20 groups can be added in the Address Book. NOTE: If user login administration is enabled, you can only edit destinations in the Address Book by logging in with administrator privileges. Before adding a group in the Address Book, the individuals to be included in the group must be added first.
Default Setting (System Menu) Add Address: a b 1 Contact 2 *Group ********************* Detail: Group Name: GUI Section [ C b 1/4 7 Press the OK key. Add Address appears. 8 Press the U or V key to select [Group]. 9 Press the OK key. This displays the screen for editing groups. NOTE: If the maximum number of groups has already Edit ] been registered, the screen will display Registered numbers exceeded. and return to the Address Book. 10 Enter each item and then press the OK key. Registered.
Default Setting (System Menu) Entering Group Member Detail: Group Member: 30 [ C b 2/4 Edit 1 Press the Y or Z key to display Group Member. 2 Press [Edit] (the Right Select key). This displays the list of destinations registered to the group. 3 Press [Menu] (the Right Select key). The group editing menu appears.
Default Setting (System Menu) NOTE: If you select an individual destination that has already been registered to the group, the screen will display This address is already registered. and return to the screen of step 7. Deleting member from group To delete a member registered to the group, follow the procedure below.
Default Setting (System Menu) Detail: Address Number: 019 [ C b 4/4 Edit 1 Press the Y or Z key to display Address Number. 2 Press [Edit] (the Right Select key). An entry screen appears. 3 Press the U or V key or the numeric keys to enter the address number. 4 Press the OK key. The address number is registered. ] Address Number: D b (001 - 120) *****053* NOTE: If you enter an address number that is already registered, the screen will display This address number is already registered.
Default Setting (System Menu) Addressbook: a b k Design ********************* l Fiala l Maury [ Menu ] a b Menu: 1 Detail Rdit ********************* 2 Delete 3 Add Address 4 Search(Name) A b 1/7 Detail: Contact name Sally [ Edit 4 Press the OK key. The Address Book list screen appears. 5 Press the U or V key to select the destination you want to edit. 6 Press [Menu] (the Right Select key). Menu appears. 7 Press the U or V key to select [Detail/Edit]. 8 Press the OK key.
Default Setting (System Menu) Adding a Destination on One-touch Key This machine has 11 one-touch keys and you can register 2 destinations to each of them. The one-touch keys are arranged as shown below: No.1 No.2 No.3 No.4 No.12 No.13 No.14 No.15 No.5 No6 No.7 No.8 No.16 No.17 No.18 No.19 No.9 No.10 No.11 No.20 No.21 No.22 SHIFT NOTE: Refer to One-Touch Key on page 3-3 for how to use them.
Default Setting (System Menu) Editing One-touch Key Edit/delete the destinations you added to One-touch Key. Use the procedure below to edit the one-touch key. Select Key No.: a b 1 No. 1 ********************* 2 No. 12 [ Exit [ Exit In the basic screen, press the one-touch key where you want to edit the destination and hold it (2 seconds or longer). Select Key Set. appears. The screen shown is the one when No.1/No.12 is pressed and held.
Default Setting (System Menu) 7 Press the OK key. A confirmation screen appears. 8 Press [Yes] (the Left Select key). The selected destination is registered to the one-touch key, overwriting the previous one. Registered. is displayed and the screen returns to the basic screen. Overwrite. Are you sure? z No.
Default Setting (System Menu) Restarting the System Restart the machine without turning the main power switch off. Use this to deal with any unstable operation by the machine. (Same as the computer restart.) Use the procedure below to restart the system. Sys. Menu/Count.:a b 1 Report 2 Counter 3 System ********************* [ Exit ] 1 When you are performing user management and have not logged in, a login screen will appear.
Default Setting (System Menu) Network Setup The following network settings are available. • LAN Interface Setup …8-145 • TCP/IP (IPv4) Setup …8-146 • TCP/IP (IPv6) Setup …8-146 • NetWare Setup …8-147 • AppleTalk Setup …8-149 • WSD Scan Setup …8-150 • WSD Print Setup …8-151 • Protocol Detail …8-153 LAN Interface Setup Specify the settings for the LAN interface to be used. The default setting is Auto. Use the procedure below to select the interface. Sys. Menu/Count.
Default Setting (System Menu) LAN Interface: a b 1 *Auto ********************* 2 10Base-Half 3 10Base-Full 5 Press the U or V key to select [LAN Interface]. 6 Press the OK key. LAN Interface appears. 7 Press the U or V key to select the desired LAN interface. The available LAN interfaces are as follows: Auto 10Base-Half 10Base-Full 100Base-Half 100Base-Full 8 Press the OK key. Completed. is displayed and the screen returns to the Network Setting menu.
Default Setting (System Menu) System: a b 1 Network Setting ********************* 2 I/F Block Set. 3 Security Level [ Exit ] Network Setting: a b 1 TCP/IP Settings ********************* 2 NetWare 3 AppleTalk [ Exit ] TCP/IP Settings: a b 1 TCP/IP ********************* 2 IPv4 Setting 3 IPv6 Setting [ Exit ] Exit The System menu appears. 3 Press the U or V key to select [Network Setting]. 4 Press the OK key. The Network Setting menu appears. 5 Press the U or V key to select [TCP/IP Settings].
Default Setting (System Menu) Sys. Menu/Count.:a b 1 Report 2 Counter 3 System ********************* [ Exit ] 1 When you are performing user management and have not logged in, a login screen will appear. Then, enter the user ID and password to log in, and press [Login] (the Right Select key). Login User Name: L b ******************* Login Password: [ Login In the Sys. Menu/Count. menu, press the U or V key to select [System], and press the OK key.
Default Setting (System Menu) Ether-II 802.2 SNAP 8 Press the OK key. Completed. is displayed and the screen returns to the Network Setting menu. For detailed information on restarting the system, refer to Restarting the System on page 8-144. AppleTalk Setup Select the Apple Talk network connection. The default setting is On. Use the procedure below to setup the AppleTalk setting. Sys. Menu/Count.
Default Setting (System Menu) AppleTalk a b 1 Off 2 *On ********************* 6 Press the OK key. AppleTalk appears. 7 Press the U or V key to select [On] or [Off] and then press the OK key. Completed. is displayed and the screen returns to the Network Setting menu. WSD Scan Setup Select whether or not to use WSD Scan. The default setting is On. Use the procedure below to setup the WSD-SCAN setting. The machine must be restarted after the setting is changed. Sys. Menu/Count.
Default Setting (System Menu) WSD-SCAN: a b 1 *Off ********************* 2 On 5 Press the U or V key to select [WSD-SCAN]. 6 Press the OK key. The WSD-SCAN menu appears. 7 Press the U or V key to select [On] or [Off]. 8 Press the OK key. Completed. is displayed and the screen returns to the Network Settings menu. WSD Print Setup Select whether or not to use WSD Print. The default setting is On. Use the procedure below to setup the WSD-PRINT setting.
Default Setting (System Menu) Network Setting: a b 1 TCP/IP Settings ********************* 2 NetWare 3 AppleTalk [ Exit ] a b WSD-PRINT: 1 *Off ********************* 2 On 4 Press the OK key. The Network Setting menu appears. 5 Press the U or V key to select [WSD-PRINT]. 6 Press the OK key. The WSD-PRINT menu appears. 7 Press the U or V key to select [On] or [Off]. 8 Press the OK key. Completed. is displayed and the screen returns to the Network Settings menu.
Default Setting (System Menu) Protocol Detail Make other network related settings. Item Description Default Setting Restarting the System* NetBEUI Selects whether or not to receive documents using NetBEUI. On × LPD Select whether or not to receive documents using LPD as the network protocol. On z FTP (Server) Select whether or not to receive documents using FTP. On z FTP (Client) Select whether or not to send documents using FTP, and the number of the port to be used.
Default Setting (System Menu) Item Restarting the System* Description Default Setting IPP Select whether or not to use IPP, and the number of the port to be used. Off Port number: 631 z IPP over SSL Select whether or not to use IPP over SSL. SSL must be set to [On] in SSL Setting on page 8-156. On z Thin Print Select whether or not to use Thin Print. Off × * z: The machine must be restarted after the setting is changed.
Default Setting (System Menu) TCP/IP Settings: a b 2 IPv4 Setting 3 IPv6 Setting 4 Protocol Detail ********************* [ Exit ] Protocol Detail: a b 1 NetBEUI ********************* 2 SNMPv3 3 FTP(Server) [ Exit ] a b 1 *Off ********************* 2 On 5 Press the U or V key to select [TCP/IP Settings]. 6 Press the OK key. The TCP/IP Settings menu appears. 7 Press the U or V key to select [Protocol Detail]. 8 Press the OK key. The Protocol Detail menu appears.
Default Setting (System Menu) Network Security The network security functions can be set up to protect printer operation and the print data. The following network security settings are available. • SSL Setting …8-156 • SNMPv3 Setting …8-161 • IPSec Setting …8-162 SSL Setting This allows you to use SSL network security for communication. You can use SSL Setup to select whether or not SSL is used and to specify the IPP port and HTTP port security settings.
Default Setting (System Menu) Network Setting: a b 7 Secure Protocol ********************* 8 Host Name 9 LAN Interface [ Exit ] Secure Protocol: a b 1 SSL ********************* 2 IPP Security 3 HTTP Security [ Exit ] SSL: a b 1 *Off ********************* 2 On [ Exit 4 Press the OK key. The Network Setting menu appears. 5 Press the U or V key to select [Secure Protocol]. 6 Press the OK key. Secure Protocol appears. 7 Press the U or V key to select [SSL]. 8 Press the OK key. SSL appears.
Default Setting (System Menu) System: a b 1 Network Setting ********************* 2 I/F Block Set. 3 Security Level [ Exit ] Network Setting: a b 7 Secure Protocol ********************* 8 Host Name 9 LAN Interface [ Exit ] Secure Protocol: a b 1 SSL 2 IPP Security ********************* 3 HTTP Security [ Exit ] IPP Security: a b 1 IPP/IPP over SSL 2 *IPPoverSSL only ********************* 2 The System menu appears. 3 Press the U or V key to select [Network Setting]. 4 Press the OK key.
Default Setting (System Menu) Sys. Menu/Count.:a b 1 Report 2 Counter 3 System ********************* [ Exit ] 1 When you are performing user management and have not logged in, a login screen will appear. Then, enter the user ID and password to log in, and press [Login] (the Right Select key). Login User Name: L b ******************* Login Password: [ Login In the Sys. Menu/Count. menu, press the U or V key to select [System], and press the OK key.
Default Setting (System Menu) 9 Press the U or V key to select [HTTP/HTTPS] or [HTTPS only]. 10 Press the OK key. Completed. is displayed and the screen returns to the Secure Protocol menu. LDAP Security Specify the protocol to be used for LDAP. The default setting is Off. Use the procedure below to make the setting. Sys. Menu/Count.:a b 1 Report 2 Counter 3 System ********************* [ Exit ] 1 When you are performing user management and have not logged in, a login screen will appear.
Default Setting (System Menu) Secure Protocol: a b 2 IPP Security 3 HTTP Security 4 LDAP Security ********************* [ Exit ] LDAP Security: a b 1 *Off ********************* 2 LDAPv3/TLS 3 LDAP over SSL 6 Press the OK key. Secure Protocol appears. 7 Press the U or V key to select [LDAP Security]. 8 Press the OK key. LDAP Security appears. 9 Press the U or V key to select [Off], [LDAPv3/ TLS] or [LDAP over SSL]. 10 Press the OK key. Completed.
Default Setting (System Menu) IPSec Setting Make this setting when you use IPSec. The default setting is On and that of Rule Setting is also Off. Use the procedure below to make the setting. Sys. Menu/Count.:a b 1 Report 2 Counter 3 System ********************* [ Exit ] 1 When you are performing user management and have not logged in, a login screen will appear. Then, enter the user ID and password to log in, and press [Login] (the Right Select key).
Default Setting (System Menu) If you select [On] and press the OK key, Rule Setting appears. Press the U or V key to select [On] or [Off]. Rule Setting: a b 1 *Off ********************* 2 On 8 Press the OK key. Completed. is displayed and the screen returns to the Network Setting menu.
Default Setting (System Menu) Interface Block Setting This allows you to protect this machine by blocking the interface with external devices such as USB hosts or optional interfaces. The following interface block settings are available: • USB Host (USB memory slot setting) • USB Device (USB interface setting) • Optional interface (Optional interface card setting) USB Host (USB memory slot setting) This locks and protects the USB memory slot (A1) or USB port (A2) (USB host).
Default Setting (System Menu) USB Host: a b 1 *Unblock ********************* 2 Block 6 Press the OK key. USB Host appears. 7 Press the U or V key to select [Unblock] or [Block]. 8 Press the OK key. Completed. is displayed and the screen returns to the I/F Block Set. menu. USB Device (USB interface setting) This locks and protects the USB interface connector (B1) (USB Device). The default setting is Unblock. Use the procedure below to specify the USB Device setting. Sys. Menu/Count.
Default Setting (System Menu) USB Device: a b 1 *Unblock ********************* 2 Block 5 Press the U or V key to select [USB Device]. 6 Press the OK key. USB Device appears. 7 Press the U or V key to select [Unblock] or [Block]. 8 Press the OK key. Completed. is displayed and the screen returns to the System menu.
Default Setting (System Menu) Optional interface (Optional interface card setting) This locks and protects the optional interface slot. The default setting is Unblock. Use the procedure below to specify the optional interface setting. Sys. Menu/Count.:a b 1 Report 2 Counter 3 System ********************* [ Exit ] 1 When you are performing user management and have not logged in, a login screen will appear. Then, enter the user ID and password to log in, and press [Login] (the Right Select key).
Default Setting (System Menu) 8 8-168 Press the OK key. Completed. is displayed and the screen returns to the System menu.
Default Setting (System Menu) Security Level (Security Level setting) The Security Level setting is primarily a menu option used by service personnel for maintenance work. There is no need for customers to use this menu.
Default Setting (System Menu) Optional Functions You can use the optional applications installed on this machine. Op Functions See Optional Functions on page Appendix-4.
9 Maintenance This chapter describes cleaning and toner replacement. • • • Cleaning ....................................................................... 9-2 Toner Container Replacement...................................... 9-4 Replacing the Waste Toner Box ...................................
Maintenance Cleaning Clean the machine regularly to ensure optimum output quality. CAUTION: For safety, always unplug the power cord before cleaning the machine. Glass Platen Wipe the inside of the document processor and the glass platen with a soft cloth dampened with alcohol or mild detergent. IMPORTANT: Do not use thinner or other organic solvents. Document Processor If black streaks or dirt appears in copies when using the document processor, clean the slit glass with the supplied cleaning cloth.
Maintenance Cleaning the paper transfer unit CAUTION: Some parts are very hot inside the machine. Exercise caution as there is a risk of burn injury. The paper transfer unit should be cleaned each time the toner container and waste toner box are replaced. To maintain optimum print quality, it is also recommended that the inside of the machine be cleaned once a month as well as when the toner container is replaced.
Maintenance Toner Container Replacement When the message display displays Add toner, replace the toner. Every time you replace the toner container, be sure to clean the parts as instructed below. Dirty parts may deteriorate output quality. CAUTION: Do not attempt to incinerate the toner container or the waste toner box. Dangerous sparks may cause burns. Toner Container Replacement 1 While pulling the top tray cover lever, open the top tray.
Maintenance Make sure the release lever is in the release position. 5 Push down on the top of the toner container to install it firmly in place. 6 Close the top tray. When closing the top tray, do not press hard on the operation panel. NOTE: When closing the top tray, take care not to pinch your fingers.
Maintenance Replacing the Waste Toner Box Replace the waste toner box when the Check waste toner box message is displayed. A new waste toner box is included with the toner kit. The waste toner box needs to be replaced before the machine will operate. CAUTION: Do not attempt to incinerate the toner container or the waste toner box. Dangerous sparks may cause burns. Replacing the Waste Toner Box 1 Open the waste toner cover. 2 Press the lock button and gently remove the waste toner box.
Maintenance 4 Open the cap of the new waste toner box. 5 Insert the new waste toner box as shown in the figure. When the box is set correctly, it will snap into place. 6 Make sure that the waste toner box is correctly inserted and close the waste toner cover. New Waste Toner Box After replacing the toner containers and the waste toner box, clean the paper transfer unit. For instructions, refer to Cleaning on page 9-2.
Maintenance Prolonged Non-Use and Moving of the Machine Prolonged Non-use If you ever leave the machine unused for a long period of time, remove the power cord from the wall outlet. We recommend you consult with your dealer about the additional actions you should take to avoid possible damage that may occur when the machine is used next time. Moving the Machine When you move the machine: • Move it gently. • Keep it as level as possible to avoid spilling toner inside the machine.
10 Troubleshooting This chapter explains how to solve problems with the machine. • • • Solving Malfunctions................................................... 10-2 Responding to Error Messages .................................. 10-5 Clearing Paper Jams ................................................
Troubleshooting Solving Malfunctions The table below provides general guidelines for problem solving. If a problem occurs with your machine, look into the checkpoints and perform procedures indicated on the following pages. If the problem persists, contact your Service Representative. Symptom Checkpoints Corrective Actions Reference Page The operation panel does not respond when the main power switch is turned on. Is the machine plugged in? Plug the power cord into an AC outlet.
Troubleshooting Symptom Checkpoints Corrective Actions Reference Page Copies have a moire pattern (dots grouped together in patterns and not aligned uniformly). Is the original a printed photograph? Set the image quality to [Photo]. 5-15 Printouts are not clear. Did you choose appropriate image quality for the original? Select appropriate image quality. 5-15 Printouts are dirty. Is the platen or the document processor dirty? Clean the platen or the document processor. — Printouts are fuzzy.
Troubleshooting Symptom Checkpoints Corrective Actions Reference Page Documents are printed improperly. Are the application software settings at the PC set properly? Check that the printing system driver and application software settings are set properly. — While the operation panel was being used, the keys locked up and do not respond when pressed. Is the operation panel locked? Check the panel lock setting in Embedded Web Server and change the setting if necessary.
Troubleshooting Responding to Error Messages If the control panel displays any of these messages, follow the corresponding procedure. Alphanumeric Corrective Actions Reference Page Error Message Checkpoints Load paper in cassette 1. Is the indicated cassette out of paper? Load paper. 2-27 Load paper in MP Tray. Is the paper of the selected size loaded in the multi purpose tray? Load the paper in the multi purpose tray which is of the size and type indicated on the Message Display.
Troubleshooting Error Message Checkpoints Corrective Actions Reference Page Job Accounting restriction exceeded. Cannot print. – The job is canceled. Press the OK key. — Job Accounting restriction exceeded. Cannot scan. – The job is canceled. Press the OK key. — Sub address/Polling box limit exceeded. Job is canceled. – FAX box is full, and no further storage is available. The job is canceled. Press the OK key. — Incorrect Login User Name or Password. Job Is canceled.
Troubleshooting Error Message Checkpoints Corrective Actions Reference Page Place original and press Start key. – Remove originals from the document processor, put them back in their original order, and place them again. Press the Start key to resume printing. Press the Stop key to cancel the job. 2-43 Remove original from document processor. Are there any originals left in the document processor? Remove originals from the document processor. — Maximum Number of scanned pages. Job is canceled.
Troubleshooting Error Message Send error. #### Checkpoints Corrective Actions – 1105: E-mail - The SMTP protocol setting is turned off. Use Embedded Web Server and turn on the SMTP protocol setting. Scan to PC (SMB) - SMB setting is turned off. Use Embedded Web Server and turn on the SMB setting. Scan to PC (FTP) - FTP setting is turned off. Use Embedded Web Server and turn on the FTP setting. 1106: The sender address setting under E-mail: SMTP is not registered.
Troubleshooting Error Message Checkpoints Corrective Actions Reference Page File is not found. Job is canceled. – The specified file is not found. The job is canceled. Press the OK key. — Top tray is full of Paper. Remove the paper. – Remove paper from the top tray, and press the OK key to resume the job. — Unknown toner Installed. – If the toner container was taken from a different machine of the same model while it was displaying the Add toner. message, ignore the message and use the toner.
Troubleshooting Responding to an Error Lamp Flashes If an error lamp flashes, press [Status/Job Cancel] to check an error message. If the message is not indicated on the Message Display when [Status/Job Cancel] is pressed or the error lamp flashes for 1.5 seconds, check the following. Symptom Cannot send fax. Checkpoints Corrective Actions Reference Page Is the modular cord connected correctly? Connect the modular cord correctly. — Is Permitted FAX No. or Permitted ID No.
Troubleshooting Clearing Paper Jams If a paper jam occurs, a message will be displayed about the jam and copying or printing will stop. Remove jammed paper. After removing jammed paper, the machine will re-start printing. Leave the main power switch on and to remove the jammed paper refer to the following information below. Detailed paper jam positions are as follows. Refer to the indicated page number to remove the paper jam.
Troubleshooting Online Help Messages The online Help message function of the machine will show the procedure for removing a paper jam in the message display. When Paper Jam is displayed, press [Help](the Left Select key) to display the procedure to clear the jam. Press U to display the next step or press V to display the previous step. Press the OK key to exit the online help message display. When a paper jam occurs, you can use the online Help message to remove the paper jam.
Troubleshooting After you have removed the paper jam, replace the lower feed cover. Paper Cassette/Paper Feeder In the event that a paper jam occurs in the paper cassette, follow the procedure below to remove the jam. Paper jams in the cassette of the optional paper feeder are removed in the same way. 1 Pull out the cassette or optional paper feeder. 2 Remove any partially fed paper. If you are able to remove the jam, go to step 5.
Troubleshooting Inside the Machine 1 Pull up the rear cover lever and open the rear cover. CAUTION: Some parts are very hot inside the machine. Exercise caution as there is a risk of burn injury. 2 If most of the paper is out in the upper tray, grasp the paper and pull it out. 3 If a paper jam reaches the fuser unit as shown, open the fuser cover, grasp the paper, and pull it out. 4 If a paper jam does not reach the metal roller as shown, grasp the paper and pull it out.
Troubleshooting 5 If a paper jam has occurred inside the machine as shown, open the rear feed cover and pull out the paper. 6 If a paper jam reaches the Duplex Unit as shown, lift up the Duplex Unit and remove the paper. 7 Close the rear cover. The error will be cleared and printing will resume after warm-up. Rear Feed Cover Duplex Unit Document Processor Follow the steps below to clear paper jams in the document processor. 1 Remove all of the originals from the document feed tray.
Troubleshooting 3 Remove the jammed original. If the original is caught in the rollers or difficult to remove, proceed to the next step. 4 Open the document processor. 5 Remove the jammed original. If the original tears, remove every loose scrap from inside the machine. 6 Close the document processor. 7 Place the originals.
11 Management This chapter explains the following operations. • • • User Login Administration .......................................... 11-2 Job Accounting ......................................................... 11-13 Checking the Counter...............................................
Management User Login Administration User login administration specifies how the user access is administered on this machine. Enter correct login user name and password for user authentication to log in. Access are in three levels - User, Administrator, and Machine Administrator. The security levels can be modified only by the machine administrator. First User Login Administration Follow these steps for the first user login administration. Enable user login administration. (page 11-3) T Add a user.
Management Sys. Menu/Count.:a b 4 User/Job Account ********************* 5 User Property 6 Common Settings [ Exit ] 2 From the system menu / counter menu, press the U or V key to select [User/Job Account]. 3 Press the OK key. The User/Job Account menu appears. Enabling/Disabling User Login Administration This enables user login administration.
Management User Login: a b 1 *Off 2 Local Authentic. ********************* 3 Netwk Authentic. a b Server type: 1 NTLM ********************* 2 Kerberos 3 Account Agency Host Name: GUI* 5 Press the OK key. User Login appears. 6 Press the U or V key to select [Local Authentic.] or [Netwk Authentic.], and then press the OK key. Select [Off] to disable user login administration.
Management Login/Logout Once you enable user login administration, a login user name and password entry screen appears each time you use this machine. Login Log in using the procedure below. NOTE: Refer to Character Entry Method on Appendix-7 for details on entering characters. Login User Name L b ******************* Login Password: [ Login 1 If the screen below appears during the operations, perform the following login operations.
Management Adding a User This adds a new user. You can add Up to 21 users (including the default login user name). The table below explains the user information to be registered. Item Description User Name* Enter the name displayed on the user list (up to 32 characters). Login User Name* Enter the login user name to log in (up to 32 characters). The same login user name cannot be registered. Login Password* Enter the password to log in (up to 64 characters).
Management User Login Set.: a b 1 User Login 2 Local User List ********************* 3 IC Card Setting [ Exit ] Local User List: a b l Admin l DeviceAdmin ********************* [ Menu T b S [ ABC Text Press the OK key. The User Login Set. menu appears. 4 Press the U or V key to select [Local User List]. 5 Press the OK key. Local User List appears. 6 Press [Menu] (the Right Select key), press the U or V key to select [Add User], and then press the OK key.
Management Detail: Login Password: OOOOOOOOOOO [ C b 3/6 Edit 10 Press the Y or Z key to select [Login Password:], press [Edit] (the Right Select key), enter the login password, and then press the OK key. ] 11 Enter the same login password to confirm and press the OK key. Detail: C b p E-mailAddress: 4/6 ******@abcdef.jp [ Detail: Access Level: Administrator Edit 12 Press the Z key to select [E-mailAddress:], press [Edit] (the Right Select key), enter the e-mail address, and then press the OK key.
Management User/Job Account: a b 1 User Login Set. ********************* 2 Job Account. Set. 3 Unknown ID Job [ Exit ] User Login Set.: a b 1 User Login 2 Local User List ********************* 3 Group Auth. [ Exit ] Local User List: a b l DeviceAdmin ********************* l Admin l User1 [ Menu ] 1 See the procedure for displaying user control on page 11-2, and display the User/Job Account. 2 In the User/Job Account menu, press the U or V key to select [User Login Set.]. 3 Press the OK key.
Management 5 The overwrite confirmation screen appears. Press [Yes] (the Left Select key). The user information is changed and the screen returns to Local User List. Deleting a user Local User List: a b l DeviceAdmin l Admin ********************* l User1 [ Menu ] a b Menu: 1 Detail/Edit 2 Delete ********************* 3 Add User 1 Press the U or V key to select the user you want to delete, and then press [Menu] (the Right Select key).
Management Group Auth.: a b 1 *Off ********************* 2 On 5 Press the OK key. Group Auth. appears. 6 Press the U or V key to select [On] or [Off]. 7 Press the OK key. Completed. is displayed and the screen returns to the User/Job Account menu. Displaying Network User Propertiy Use the procedure below to display the property of the user logged on using the network authentication. This menu can be used only when [Netwk Authentic.] is selected as the user authentication method.
Management Unknown login user name Job This specifies the behavior for handling the jobs sent with unknown login user names or User ID (i.e. unsent IDs). If the User Login is set to invalid and Job Accounting is set to valid, follow the procedure when the Account ID is unknown. The table below shows the available settings. Item Description Reject The job is rejected (not printed). Permit The job is permitted to be printed. Use the procedure below to process jobs sent from unknown users.
Management Job Accounting Job accounting Manages the copy/print count accumulated by individual accounts by assigning an ID to each account. Job accounting helps the following activities in business organizations. • Manageability of up to 20 individual accounts. • Availability for account IDs with as many as eight digits (between 0 and 99999999) for security. • Integrated management of printing and scanning statistics through the use of an identical account ID.
Management Job Account.Set.:a b 1 Job Accounting ********************* 2 Account. Report 3 Total Accounting [ Exit ] a b Job Accounting: 1 *Off ********************* 2 On 3 Press the OK key. The Job Account. Set. menu appears. 4 Press the U or V key to select [Job Accounting]. 5 Press the OK key. Job Accounting appears. 6 Press the U or V key to select [On]. To disable job accounting, select [Off]. 7 Press the OK key. Completed. is displayed and the screen returns to the Job Account. Set. menu.
Management Login/Logout If job accounting is enabled, an account ID entry screen appears each time you use this machine. Use the procedure below to login and logout. Login NOTE: Refer to Character Entry Method on Appendix-7 for details on entering characters. Account ID: b ******************* 1 In the screen below, enter the account ID using the numeric keys and press the OK key. NOTE: If you entered a wrong character, press the Clear key and enter the account ID again.
Management Managing Accounts This section explains how to add a new account. The following entries are required. Item Description Account Name Enter the account name (up to 32 characters). Account ID Enter the account ID as many as eight digits (between 0 and 99999999). Restriction This Prohibits printing/scanning or restricts the number of sheets to load. Refer to Restricting the Use of the Machine on page 11-20. Use the procedure below to register a new account.
Management Menu: a b 1 Detail/Edit 2 Delete 3 Add Account ********************* Account Name: * [ T b S ABC Text Account ID: 6 Press [Menu] (the Right Select key), press the U or V key to select [Add Account], and then press the OK key. 7 Enter the account name and press the OK key. 8 Enter the account code and press the OK key. ] b ******************* S k Dep.01: a b 1 Exit ********************* 2 Detail NOTE: Any account ID that has already registered cannot be used.
Management User/Job Account:a b 1 User Login Set. 2 Job Account.Set. ********************* 3 Unknown ID Job [ Exit ] Job Account.Set.:a b 4 Each Job Account 5 Account. List ********************* 6 Default Setting [ Exit ] Account. List: a b k UI R&D DEP. ********************* k Osaka GUI Design k Kyoceramita [ Menu ] 1 See the procedure for displaying user control on page 11-2, and display the User/Job Account. 2 In the User/Job Account menu, press the U or V key to select [Job Account. Set.].
Management 4 After completing changing the account information, press the OK key again. A confirmation screen appears. 5 Press [Yes] (the Left Select key). The account information is changed. Registered. is displayed and the screen returns to Account. List. Overwrite. Are you sure? z k Osaka GUI DESIGN [ Yes ] [ No ] Deleting an account Account. List: a b k UI R&D DEP.
Management User/Job Account:a b 1 User Login Set. 2 Job Account.Set. ********************* 3 Unknown ID Job [ Exit ] Job Account.Set: a b 1 Job Accounting ********************* 2 Account Report 3 Total Accounting [ Exit ] Default Setting: a b 1 Apply Limit 2 Copy/Print Count ********************* 3 Counter Limit [ Exit ] Copy/Print Count:a b 1 Total 2 *Split ********************* 1 See the procedure for displaying user control on page 11-2, and display the User/Job Account.
Management Restriction Items [Split] selected for Copier/Printer Count Item Detail Copier print limit (total) A limit can be set for the total number of full color copies, monochrome copies, and black & white copies. Copier print limit (full color) A limit can be set for the number of full color copies. Printer print limit (total) A limit can be set for the total number of pages printed in color and black & white.
Management Applying Restriction Restriction can be applied in two modes as follows: Item Description Off No restriction given Counter Limit Restricts the print counter in one-page increments up to 9,999,999 copies. Reject Usage Restriction is applied. Use the procedure below to select a restriction method. Account. List: a b k UI R&D DEP. k Osaka GUI Design ********************* k Kyoceramita [ Menu ] C b Detail: Print Restrict.: 4/6 1 Follow steps 1 to 7 of Managing Accounts on page 11-16.
Management If you select [Counter Limit], enter the upper limit number of pages in the next screen, and then press the OK key. Limit Pages: D b (1 - 9999999) **123456*pages 5 Repeat step 3 to 4 to set items as necessary. 6 Press the OK key again. A confirmation screen appears. 7 Press [Yes] (the Left Select key). The restriction of use is changed. Registered. is displayed and the screen returns to Account. List. Overwrite.
Management Job Account.Set.:a b 4 Each Job Account 5 Account. List 6 Default Setting ********************* [ Exit ] Default Setting: a b 1 Apply Limit ********************* 2 Copy/Print Count 3 Counter Limit [ Exit ] Apply Limit: a b 1 Immediately 2 *Subsequently ********************* 3 Alert Only [ Exit ] 3 Press the OK key. The Job Account. Set. menu appears. 4 Press the U or V key to select [Default Setting]. 5 Press the OK key. The Default Setting menu appears.
Management Default Counter Limit When you add a new account, you can change the default restrictions on the number of sheets used. You can set any number from 1 to 9,999,999 in 1-sheet increments. The items that can be set differ depending on whether [Split] or [Total] is selected for Managing the Copier/ Printer Counts on page 11-19.
Management User/Job Account:a b 1 User Login Set. 2 Job Account.Set. ********************* 3 Unknown ID Job [ Exit ] Job Account.Set.:a b 1 Each Job Account 2 Account. List 3 Default Setting ********************* [ Exit ] Default Setting: a b 1 Apply Limit ********************* 2 Copy/Print Count 3 Counter Limit [ Exit ] Counter Limit: a b 1 Copy Restriction ********************* 2 Print Restrict. 3 ScanRest.
Management Counting the Number of Pages Printed This counts the number of pages printed. Counts are classified into Total Job Accounting and Each Job Accounting. A new count can also be started after resetting the count data which was stored for a certain period of time. Types of the counts are as follows. Item Detail Printed Pages Displays the number of pages copied and printed, and the total number of pages used. You can also use [Duplex Pages] and [Combine Pages] to check the number of pages used.
Management Total Accounting:a b 1 Printed Pages ********************* 2 Scanned Pages 3 FAX TX Pages [ Exit ] 5 Press the OK key. The Total Accounting menu appears. 6 Press the U or V key to select the function of which you want to check counts, and then press the OK key. If you select [Printed Pages] or [Scanned Pages], press the Y or Z key to switch the counted items.
Management User/Job Account:a b 1 User Login Set. 2 Job Account.Set. ********************* 3 Unknown ID Job [ Exit ] Job Account.Set.:a b 4 Each Job Account ********************* 5 Account List 6 Default Setting [ Exit ] Each Job Account: a b k Osaka GUI DESIGN ********************* k Kyoceramita k UI R&D DEPT.
Management If you select [Scanned Pages], press the Y or Z key to switch the counted items. Copy/Print Pages:C b Copy: 1/4 1234567 Limit:1234567 If the number of output sheets is restricted by an account management function, the upper limit on the number of output sheets is also displayed. 9 Osaka GUI DESIGN: a b 1 Printed Pages 2 Scanned Pages 3 Counter Reset ********************* [ Exit ] After confirming the content, press the OK key. The screen returns to the menu for the account.
Management Printing an Accounting Report Total pages counted at all relevant accounts can be printed as an accounting report. Reports have different formats depending on how the count of copiers and printers is administered. When Split is selected for Managing the Copier/Printer Count FS-C2126MFP For the count by paper size, the report will be printed by size. Use the procedure below to print a job accounting report. User/Job Account:a b 1 User Login Set. 2 Job Account.Set.
Management 5 Print. Are you sure? z Total JobAccounting [ Yes ] [ No ] 11-32 In the confirmation screen, press [Yes] (the Left Select key). A job accounting report is printed.
Management Checking the Counter You can check the number of pages printed and scanned. The number is counted by the following items: Item Printed Pages Description By Function You can check the number of pages copied, faxed*, and printed, and the total number of pages used. By Paper Size You can check the number of pages printed for each paper size. Scanned Pages * You can check the number of pages copied, faxed*, and otherwise scanned, and the total number of pages used.
Management Printed Pages: Copy: 1234567 C b 1/4 4 Press the Y or Z key to check the count. 5 After completing checking the count, press the OK key. The screen returns to the menu for the account.