
Installation Guide


Care & Maintenance
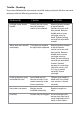
*To keep the product clean & shining, follow the steps below:
1. Rinse with clean water & dry with a soft cloth
2. Do not clean with soaps, acid, polish, abrasives, or harsh cleaners
3. Do not use cloth with a coarse surface
4. Unscrew the aerator and clean when necessary
*This installation manual is subject to change without further notice.
1
10
279
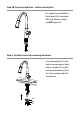
10 31/32”
Minimum distance 90mm
Less than 90mm
Cold Water
32 3/32”
Ø35~Ø38
1
2
3
10
9
11
12
13
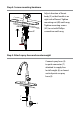
Hexagon Nut
Hot
Water
Cold
Water
2 3
1
4
5
7
6
8
4
5
6
7
8
Ø1 3/8”~
Ø1 1/2”
815
194
7 5/8”
Ø1 3/8~Ø1 1/2”
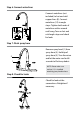
30˚
10
11
Close
Open
Left
Hot Water
Push
25˚
90˚
12
13
8
7
Ø35~Ø38
Max35
217
8 17/32”
Max1 3/8”
9
11
12
13
2
3
4
5
6
7
8
1
2
5
26
27
28
29
6
16
17
7
8
9
10
11
121314
15
18
19
20
22
23
24
25
21
4
3
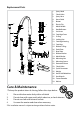
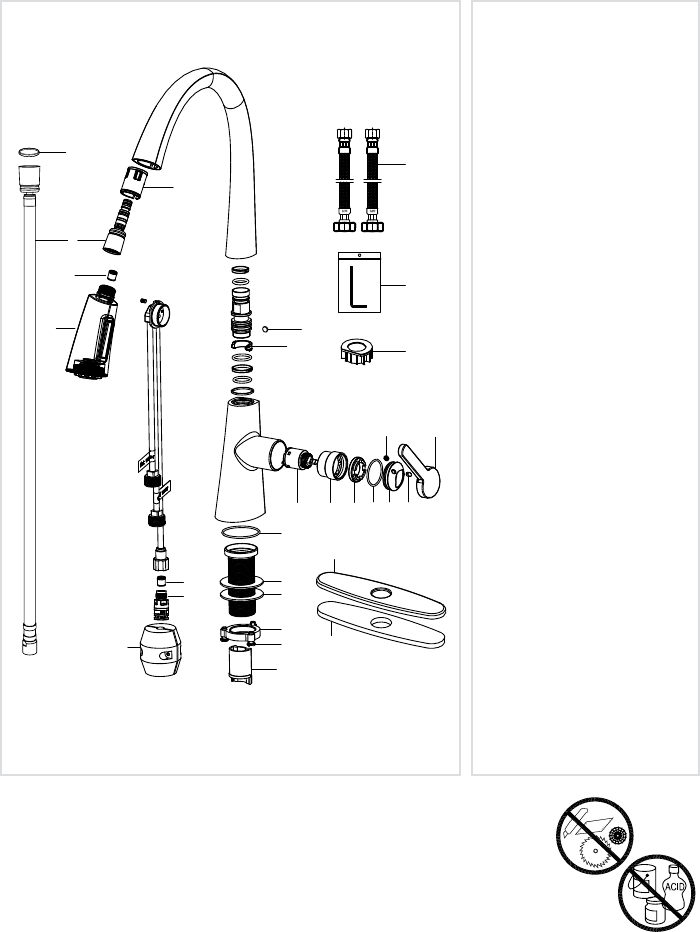
1. Spray Head
2. Check Valve
3. Spray Hose
4. Hose Guide
5. Button
6. Plastic Clip
7. Metal Handle
8. Handle Button
9. Set Screw
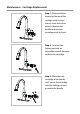
10. Cartridge Cover
11. O-Ring
12. Locking Nut
13. Cartridge Housing
14. Cartridge
15. Rubber O-Ring
16. Deck Plate
17. Base Plate
18. Rubber Washer
19. Metal Washer
20. Mounting Nut
21. Mounting Screws
22. Protective Sleeve
23. Check Valve
24. Quick Connector
25. Weight
26. Hot & Cold Waterlines
27. Hex Wrench
28. Faucet Extender
29. Washer
Replacement Parts