
Installation Instructions


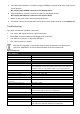
Table Of Contents

Figure 2: HDMI Connectors – SOURCE and DISPLAY (with Dimensions in mm)
CLS-AOCH/xl / CP-AOCH/xl Plug and Play Installation
Before installing the cable, make sure that you have an HDMI graphic card or devices with an HDMI
port (for example, a PC, laptop, DVD/Blue-ray player or any other video/audio signal source device).
Optical fiber cable is not robust physically compared to conventional copper cable
materials. Even though this cable is designed to be resistant to artificial strengths on
the cable, CLS-AOCH/xl / CP-AOCH/xl can be damaged if it is excessively pinched,
twisted or kinked when being installed and after being installed. Take care not to bend
or twist the cable tightly.
When CLS-AOCH/xl / CP-AOCH/xl is installed into the conduit, the fiber pulling
strength and the bending radius are the key conditions to safe installation of the cable.
Do not disassemble or modify the products, especially the HDMI connector head parts.
To install the CLS-AOCH/xl / CP-AOCH/xl:
1. Unpack the cable from the package with care and remove the cable tie.
2. Place the micro-HDMI (Type D) connector inside the Pulling Tool and close its cover.
Note that you can pull the cable either from the display side or the source side (as
shown in Figure 3
), but you have to make sure that the cable polarity is correct
(tagged Source if pulling the source side or Display if pulling the display side).
3. Attach the pulling cable to the Pulling Tool.
Figure 3: Attaching the Pulling Tool
4. Carefully install the cable (for example, in the wall or conduit or under the floor).