
User Manual


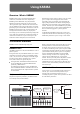


Table Of Contents
- About this manual
- Contents
- Introduction to KRONOS
- Front and rear panels
- Front panel
- 1. MAIN VOLUME knob
- 2. Control Surface
- 3. Data entry
- 4. DISK access indicator
- 5. MODE buttons
- 6. UTILITY buttons
- 7. BANK SELECT buttons
- 8. KARMA buttons
- 9. Vector Joystick
- 10. Drum Track
- 11. SW1 and SW2
- 12. Joystick
- 13. Ribbon controller
- 14. Headphone jack
- 15. EXIT button
- 16. SEQUENCER buttons
- 17. TEMPO controls
- 18. SAMPLING buttons
- 19. TouchView display
- Rear panel
- TouchView user interface
- Front panel
- Basic information
- Setup
- Update information
- Front and rear panels
- Playing and editing Programs
- Playing and editing Combinations
- Playing Combinations
- Easy Combination editing
- Detailed Combination editing
- Creating songs (Sequencer mode)
- Set Lists
- Sampling (Open Sampling System)
- Global Settings, Wave Seq., Drum Kits
- Loading & saving data, and creating CDs
- Using Effects
- Using KARMA
- Using the Drum Track
- Appendices
- Troubleshooting
- Error and confirmation messages
- A (ADC–Are You Sure)
- B (Buffer)
- C (Can’t calibrate–Completed)
- D (Destination–Disk)
- E (Error–Exceeded)
- F (File–Front)
- H
- I (Illegal–Index)
- K
- M (Master–Multisample)
- N (No data–Not enough song memory)
- O (Obey copyright rules–Oscillator)
- P (Pattern–Program)
- R (Rear sample–Root)
- S (Sample–Source)
- T (The clock–/TEMP folder detected)
- U (Unable to create directory–USB Hub)
- W (Wave)
- Y (You)
- Disk and Media information
- Specifications
- MIDI Implementation Chart

Using KARMA
230
Checking note-on/off and key zone
The screen shown below is a realtime display of the note
data received from the keyboard, pads 1–8, and MIDI IN,
and the note on/off data generated by the KARMA module,
together with the name of the chord that was detected.
1. Go to the Program P0: Play– KARMA GE page.
When you play the keyboard, the name of the chord detected
by the KARMA module will appear in the “Chord” field of
KARMA Module Info.
The CCs/Notes area shows the key zone of the KARMA
module, and the state of the control data and note on/off data
generated by the KARMA module. (See “Setting KARMA’s
keyboard zone” on page 236.)
Using the KARMA controllers
Note: The state of the KARMA controllers is saved when
you write the program.
KARMA on/off: ON/OFF switch
KARMA will turn on/off each time you press the ON/OFF
switch. If it is on, the switch LED will light. When you play
the keyboard, the GE selected for the KARMA module will
start generating a phrase or pattern.
Making the performance continue after you
remove your hand from the keyboard: the LATCH
switch
You can make KARMA continue playing even after you
remove your hand from the keyboard.
LED lit: Latch is on. The performance will continue even
after you remove your hand from the keyboard.
LED dark: Latch is off. The performance will stop when you
remove your hand from the keyboard.
Modifying the phrase or pattern generated by
the KARMA module: KARMA CONTROLS 1–8
sliders, KARMA SWITCHES 1–8, SCENE 1–8
switches
Parameters useful for controlling the phrase or pattern are
already assigned to the KARMA CONTROLS 1–8 sliders,
KARMA SWITCHES 1–8, and SCENE 1–8 switches. You
can operate these controllers to create a wide range of
changes in the phrase or pattern that’s playing.
1. Go to the Program P0: Play– KARMA GE page.
The lower part of the display shows the names of the sliders
and switches that are assigned in this program. In the pre-
loaded programs, the KARMA CONTROLS sliders and
KARMA SWITCHES have already been assigned.
2. Operate the front panel KARMA CONTROLS 1–8
sliders and KARMA SWITCHES 1–8.
The pattern or phrase will change accordingly.
You can also turn the switches on/off by pressing them in the
display. You can operate the sliders by selecting them and
then using the VALUE controller to adjust the value.
The type or value of the parameter being controlled by the
sliders and switches is shown in the KARMA Module Info
“KARMA Value” field. This lets you see how the parameters
are being affected by your slider or switch operations.
The saved value is shown at the lower right of each slider or
switch.