
Use and Care Manual
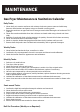

Gas Fryer Maintenance & Sanitation Calendar
Daily Tasks:
1. Clean the fryer's exterior surfaces with a damp cloth using warm water and mild soap.
Remove discolorations and grime using non-metallic scouring pads.
2. Empty the tank into an approved hot oil storage vessel while filtering the oil at about 275°F
(135°C).
3. Clean the crumbs and debris from the cold zone and tank walls using a brush and clean
cloth.
4. Refill the fry tank with fresh oil after testing it for quality. Discard old oil when necessary.
5. Clean and sanitize the area around the fryer.
6. Wash or wipe the basket hanging plate and clean the fry baskets and fryer rack.
7. Ensure these daily tasks are executed and reviewed by shift or general managers.
Weekly Tasks:
1. Clean behind and under the fryer, as well as its sides.
2. Confirm the fry vat temperature control is accurate and doesn't need calibration.
3. Check the burner flame for appearance and calibration.
Monthly Tasks:
1. Perform a fry tank boil-out.
2. Test fryer warm-up time.
3. Check the burner orifices and re-tune.
4. Run a burner test to confirm gas consumption is within 2% of the original value.
5. Inspect the burner baffles for condition and thickness; replace if necessary.
6. Have the unit inspected by a factory-trained service technician.
7. Inspect safety apparel, accessories, and fry baskets; replace elements showing excessive
wear or performance issues.
8. Validate the calibration of the thermometer used to calibrate the thermostat.
9. Use a clean-out rod to clear the drain and record the measured test results for future refer-
ence.
Semi-annual Tasks:
1. Confirm the high limit and pilot thermopile safeties are functional.
2. Clean the burner orifices and re-tune.
3. Run a burner test and confirm gas consumption.
4. Inspect the burner baffles, safety apparel, and accessories.
5. Replace elements showing excessive wear or performance issues.
6. Validate the calibration of the thermometer used to calibrate the thermostat.
7. Run a drain time test.
8. Record the measured test results for future reference.
Boil Out Procedure (Weekly or as Required):
1. Drain the tank as described under "Draining the Oil."
2. Flush out scraps and sediment using warm shortening and a tank brush. Drain thoroughly.
3. Close the drain valve and fill the tank with water.
4. Use a low-foaming cleaner/degreaser to clean the fry tank. Follow package instructions.
5. Add commercial boil-out solution to the tank (solution level between MIN and MAX tank
levels).
6. Set thermostat to recommended solution temperature (not exceeding 210°F). Simmer for
15-20 minutes.
7. Drain the cleaning solution.
8. Close the drain valve and refill the tank with water. Add 1 cup (1/4 L) of vinegar or citric acid
solution to neutralize alkaline residue (solution between MIN and MAX tank levels).
9. Drain the tank as described under "Draining the Oil."
10.Rinse the tank thoroughly with clear, hot water and ensure all traces of cleaner are removed.
Dry the tank thoroughly.
11.Close the drain valve and add shortening. Follow the "Filling the Tank with Shortening" proce-
dure in this manual.
The fryer is now ready for use.