
Universal Remote User Manual
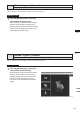
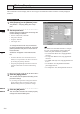

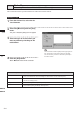

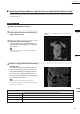
Table Of Contents
- Safety Symbols
- Notes on this Manual
- Trademarks
- About This Manual and Related Documents
- Safety Precautions
- Software Restrictions
- Notes On Use
- Notes On Storage
- Contents
- Conventions for Command Reference (Chapter 2)
- Chapter 1 Forward
- Chapter 2 Command Reference
- File Menu
- File – New
- File – Open
- File – Save – Elements
- File – Save – Scene
- File – Save as – Elements
- File – Save as – Scene
- File – Import – Elements
- File – Import – Digitizer – One Scan
- File – Import – Digitizer – Step Scan
- File – Import – Digitizer – One Scan
- File – Import – Digitizer – Step Scan
- File – Import – Digitizer – PC Card
- File – Import – Digitizer – PC Card
- File – Import – Digitizer – One Scan
- File – Import – Digitizer – Step Scan
- File – Import – Digitizer – PC Card
- File – Import – Digitizer – One Scan
- File – Import – Digitizer – Step Scan
- File – Import – Digitizer – Easy Align
- File – Import – Digitizer – PSC-1
- File – Export – Elements
- File – Export – Images
- File – Remove Elements
- File – Preferences
- File – Select Digitizer
- File – Exit
- View Menu
- Select Menu
- Edit Menu
- Build Menu
- Build – Registration – Initial – Manual
- Build – Registration – Initial – Auto
- Build – Registration – Fine – Elements
- Build – Registration – Fine – Points
- Build – Move – Points
- Build – Move – Elements
- Build – Move – To Origin
- Build – Move – To X-Y-Z
- Build – Rotate – Elements
- Build – Merge
- Build – Fill Holes – Manual
- Build – Fill Holes – Auto
- Build – Smooth – Element
- Build – Smooth – Points
- Build – Subsample – Uniformly – Element
- Build – Subsample – Uniformly – Points
- Build – Subsample – Adaptively – Element
- Build – Subsample – Adaptively – Points
- Build – Modify – Element
- Build – Modify – Points
- Build – Subdivision – Element
- Build – Subdivision – Points
- Build – Triangulate – Elements
- Build – Triangulate – Polygons
- Build – Texture Blending
- Build – Check Polygons – Element
- Build – Check Polygons – Polygons
- Info Menu
- Window Menu
- Tool Menu
- Pop-up Menus in Element View Window
- View Mode – Front/Right/Left/Back/Top/Bottom/Isometric/Perspective
- Rendering Mode – Wireframe/Shading/Texture Mapping/Wireframe+ Shading/Wireframe + Texture Mapping
- Show Vertex/Hide Vertex
- Show Normal/Hide Normal
- Show Axis/Hide Axis
- Smooth Shading/Flat Shading
- Select element from window
- Create clone window
- Close window
- Property
- Pop-up Menus in Element List
- Pop-up Menus in Image Window
- File Menu
- Chapter 3 Appendix
230
Chapter
2
Window
Menu
9i
910
900
700
300
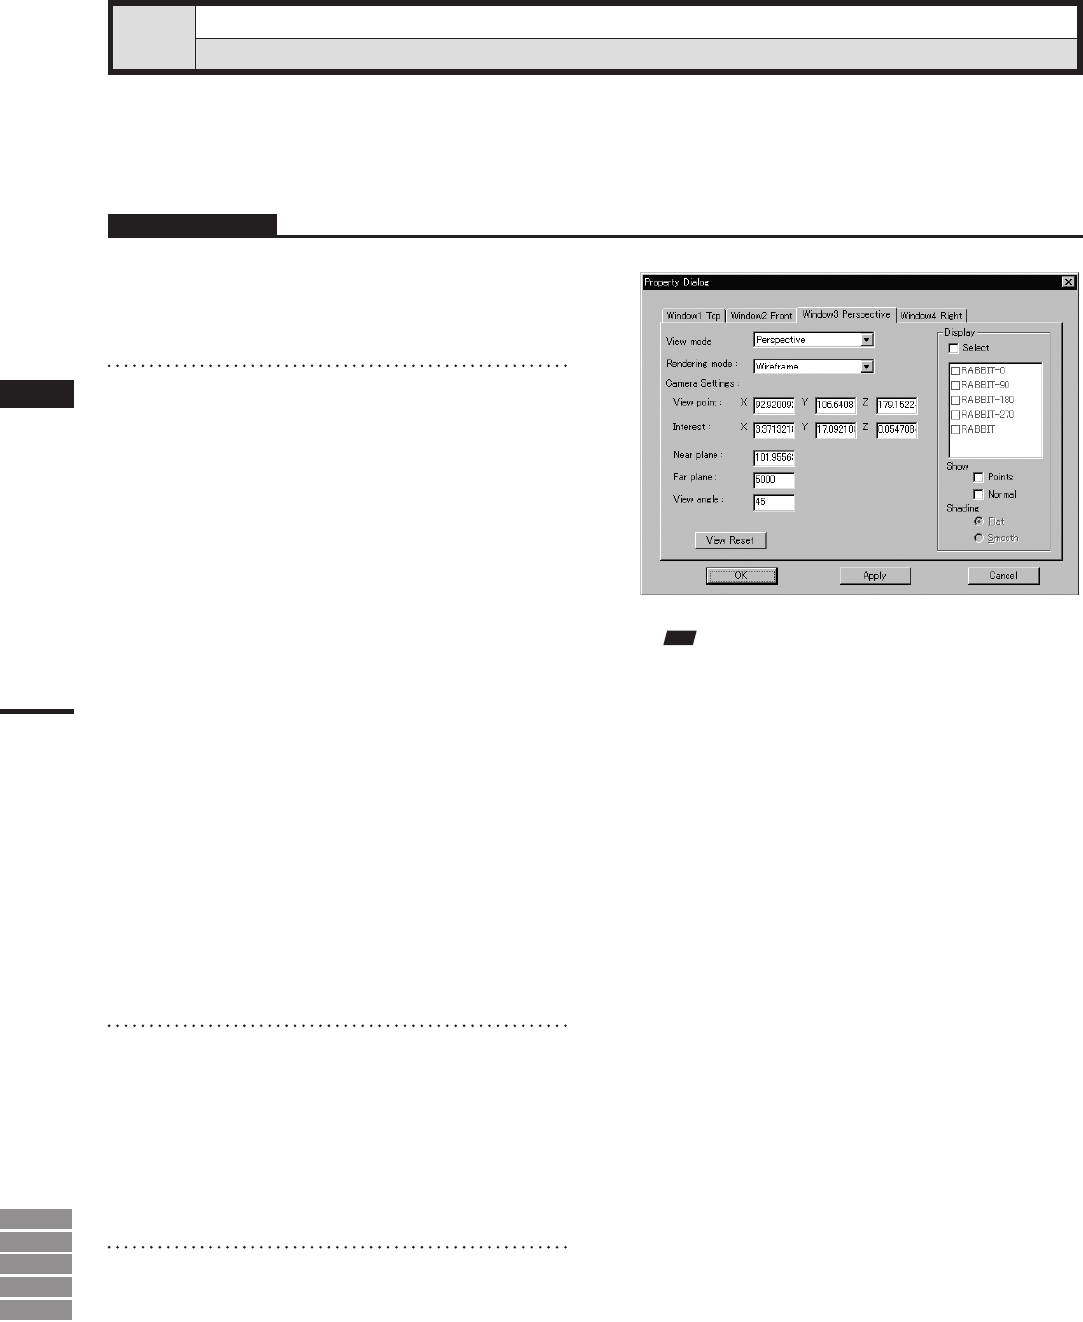
Window – Property
Displaying Window Properties
This command is used to display and set various types of information related to all the currently displayed
windows.
Operating Procedure
1
Click [Property] on the [Window] menu.
The [Window – Property] dialog box will ap-
pear.
2
Set the parameters.
Clicking the [View reset] button will change the
Camera Settings as follows:
• Interest: 0.000, 0.000, -1000.000
• Near plane: 500.000
• Far plane: 5000.000
• View angle: 45.0
To change the element for only the windows
for which parameters have been set, check the
[Select] checkbox and place a check mark for
those elements.
“Selective” will appear in the window’s title
bar.
Note
Forwindowviewsotherthan“Isometric”or“Perspec-
tive”view,itisnotpossibletoset[Viewangle]and
certain“Viewpoint”andInterest”parameters.
• For“Front”and“Back”views,only[Z]parameter
canbeset.
• For“Top”and“Bottom”views,only[Y]parameter
canbeset.
• For“Right”and“Left”views,only[X]parametercan
beset.
• For“Isometric”view,allparametersotherthan
[Viewangle]canbeset.
• For“Perspective”view,alltheparameterscanbeset.
• For those elements set in the element list to be
hidden, it is not possible to set them to be shown
by checking the [Select] checkbox.
• The [Flat] and [Smooth] radio buttons cannot be
selected if Wireframe is selected as Rendering
mode.
3
Click the [Apply] button.
The windows will be updated according to the
parameter settings
• If you change the parameter settings and click the
[Apply] button again, the windows will be up-
dated according to the new parameter settings.
4
Click the [OK] button.
This will conrm execution of window property
change and close the dialog box.