
Universal Remote User Manual
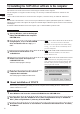
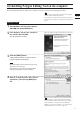

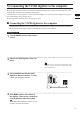
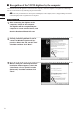
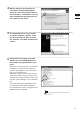
Table Of Contents
- Safety Symbols
- Notes on this Manual
- Trademarks
- About This Manual and Related Documents
- Safety Precautions
- Software Restrictions
- Notes On Use
- Notes On Storage
- Contents
- Conventions for Command Reference (Chapter 2)
- Chapter 1 Forward
- Chapter 2 Command Reference
- File Menu
- File – New
- File – Open
- File – Save – Elements
- File – Save – Scene
- File – Save as – Elements
- File – Save as – Scene
- File – Import – Elements
- File – Import – Digitizer – One Scan
- File – Import – Digitizer – Step Scan
- File – Import – Digitizer – One Scan
- File – Import – Digitizer – Step Scan
- File – Import – Digitizer – PC Card
- File – Import – Digitizer – PC Card
- File – Import – Digitizer – One Scan
- File – Import – Digitizer – Step Scan
- File – Import – Digitizer – PC Card
- File – Import – Digitizer – One Scan
- File – Import – Digitizer – Step Scan
- File – Import – Digitizer – Easy Align
- File – Import – Digitizer – PSC-1
- File – Export – Elements
- File – Export – Images
- File – Remove Elements
- File – Preferences
- File – Select Digitizer
- File – Exit
- View Menu
- Select Menu
- Edit Menu
- Build Menu
- Build – Registration – Initial – Manual
- Build – Registration – Initial – Auto
- Build – Registration – Fine – Elements
- Build – Registration – Fine – Points
- Build – Move – Points
- Build – Move – Elements
- Build – Move – To Origin
- Build – Move – To X-Y-Z
- Build – Rotate – Elements
- Build – Merge
- Build – Fill Holes – Manual
- Build – Fill Holes – Auto
- Build – Smooth – Element
- Build – Smooth – Points
- Build – Subsample – Uniformly – Element
- Build – Subsample – Uniformly – Points
- Build – Subsample – Adaptively – Element
- Build – Subsample – Adaptively – Points
- Build – Modify – Element
- Build – Modify – Points
- Build – Subdivision – Element
- Build – Subdivision – Points
- Build – Triangulate – Elements
- Build – Triangulate – Polygons
- Build – Texture Blending
- Build – Check Polygons – Element
- Build – Check Polygons – Polygons
- Info Menu
- Window Menu
- Tool Menu
- Pop-up Menus in Element View Window
- View Mode – Front/Right/Left/Back/Top/Bottom/Isometric/Perspective
- Rendering Mode – Wireframe/Shading/Texture Mapping/Wireframe+ Shading/Wireframe + Texture Mapping
- Show Vertex/Hide Vertex
- Show Normal/Hide Normal
- Show Axis/Hide Axis
- Smooth Shading/Flat Shading
- Select element from window
- Create clone window
- Close window
- Property
- Pop-up Menus in Element List
- Pop-up Menus in Image Window
- File Menu
- Chapter 3 Appendix
3)
InstallingtheASPIdriversoftwaretothecomputer
ThesoftwareusesSCSIastheinterfaceconnectingtheVIVIDandthecomputer.
ForthecomputertorecognizeVIVIDcorrectly,itisnecessarytoinstalltheASPIdriversoftwareonthe
computer.
*
EveniftheVIVIDwillnotbeconnectedtothecomputer,itisstillnecessarytoinstalltheASPIdriver.
Note
When Windows Vista or Windows 7 is used, it is necessary to install the driver software of the RATOC Systems Inc.’s USB2.0-Ul-
traSCSI converter U2SCX on the computer. Be careful not to install the Adaptec ASPI driver software, because it cannot control the
VIVID digitizer.
To install the USB2.0-UltraSCSI converter driver software, refer to “About installation of U2SCX” below.
Operating Procedure
1
Start up Windows, and set the Polygon
Editing Tool CD-ROM into the computer’s
CD-ROM drive.
2
Using Explorer, access the CD-92ROM
drive and double-click on “aspi_v***.
exe”.
Memo
The“aspi_v.exe”lestoresthedriverandinstalla-
tionsoftwareinself-compressedform.Double-clicking
on“aspi_v.exe”causestheletoautomaticallydecom-
pressintomultipleles.
3
Proceed to install the driver as de-
scribed below.
Memo
Aboutthedetailsofinstallation,refertothedecom-
pressed“Readme.txt”le.
4
Double-click on the decompressed
“ASPIINST.EXE” file.
The driver install program starts up.
Memo
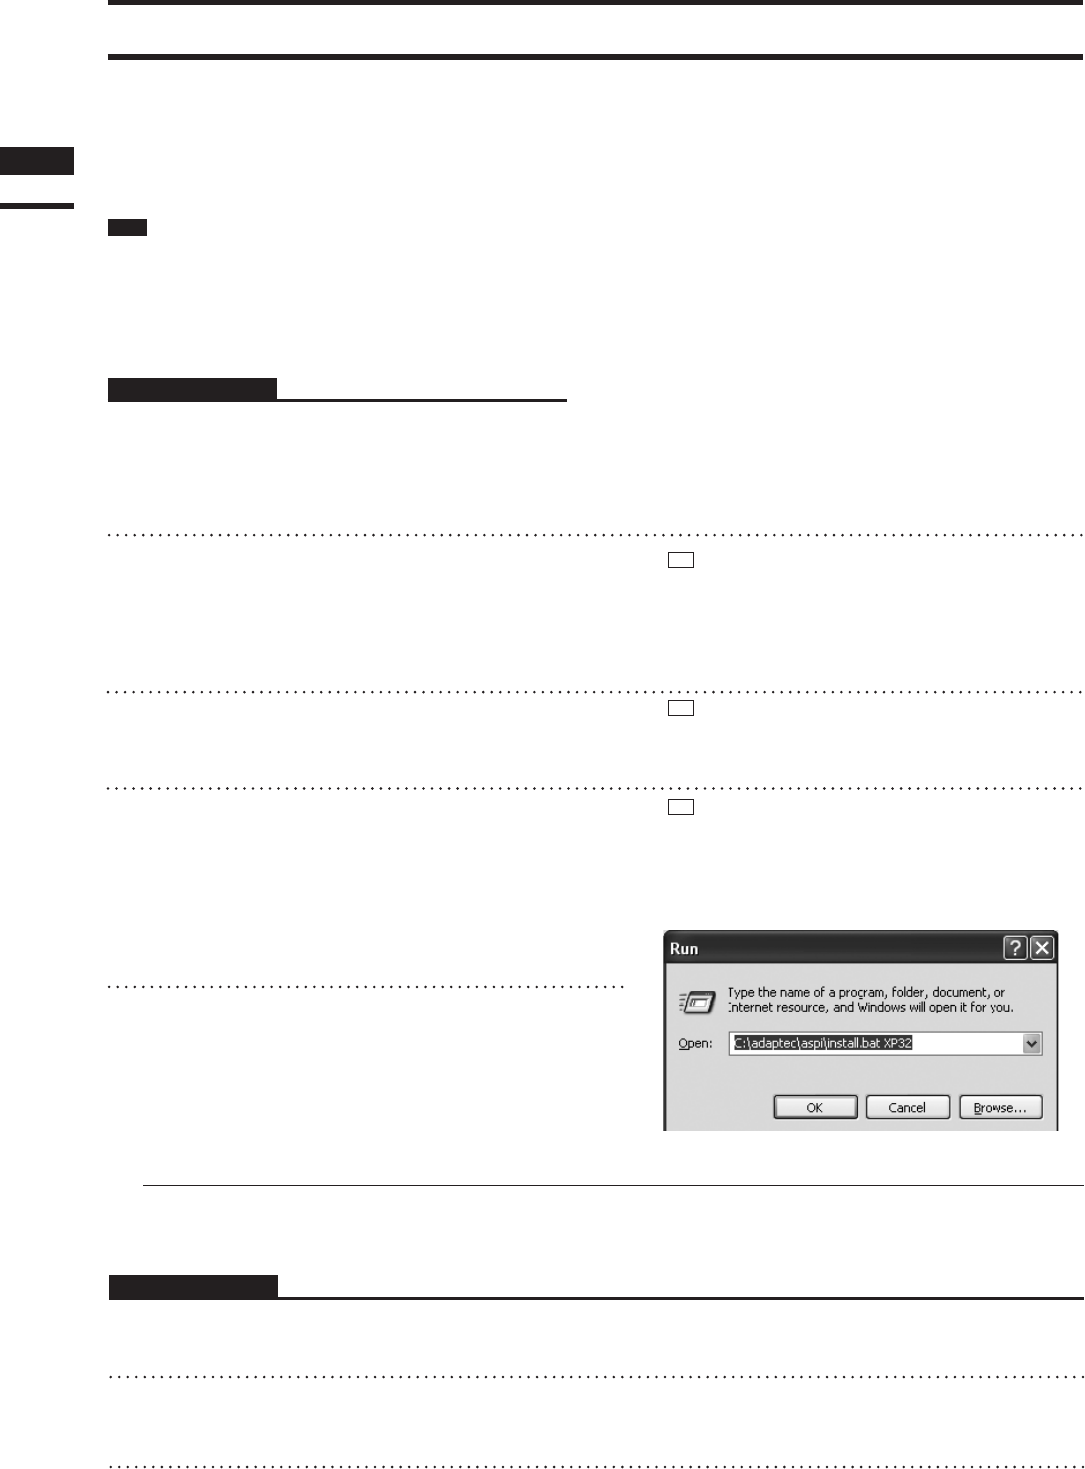
IfyouuseWindowsXP,select[Run]fromthe[Start]
menu,andthenrunthedecompressed“INSTALL.BAT”
leadded“XP32”parameterasfollowingdialog.The
install program starts to install.
5
Follow the instructions on the screen to
complete the installation.
The install program installs the ASPI driver.
Chapter
1
Preparations
nAboutinstallationofU2SCX
ItisnecessarytoinstallPolygonEditingToolonthecomputerbeforeinstallingthedriversoftwareofthe
USB2.0-UltraSCSIconverter.
Operating Procedure
1
Start Windows and insert the software CD-ROM into the CD-ROM drive.
2
From Explorer, open the “U2SCX for Vista” (when using Windows Vista) or “U2SCX for
Win7” (when using Windows 7 ) directory in the CD-ROM.
3
Proceed to install the driver as described on “Installation of Emulation Driver” in U2SCX_
InstallGuide.
10