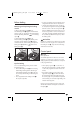
CV_KH1172_E4980_LB6.qxd 20.06.2008 10:03 Uhr Seite 1 6 AUTOMATIC BREAD MACHINE KH 1172 AUTOMATIC BREAD MACHINE Operating instructions KOMPERNASS GMBH · BURGSTRASSE 21 · D-44867 BOCHUM www.kompernass.com ID-Nr.
CV_KH1172_E4980_LB6.qxd 20.06.
IB_KH1172_E4980_LB6.qxd 20.06.2008 10:23 Uhr Seite 1 INDEX PAGE Safety instructions 2 Appliance Overview 3 Items supplied 4 Intended use 4 Technical data 4 Characteristics 4 Before the First Use 4 Before baking 5 Control panel 5 Functions of the Bread Baking Machine 7 Error Messages 8 Baking bread 8 Inserting the ingredients...................................................................................................................8 Inserting the baking mould ............
IB_KH1172_E4980_LB6.qxd 20.06.2008 10:23 Uhr AUTOMATIC BREAD MACHINE KH 1172 Seite 2 • Start a baking programme only when a baking mould is fitted in the appliance. • Do not place any objects on the appliance and do not cover it during use. Risk of fire! • NEVER lay aluminium foil or other metallic objects in the Bread Baking Machine. This could lead to a short circuit. Risk of fire! • NEVER use the appliance without a baking mould or with an empty one.
IB_KH1172_E4980_LB6.qxd 20.06.2008 10:23 Uhr CAUTION! Potential Appliance Damage! Seite 3 • DO NOT transport the Bread Baking Machine if the baking mould contains fluid or hot contents, e.g. jams. Risk of Burns! • During use, NEVER come into contact with the rotating kneading hook. • When not in use, and before cleaning the appliance, remove the power cable from the plug. • Always close the lid when the machine is in use. • Only use the appliance inside buildings.
IB_KH1172_E4980_LB6.qxd 20.06.2008 10:23 Uhr Items supplied Seite 4 Before the First Use Disposal of the packaging material Unpack your appliance, remove all transportation restrainers and dispose of the packaging material as per the current regulations for your locality.
IB_KH1172_E4980_LB6.qxd 20.06.2008 10:23 Uhr Before baking Seite 5 • To ensure an optimal rising result from the yeast, all ingredients should be at room temperature. • Measure the ingredients precisely. For this use, for example, the supplied measuring beaker w. With the scales on the measuring beaker w being in Milliliter (ml) and Ounces (oz) you can measure ingredients in various measurement units.
IB_KH1172_E4980_LB6.qxd 20.06.2008 10:23 Uhr Button - Browning Level With the Browning Level button you can determine the preferred level of browning: LIGHT MEDIUM -DARK . This function cannot be activated with the programmes 8. Dough and 9. Jam. Seite 6 Button - Programme selection Press the button Programme selection , to switch through the various programmes described in detail in the table "Programme time periods". Use the programmes for the following preparations: 1.
IB_KH1172_E4980_LB6.qxd 20.06.2008 10:23 Uhr Seite 7 8. Programme Dough (kneading) For the preparation of yeast dough for buns, pizza or plaits. In this Programme no baking is done. Functions of the Bread Baking Machine 9. Programme Jam For making jams, preserves, jellies and fruit spreads.
IB_KH1172_E4980_LB6.qxd 20.06.2008 10:23 Uhr Error Messages Seite 8 Inserting the baking mould Place the baking mould 4 slightly slanting on the drive shaft. Turn the baking mould 4 lightly in a clockwise direction, until it is sitting correctly in the baking space 0. (Marking “ LOCK” in the baking space 0). • If the display 7 shows "HHH" after the programme has been started, it indicates that the temperature in the Bread Baking Machine is still too high. Stop the programme and remove the power plug.
IB_KH1172_E4980_LB6.qxd 20.06.2008 10:23 Uhr Warning! Seite 9 Tip: If you remove the kneading hook q from the dough after the last kneading process, the bread will not be torn when removing it from the baking mould 4. For this, you must interrupt the baking programme.
IB_KH1172_E4980_LB6.qxd 20.06.2008 10:23 Uhr Seite 10 Warning! The Bread Baking Machine automatically regulates the baking temperature and time. Should the bread still be too light on completion of the baking programme, it can be after-baked using the programme Baking: Always use oven cloths or gloves to remove the baking mould 4 from the Bread Baking Machine.
IB_KH1172_E4980_LB6.qxd 20.06.2008 10:23 Uhr Cleaning and Care Seite 11 Important Warning! Before cleaning the appliance, ALWAYS remove the plug from the wall socket and allow the appliance to cool down completely. Protect the appliance against splashing water and moisture, these could cause you to receive an electric shock. Please also observe the safety instructions. Never submerse the baking mould 4 in water or other liquids. It could cause irreparable damage to the baking mould 4.
IB_KH1172_E4980_LB6.qxd 20.06.2008 10:23 Uhr Seite 12 Warranty and Service Importer You receive a 3-year warranty for this device as of the purchase date. The device has been manufactured with care and meticulously examined before delivery. Please retain your receipt as proof of purchase. In the case of a warranty claim, please make contact by telephone with our service department. Only in this way can a post-free despatch for your goods be assured.
IB_KH1172_E4980_LB6.qxd 20.06.2008 10:23 Uhr Seite 13 Programme time periods Bread size Clock timer (max.) 700 g 900 g 700 g 900 g 700 g 5 Fast 900 g 700 g 13 Std. 13 Std. 13 Std. 13 Std. 13 Std. 13 Std. 6 Gluten free 4 Sweet 3 Wholewheat 2 French 1 Basic Programme No. 900 g 700 g 900 g 700 g 900 g 13 Std. 13 Std. 13 Std. 13 Std. - Level of browning Signal tone insert ingredients Total time hours.
IB_KH1172_E4980_LB6.qxd 20.06.2008 7 Seite 14 11 Bake 10 Cake 9 Jam 8 Dough Express Programme No. 10:23 Uhr Bread size 700 g 900 g - - - - Clock timer (max.) - - 13 Hrs. - 13 Hrs - Level of browning - - Signal tone insert ingredients - - Total time hours. - - 0:59 1:15 1:30 1:20 1:28 1:00 All of the following time details in minutes Knead 1 11 20 - 15 - - - 15 8 - Signal tone - - - - Time details in the display ap- approx. prox.
IB_KH1172_E4980_LB6.qxd 20.06.2008 10:23 Uhr Seite 15 Troubleshooting the Bread Baking Machine What do I do if the kneading hook q is stuck in the baking mould 4 after baking? • Fill the baking form 4 with hot water and twist the kneading hook q to loosen the encrustation underneath. What happens if the finished bread is left inside the bread maker? • Through the „Keep-warm function“ it is ensured that the bread is kept warm for approx. 1 hour and is also protected against moisture.
IB_KH1172_E4980_LB6.qxd 20.06.2008 10:23 Uhr Seite 16 What do I do if smoke comes from the baking space 0 or the ventilation slots 6? • Remove the power plug immediately! Allow the appliance to cool down, then remove the baking mould 4. Clean the exterior of the baking mould 4 as well as the baking space 0, as the smoke was probably caused by food residues. Should there be no food residues in the baking space 0 or on the exterior surfaces of the baking mould 4, do not switch the appliance back on.