
Owner's manual
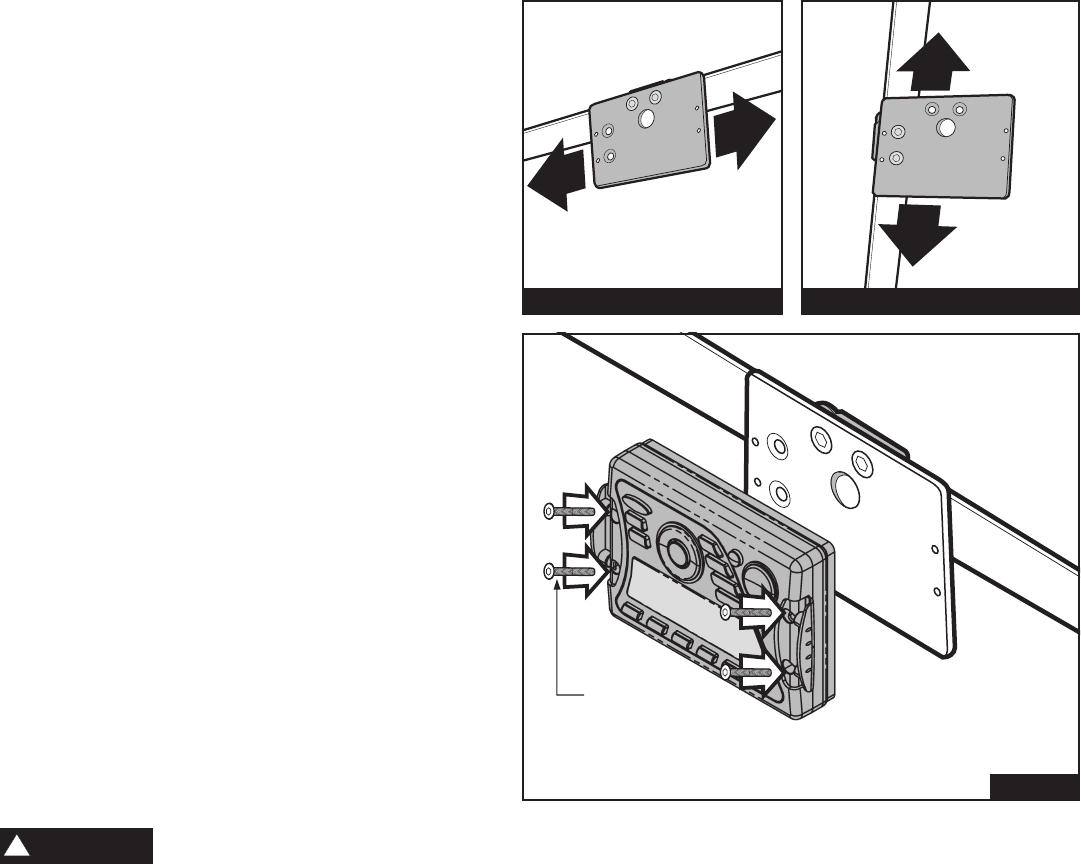
Once the mounting plate is secure, slide the bracket along
your vehicle’s roll cage until the commander is in your
desired location as indicated in. Images “4.1” and “4.2”.
Be certain the commander is easily accessible, but does
not interfere with the driver’s visability.
d) Once you have reached your desired location, finish
tightening the bracket hardware. Do not overtighten the
T-handles as this will cause them to break the mounting
brackets.
e) Thread the commander’s wire harness through the large
hole of the mounting plate. Fasten the commander to the
mounting plate by peeling back the two rubber flaps on
both sides of the unit and using the supplied M3 x 25mm lg.
phillips flat-head style machine screws as indicated in
Image “5”.
2) Mounting the Tuner/Amplifier to your UTV
When choosing a mounting location for the tuner/amplifier, take
into consideration wire lengths, ventilation, and protection from
the elements. Please Note: It is necessary to follow the
manufacturer’s specific installation instructions when mounting
the tuner/amplifier. These are located with the stereo unit.
3) Mounting the Dual Speaker to your UTV
When choosing a mounting location for the Dual Speaker, take
into consideration wire lengths, ventilation, and protection from
the elements. Please refer to the installation instructions
located with the Dual Speaker before mounting.
Maintenance and Care: Tighten all hardware after first use and
periodically thereafter.
Failure to follow these installation instructions completely may void any warrantable components and result in
property damage or personal injury. NEVER operate or transport UTV with unsecured cargo.
For additional assistance, please contact our customer service department at:
Kolpin Outdoors, Inc. | 205 N. Depot Street| | Fox Lake, WI 53933 | 1.877.956.5746 | customerservice@kolpin.com
WARNING
!
Top Mounting – Image 4.1 Side Mounting – Image 4.2
M3 x 25mm
Phillips Flat-Style
Machine Screw
Image 5