
User's Guide
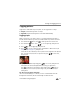


Table Of Contents
- KODAK EASYSHARE Z981 Digital Camera
- Product features
- Table of contents
- Setting up your camera
- Taking pictures/videos
- Taking pictures in Smart Capture mode
- Taking a video
- Adjusting LCD brightness
- Capture modes
- Using the zoom
- Using the flash
- Using the Drive button
- Using the Focus button
- Taking panoramic pictures
- P, A, S, and M modes
- Using exposure compensation to adjust brightness
- Using the histogram to view picture brightness
- Understanding the picture-taking icons
- Know when your batteries need charging
- Sharing and tagging pictures
- Reviewing and editing
- Reviewing pictures/videos
- Deleting pictures/videos
- Viewing pictures/videos in different ways
- A smarter way to find your pictures
- Understanding the review icons
- Creating a multimedia slide show
- Using the menu button in review
- Selecting multiple pictures/videos
- Cropping pictures
- Copying pictures/videos
- Using KODAK PERFECT TOUCH Technology
- Using the RAW Develop feature
- Editing videos
- Doing more with your camera
- Transferring, printing pictures
- Troubleshooting
- Appendix
- Index

Sharing and tagging pictures
www.kodak.com/go/support
27
Using the keyboard
The keyboard appears when you need to add names or keywords.
1 Press to choose a letter, then press OK.
2 When finished, press to choose OK, then press OK.
3 If you’ve added a new name, the camera prompts you to update all faces to match
assigned names. Choose Yes, then press OK.
The name is assigned to all faces that match this one.
Tip: Here’s another way to update pictures so that faces are matched to names:
1 Press the Review button.
2 Press the Menu button. Press to choose Tag People, then press OK.
3 Press to choose Update People Tags, then press OK.
Marking pictures/videos for emailing
It’s simple to mark pictures so that they’re ready to email when you transfer them to
your computer. First, create a new email address. (See Using the keyboard.)
1 Press the Review button. Press to find a picture.
2 Press the Share button.
3 Press to choose Email, then press OK.
4 Press to find an email address, then press OK.
To mark other pictures/videos with the same address, press , then press OK.
To send the pictures/videos to more than one address, repeat step 4.
To return to picture-taking mode, press the Shutter button halfway down.
When you transfer the marked pictures/videos to your computer, the software prompts
you to send the pictures/videos. (For other software applications, refer to their
documentation.)
To access your camera’s Help system, see page 50.