
Use and Care Guide


24
OPERATING INSTRUCTIONS
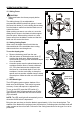
g. Attach the battery pack to the saw.
h. Pull out the arm-lock pin to release the saw arm.
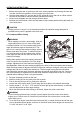
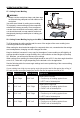
i. Place the work piece at on the miter table with
one edge securely against the fence. If the
board is warped, place the convex side against
the fence. If the concave edge of the board is
against the fence, the board could collapse on
the table at the end of the cut and jam the blade
(see Cutting Warped Material).
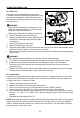
j. Turn on the LED light switch (C) and align the
pencil line with the blade’s shadow line.
k. Use the work clamp (2) to secure the work piece
against the saw table and fence.
l. When cutting a long work piece, use a block
(not supplied) to support the work piece.
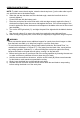
WARNING
• To avoid serious personal injury, always securely
tighten the miter-control lever before making a
cut. Failure to do so could result in movement of
the control arm or miter table while making a cut.
• Never use another person as an additional
support for a work piece that is longer or wider
than the basic saw table, or to help feed, support,
or pull the work piece.
• To avoid serious personal injury, always keep
hands outside of the “No-Hands Zone”, as
marked on the saw base, or at least 3” (7.6 cm)
away from the blade. Never perform any cutting
operation “freehand” (i.e., without holding the
work piece against the fence), because the blade
could grab the work piece, causing it to slip and twist.
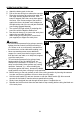
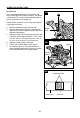
m. Before turning on the saw, perform a test of the cutting operation by lowering the saw arm
to make sure that no problems will occur when the cut is made.
n. Hold the main handle (R) and turn the saw on with the ON/Off switch (B). Allow several
seconds for the blade to reach maximum speed before cutting.
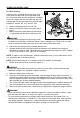
o. Slowly lower the blade into and through the work piece. Complete the cut.
p. Release the On/Off switch. Allow the saw blade to stop rotating before raising the blade out
of the work piece.
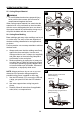
21a
straight crosscut
2
P
21b
miter crosscut
2
P