
Use and Care Guide


12
ASSEMBLY INSTRUCTIONS
This product requires assembly.
WARNING
• If any parts are damaged or missing, do not operate this tool until the missing parts are
replaced. Failure to heed this warning could result in serious personal injury.
• Always make sure that the miter saw is securely mounted to a workbench or an approved
work stand. Failure to heed this warning can result in serious personal injury.
• Battery tools are always in operating condition. Therefore, ALWAYS remove the battery
pack from tool before making any adjustments or installing accessories. Failure to heed this
warning could result in accidental starting, which can cause serious personal injury.
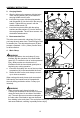
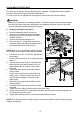
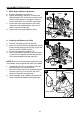
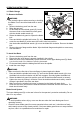
1. Mounting Holes
The miter saw should be mounted to a rm
supporting surface, such as a workbench. Four
large bolt holes have been provided in the saw
base for this purpose.
Each of the four large mounting holes (J) should
be bolted securely using M10 machine bolts, lock
washers, and hex nuts (not included). Bolts should
be of sufcient length to accommodate the saw
base, lock washers, hex nuts, and the thickness of
the workbench.
Tighten all four bolts securely.
The other smaller mounting holes are for use with
nails or screws. The nails or screws should have
sufcient length to secure the saw.
The hole pattern for mounting to a workbench is shown in Fig. 1. Carefully check the
workbench after mounting to make sure that no movement can occur during use. If any tipping,
sliding, or walking is noted, secure the workbench to the oor before operating.
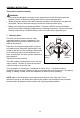
NOTE: Many of the illustrations in this manual show portions of the miter saw. This is
intentional so that we can clearly show points being made in the illustrations. Never operate
the saw without all guards securely in place and in good operating condition.
1
Mounting
Holes
Mounting
Holes