Kameleon HDP6000 1080p DLP™ Projector Users‟ Manual v1.
FCC Warning Note: This equipment has been tested and found to comply with the limits for a Class B digital device, pursuant to part 15 of the FCC Rules. These limits are designed to provide reasonable protection against harmful interference in a residential installation. This equipment generates, uses and can radiate radio frequency energy and, if not installed and used in accordance with the instructions, may cause harmful interference to radio communications.
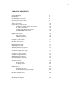
TABLE OF CONTENTS Safety Warnings Introduction Positioning the projector Choosing the aspect ratio 4 5 8 9 Video connectors Connecting a video device Composite (RCA) video connection S-video connection Component (RCA) connection SCART RGB connection 10 10 10 10 10 10 Digital connections DVI connection HDMI connection 10 10 10 Computer connections RS-232 connections 11 11 Displaying an image Adjusting the image Shutting down the projector 11 11 12 Troubleshooting your setup 13 Using the remote
Important Operating Considerations for Safety Refer to this guide for proper startup and shutdown procedures. • Follow all warnings and cautions in this manual and on the projector. • Place the projector in a horizontal position no greater than 8 degrees off axis. • Locate the projector at least 4' (1.2m) away from any heating or cooling vents. • Do not block ventilation openings. Locate the projector in a well ventilated area without obstructions to intake or exhaust vents.
Unplug this projector from the wall outlet and refer servicing to qualified service personnel under the following conditions: • When the power cord or plug is damaged or frayed • If liquid has been spilled into the projector • If the projector has been exposed to rain or water • If the projector does not operate normally by following the operating instructions.
S-Video Power HDMI RS232 VGA Rear Connector Panel USB 12 VDC triggers Composite video Component video Wired remote The projector provides the following connection options: • VGA computer. • Two HDMI™ (High Definition Multimedia Interface) • Three Component Video (RCA) • S-video • Composite video (RCA) • USB port The projector also provides the following connectors: • RS-232 for serial control • 12-volt DC output (see below) Three 12-volt DC outputs The 3.
Setting up the Projector There are a number of factors to consider when determining where to set up the projector, including the size and shape of your screen, the location of your power outlets, and the distance between the projector and the rest of your equipment. But here are some general guidelines. NOTE: To ensure adequate cable access, do not place the projector within 6 inches (0.15 m) of a wall or other object.
Projector Positioning The projected image becomes larger as the distance between the unit and screen increases. The manual zoom allows the distance from the screen to be within a minimum and maximum range. See the chart on the next page for details. The example below defines the screen height, width, diagonal, etc. HDP6000 Projection Throw Distance 16:9 Video Screen: Screen Diagonal 92" 103" 106" 110" 122.5" 146.
Choosing the aspect ratio Aspect ratio is the ratio of the image width to image height. HDTV and most DVDs are 16:9, which is the default for this projector. When in 4:3 mode the projector places black bars on both sides of the image. Native mode centers the image and turns off the internal scaler so that any resolution larger than the native projector resolution is cropped on the edges. Letterbox expands the image to fill the screen.
Connecting a video device You can connect video devices such as VCRs, DVD players, camcorders, digital cameras, video game consoles, HDTV receivers, and TV tuners to the projector. Connect the audio from your video device to your stereo system to get sound. You can connect the projector to most video devices that can output video. You cannot directly connect the coaxial cable that enters your house from a cable or satellite company; the signal must pass through a tuner first.
Computer connections You can connect a computer‟s VGA connector to the VGA input on the projector using a VGA cable. RS-232 connections You can control the projector from an LCD control panel or computer by connecting an RS-232 cable to the projector‟s Serial control connector. Displaying an image Connect the power cord to the Power connector cord on the back of the projector and to your electrical outlet. plug in power NOTE: Always use the power cord that shipped with the projector.
Adjust the focus and zoom. If the image is square but not centered adjust it using the lens shift dials. adjust focus adjust zoom horizontal lens shift vertical lens shift Rotate the elevator feet if needed for granular adjustment of the projector‟s height. Avoid placing your hands near the hot exhaust vent at the side of the projector. Adjust the Contrast or Brightness in the Basic Picture menu. Adjust the volume on your stereo receiver.
Troubleshooting your setup If your image appears correctly on the screen, skip to the next section. If it does not, troubleshoot the setup. The LED on top of the projector indicates the state of the projector and can help you troubleshoot. The status indicator on the top of the projector can help you diagnose any problems the projector is experiencing.
The following tables show common problems. In some cases, more than one possible solution is provided. Try the solutions in the order they are presented. When the problem is solved, you can skip the additional solutions. Problem No startup screen Solution Plug in power and press the power button. Only start up screen appears Press the start button and activate the laptops external port.
Still need assistance? If you need assistance, visit our website at www.knollsystems.com, or call us at 1 800 566 5579. during Pacific west coast time. This product is backed by a limited warranty. An extended warranty plan may be purchased from your retailer or dealer. When sending the projector in for repair, we recommend shipping the unit in its original packing material, or having a professional packaging company pack the unit. Please insure your shipment for its full value.
Using the keypad buttons Most buttons are described in detail in other sections, but here is an overview of their functions: Power–turns the projector on and off (page 12). Auto Image–resynchronize the projector to the source. Presets–cycles through the available preset settings. Menu–opens the onscreen menus. Select–confirms choices made in the menus. Up/Down/Left/Right arrows–navigates to and adjusts settings in the menus. Source–changes the active source.
Optimizing video images Your projector has been factory optimized for very good performance no matter what the source. However, if you wish to make further changes you can optimize the image using onscreen menus. • Adjust the Keystone, Contrast, Brightness, Color, or Tint in the Picture menu. • Select a Sharpness setting. • Use the Color Control to adjust the color gain and offset. • Adjust the Color Temperature. Select a listed value. • Turn on Overscan to remove noise on the edges of the video image.
The menus are grouped by usage: • • • • The Basic Picture menu provides common image adjustments. The Advanced Picture menu provides more complex image adjustments. The Setup menu provides set-up type adjustments that are not changed often. The Status and Service menu provides information about the projector and source. Basic Picture menu To adjust the following settings, highlight the setting, press select, use the arrow buttons to adjust the values, then press Select to confirm the changes.
Advanced Picture menu BrilliantColor™: Produces an expanded onscreen color spectrum that delivers enhanced color saturation for bright, true-to-life images. Choose Normal Look for most video sources and Bright Look for most computer sources. Iris/DynamicBlack: Select Auto to constantly adjust the aperture based on the amount of black in the current scene, or select a percentage for a fixed aperture size (100% is maximum size). Color Temperature: Changes the intensity of the colors.
Setup menu Language: Allows you to select a language for the onscreen display. Key Click: Turns the key click sound on or off. When this setting is on, pressing keys on the keypad causes the projector‟s speaker to play a “click” sound. Custom Key: Allows you to assign a different function to the Custom button, allowing you to quickly and easily use the effect. Highlight an effect and press Select to choose a different one. • • • • • • • • • • Source Info: The default action. Shows the Source Info menu.
Video Standard: When this feature is set to Auto, the projector attempts to automatically pick the video standard based on the input signal it receives. (The video standard options may vary depending on your region of the world.) If the projector is unable to detect the correct standard, the colors may not look right or the image may appear “torn.” If this happens, manually select a video standard by selecting NTSC, PAL, or SECAM from the Video Standard menu.
Help Press Help (on the keypad or remote) at any time to get interactive help for solving common, picture, sound, and cabling problems. NOTE: The projector can be re-programmed to display a custom (non- interactive) screen when Help is pressed. To do this: Create your custom screen on a computer and display it on the projector, then use the Take Snapshot command in the Setup menu. When you see the Snapshot Successful message, hold down the Help button until the message is removed.
WARNINGS • • • • • • • • • The projector uses a high-pressure mercury glass lamp. The lamp may fail prematurely, or it may rupture with a popping sound if jolted, scratched, or handled while hot. The risk of lamp failure or rupture also increases as the lamp age increases; please replace the lamp when you see the “Replace Lamp” message. To avoid burns, allow the projector to cool for at least 60 minutes before you replace the lamp. Unplug the power cord before replacing the lamp.
RS-232 terminal specifications Communication configuration To control the projector from and LCD control panel, connect RS-232 cable to the serial control connector on the projector and set your computer‟s serial port settings to match this communication configuration. Setting Value Bits per second Data bits Parity Stop bits Flow control Emulation 115,200 8 None 1 None VT100 RS232 COMMAND FORMAT All commands consist of 3 alpha characters followed by a request, all enclosed in parentheses.
Function Command Response Brightness (BRT10) Sets brightness to 10 Power (PWR0) Turns power off Power (PWR1) Turns power on Error Conditions Not all commands are supported for all projectors. If an unsupported command is issued, the command will be ignored. If a command is received that is not understood, a „?‟ character will be returned indicating the command was not understood. Limitations The projector cannot respond to commands coming in at a high-rate.
SplitScreen Compatibility SplitScreen allows two distinct sources to be displayed simultaneously. Switch primary sources, make picture adjustments and choose one of multiple display options: either two side by side horizontal or vertical source regions or a small secondary source image displayed on top of the primary source in one of four placement options lets you show two different sources at the same time.
LIMITED WARRANTY Knoll Systems, Inc. (“Knoll”) warrants that each HDP6000 (“the Product”) sold hereunder will conform to and function in accordance with the written specifications of Knoll. Said limited warranty shall apply only to the first person or entity that purchases the Product for personal or business use and not for the purpose of distribution or resale. Said warranty shall continue for a period of two (2) years from the date of such purchase.