
Manual

20
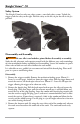
Safety System
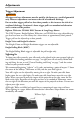
The Knight Vision has only one safety system, a cross-bolt safety system� To lock the
trigger, push the safety to the right� Push the safety to the left, to put the rifle in the fire
position�
Fire
Safe
Disassembly and Assembly
WARNING
!
Be sure rifle is not loaded or primed before disassembly or assembly.
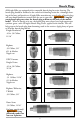
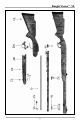
Study the rifle schematic and acquaint yourself with the different parts and terminology
of your muzzleloader before assembling or disassembling� Letters and numbers in paren-
theses refer to labels on each rifle schematic for each model�
It is advisable to use a padded vise to remove and reinstall the breech plug� Place small
parts in a pan to avoid losing them�
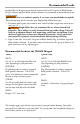
Disassembly
1� Remove the trigger assembly� Remove the mechanism locking screw (Photo #1 -
Letter A, see next page) found just above the trigger safety� Pull the trigger down and
out of the receiver; the break-open release lever (Photo #1 - Letter B) will open the
trigger, allowing the trigger to be taken out easily�
2� Remove the breech plug� Pull the break open latch to open the rifle and expose the
breech plug� With your finger, pull the extractor toward you, it will fold down and
out of the way of the plug opening� Insert the combo tool (breech plug wrench side)
into the receiver, engage the plug (part I) and turn it counterclockwise until it slides
out of the receiver� If more force is required, a hole in the combo tool allows for the
use of a rod for added leverage� Put the plug in a jar of Knight solvent for a few min-
utes while cleaning the barrel�
3� Remove the forearm stock� By using the screw drive end of the combo tool, take out
the stock screw located on the underside of the stock� The stock and barrel easily
separate�
Knight Vision™ .50