
Manual

25
WARNING
!
Be sure the rifle is not loaded or primed before disassembly or assem-
bly. Always check the chamber for shells or breach plug for the presence of a priming
devise. Using the ramrod, ensure that there is no projectile or powder charge loaded
on all muzzleloaders.
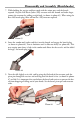
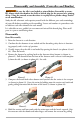
Study the rifle schematic and acquaint yourself with the different parts and terminology
of your rifle before assembling or disassembling. Letters and numbers in parentheses refer
to labels on each rifle schematic for each model.
It is advisable to use a padded vise to remove and reinstall the breech plug. Place small
parts in a pan to avoid losing them.
Disassembly
Barrel Disassembly
1. Point the firearm in a safe direction.
2. Confirm that the hammer is not cocked and the decocking safety device is function-
ing properly and is in the safe position.
3. Visually inspect that the rifle is not loaded by opening the breech (see photos #3 and
#4). Close the breech.
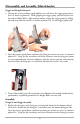
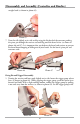
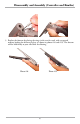
4. Remove the forearm by pushing back on the forearm release button (as shown in
photo #1). Pull downward on the front of the forearm until it releases itself complete-
ly from the rifle (as shown in photo #2). Set aside.
Photo #1 Photo #2
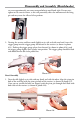
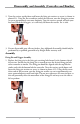
5. Compress the breach lock release button until you feel that the action is free to open
(as shown in photo #3). Open the action by holding onto the receiver and stock and
gently pulling downward on the front of the barrel (as shown in photo #4).
Photo #3 Photo #4
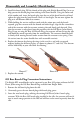
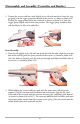
6. Hold the receiver and butt stock with the action open and the breach exposed. Grip
the extractor with the thumb and index finger, and remove the extractor by pulling
Disassembly and Assembly (Centerfire and Rimfire)