
Manual

11
Preparing to Load
WARNING
!
To reduce the risk of accidental discharge, perform the
following checks:
1. Confirm that all safeties are functioning properly and are in the safe position.
2. Check that there is no primer, either live or spent, installed.
3. Place the rifle butt on the ground, remove the ramrod, and place it in the bore. If the
ramrod tip is near flush with the muzzle, the rifle is unloaded and the bore free from
obstruction. Remove the ramrod from the barrel.
After your rifle has been cleaned and oiled, you must clear the breech plug firing hole of
any oil and debris prior to use. This is done as follows:
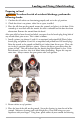
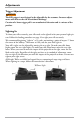
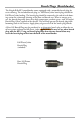
1. Install a primer (see photos #1 and #2, an unprimed and primed Full Plastic Jacket
breech plug and photos #3 and #4, an unprimed and primed bare 209 breech plug).
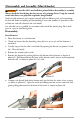
Point the muzzle at the ground and hold 4 to 6 inches from dirt or grass. Place safe-
ties in the fire position and fire a primer. Observe the dirt or grass move when the
primer is fired. This will indicate that the breech plug flash channel is clear. If the
flash channel is not clear, clear it of debris before proceeding. Repeat this step one
more time. Always remove the spent primer after each ignition.
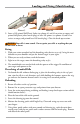
Photo #3 Photo #4
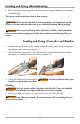
Photo #5 Photo #6
2. Return safeties to safe position.
3. Place the butt of the rifle on the ground. Screw the cleaning jag into the end of the
ramrod. Moisten a cleaning patch with Knight Easy Clean and wring any excess
liquid out with your fingers. Using short, quick strokes of your ramrod and cleaning
Loading and Firing (Muzzleloading)