
User guide
MCP-3631 Series 1 Installation Guide
Installation Guide
Rotary Pneumatic Damper Actuators
MCP-3631 Series
Mounting
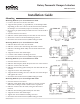
Mounting Method #1, for 1/2-inch diameter shas
1. Locatea3/16-inchcross-holeinthesha.
2. Align the hole parallel, or perpendicular, to the damper blade
depending on how the actuator will be mounted and whether
the damper is to be Normally Open or Normally Closed.
3. Insertdrivepin(HLO-1008)andslideactuatorontotheshato
engage.
4. Note the direction of rotation.
5. Slidetheretainer(HLO-1009)ontotheshatolockactuator.
6. Rotate the actuator to the desired damper position.
7. Installtheanti-rotationbracket(HMO-1003)provided.
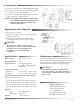
Mounting Method #2, for 1/2-inch diameter shas
1. SlidetheHLO-1016collarontothesha.
2. Slidetheactuatorontoshanotingdirectionalrotation.
3. Slidedrivebushing(HLO-1006)ontotheshaandintothe
actuator.
4. Align the actuator with the damper.
5. Lockthecollaranddrivebushingsetscrews.
6. Installtheanti-rotationbracket(HMO-1003)provided.
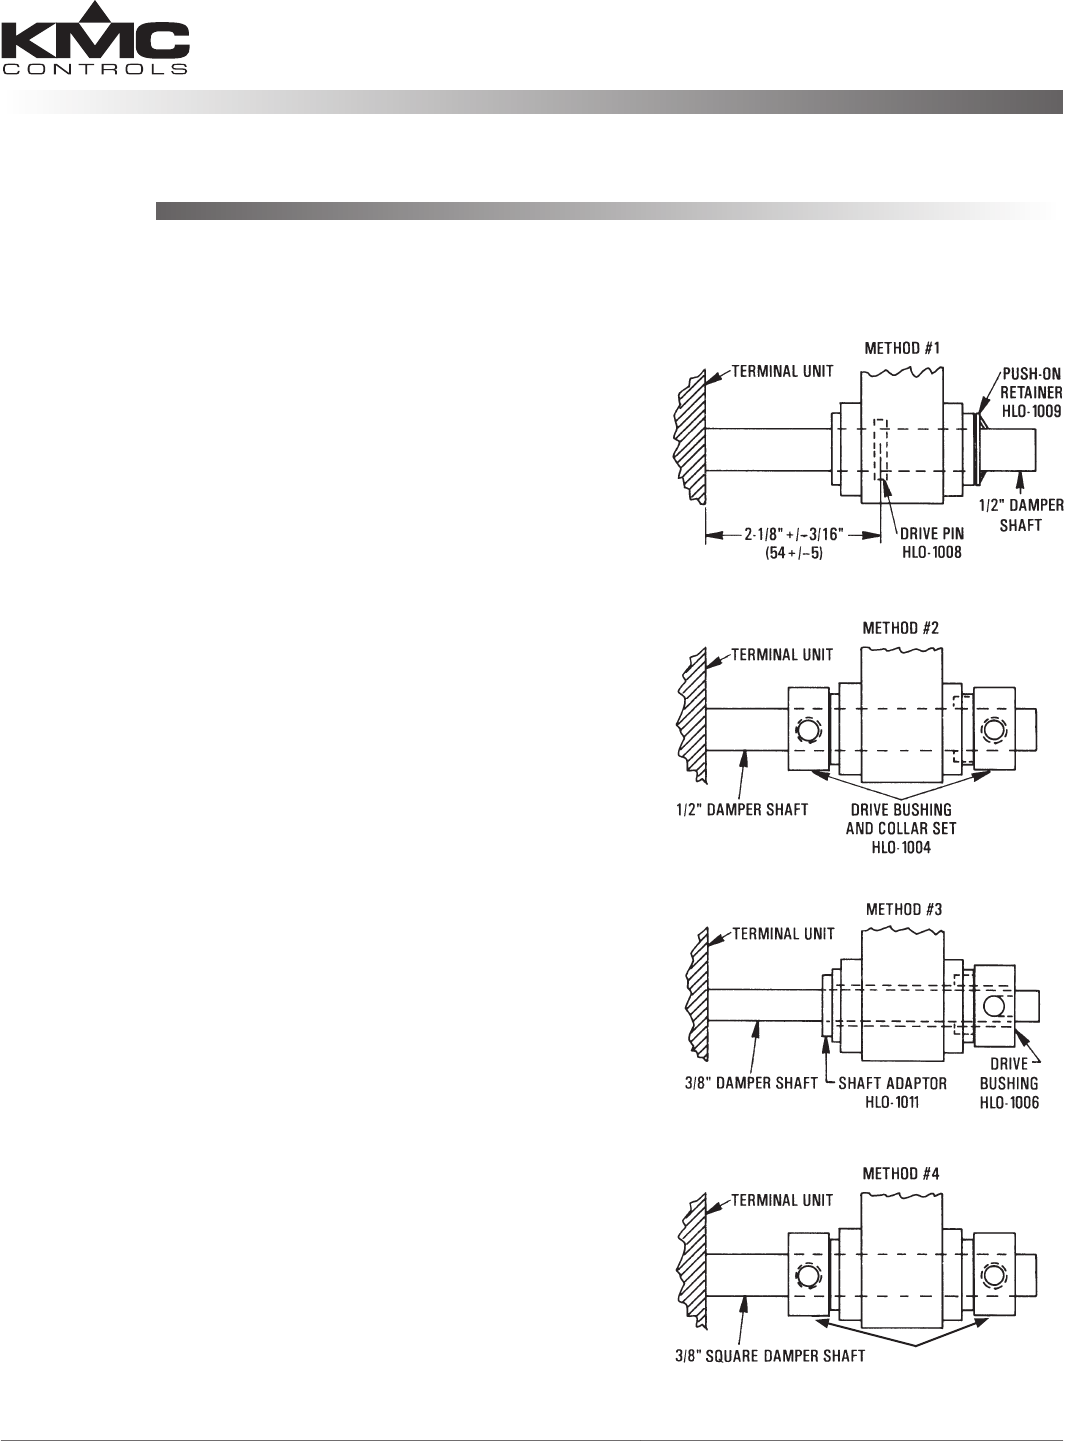
Mounting Method #3, for 3/8-inch diameter shas
1. Note the direction of rotation.
2. Slidetheshaadaptor(HLO-1011)intotherearoftheactuator.
3. Slidetheactuatorontothesha.
4. Slidethedrivebushing(HLO-1006)ontotheshaandintothe
actuator.
5. Align the actuator with the damper.
6. Align the drive bushing setscrews with the slots in the adaptor
and tighten the screws.
7. Installtheanti-rotationbracket(HMO-1003)provided.
Mounting Method #4, for 3/8-inch SQUARE shas
1. Note the direction of rotation.
2. Slidethecollar(HLO-1016)ontoshaorcorrectlyposition
HLO-1009ondampershatoholdactuatorinposition.
3. Slidetheactuatorontothesha,notingthedirectional
rotation.
4. Slidethedrivebushing(HLO-1006)ontothesha.
5. Align the actuator with the damper.
6. Tighten the collar and drive bushing setscrews.
7. Installtheanti-rotationbracket(HMO-1003)provided.
(Includes HLO-1006 and HLO-1016)
(HLO-1006)(HLO-1016)
BUSHING HLO-1016