
Product Manual

Page 19 of 25
⚠CAUTION
Be aware that the TIG torch will be electrically HOT when the Input Power Switch on the welder is
turned ON.
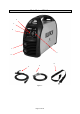
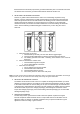
1. Remove the ground cable and the electrode holder from the weld output connections. Install
the ground cable to the positive (+) weld output connection.
2. Secure the ground clamp to the work piece
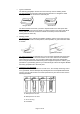
3. Connect a regulator to a bottle of ARGON gas, then connect the gas connection from the TIG
torch to the regulator.
4. Connect the TIG torch weld cable to the negative (-) weld output connection.
5. Set the desired amperage on the amperage control knob on the front panel of the welder.
6. Turn ON the input power switch on the welder.
7. Turn ON the regulator on the bottle of shielding gas and adjust the regulator to approximately
20 CFH, then open the shielding gas valve on the torch to start the flow of shielding gas.
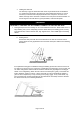
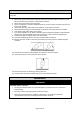
8. Follow these steps for striking an arc while TIG welding.
8.1 Open the shielding gas valve on the torch handle to start the gas flow.
8.2 Rest the TIG torch nozzle on the work piece taking care not to touch the installed tungsten
electrode.
8.3 Twist the torch to make contact between the work piece and the tungsten.
8.4 Lift the torch away from the work piece about 1/8 inch.
8.5 Move the joint down for welding by pushing the torch.
8.6 Insert the filler metal in the leading edge of the weld puddle as needed.
Maintenance
⚠WARNING
ELECTRIC SHOCK CAN KILL!
Touching live electrical parts can cause fatal shocks or severe burns. Do not touch live
electrical parts
Wear dry, hole-free insulating gloves and body protection.
Disconnect input power before installing, maintaining, or servicing this equipment.
Lockout/tagout input power according to OSHA 29 CFR 1910.147.