
Product Manual


12in. W Capacity 3-in-1 Combination
Sheet Metal Machine OWNER’S MANUAL
12in. W Capacity 3-in-1 Combination
Sheet Metal Machine OWNER’S MANUAL
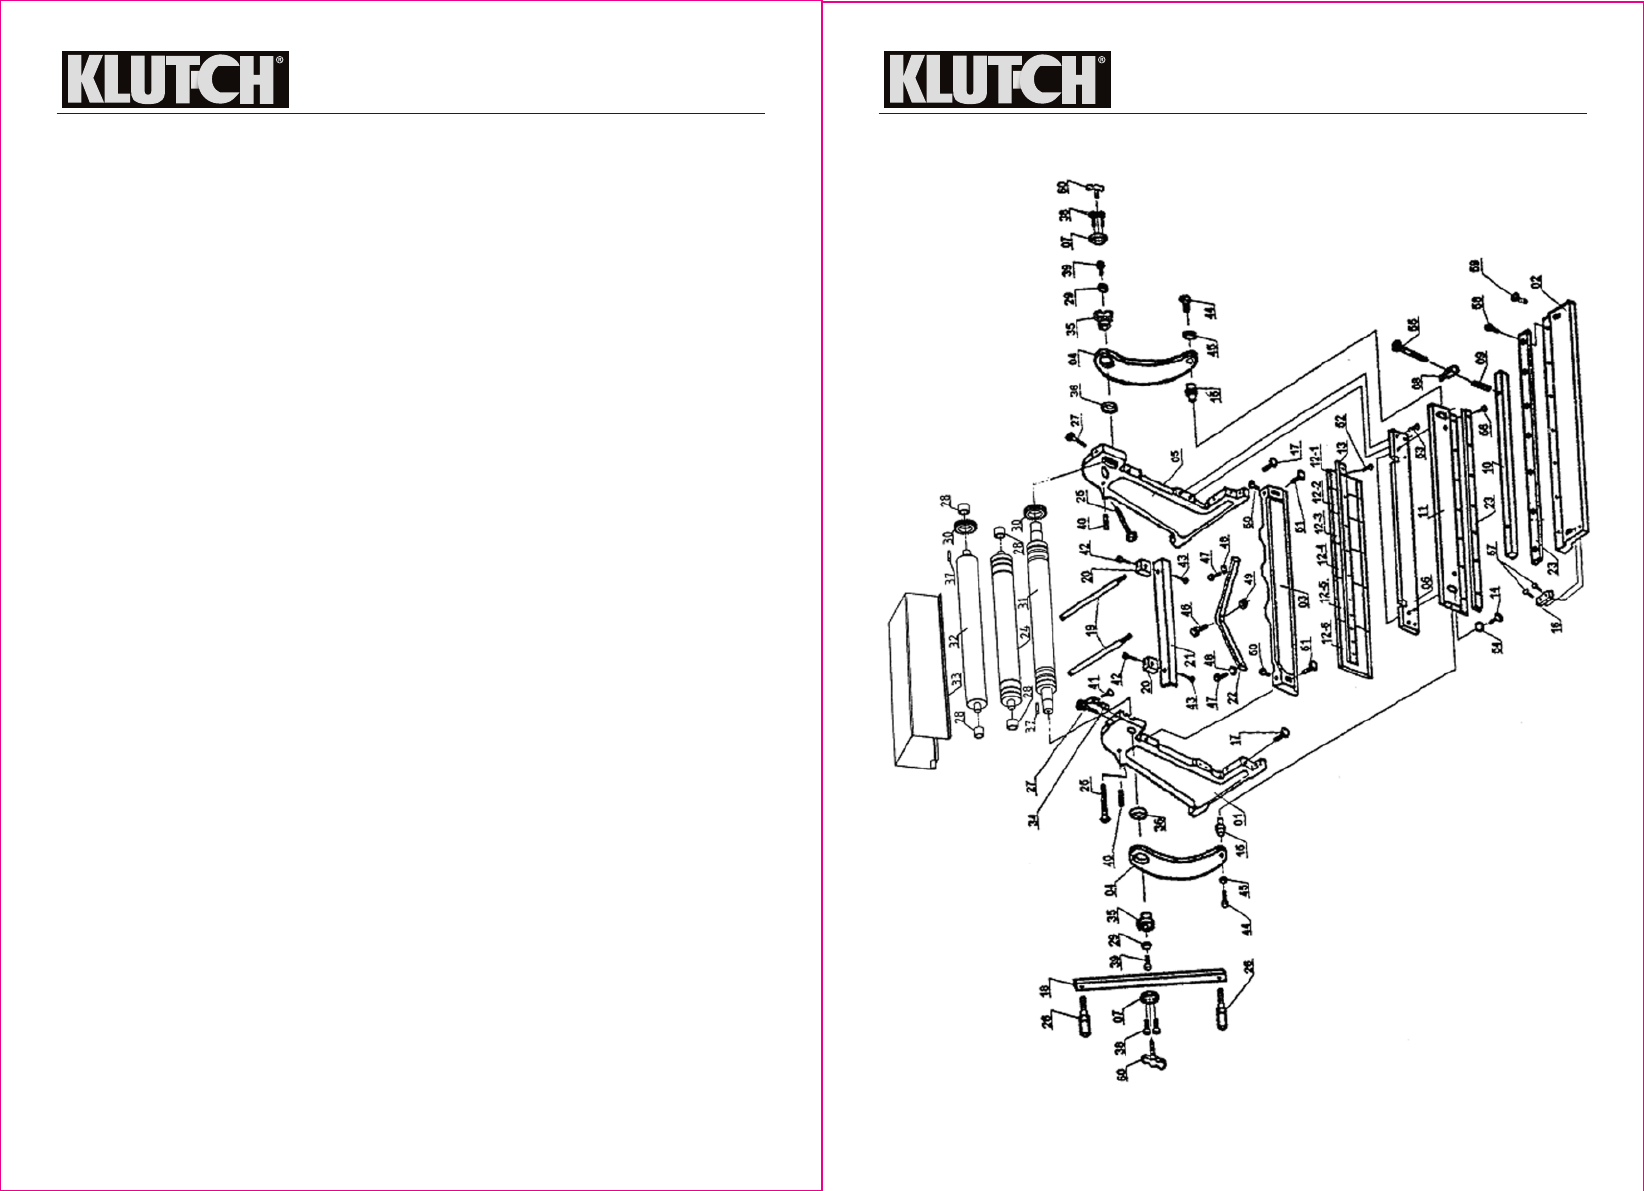
Parts Diagram
4 of 8
Braking
1. Attach the backmeasurement assembly(19-21,42,43) to the receiver holes in the back of the
crossbeam(3).
2. If necessary, adjust the position of the back measurement assembly: first loose the two hex
key screws (42), movethe assembly forward and back to the desired position, retighten the
screws.
3. Using the handle assembly (18&26), raise the crossbeam(3) up to its highest position.
4. Insert the workpiece between the upper (12) and lower(11) braking dies.
5. Turn the handle assembly (18&26) until the proper roll has been achieved. The materialshould
feed itself through the rollers as you crank the handle assembly.
Rolling
1. Lift the front Cover (33) and flip backward, out of the way.
2. Drop the Rear Roll Bar (24) by loosening the Adjustment Knob (25).
3. Insert only the leading edge of the sheet metal between the Upper Roll Bar (32) andthe Lower
Roll Bar (31), tighten the Adjustment Keys (27) until the Roll Bars are justsnug against the
sheet metal.
4. Advance the Adjustable Bolt (25) to the desired tightness for the roll.The more the Adjustable
Bolt (25) is advanced, the tighter the roll.
5. Turn the Handle Arm (18) until the desired roll is achieved.
The sheet metal should feed itself through the rollers as the Handle Arm (18) is turned
Wire Rolling
1. Use the proper groove in the lower roll bar (#24、#31) depending upon the gauge of the wire
beingrolled.
2. Follow steps 2 through 5 (above), under Rolling.
After Each Use
• Clean the surface of the Roll Bar (24, 31, 32) after use. Keep it clean and free of rust.
• Check Dies (12) and Shears (23)not damaged after use.
• Grease the crank arms(4) as necessary using agrease gun on the installed grease fittings. Do
notover-grease.
•
A light coating of oil on the area where the upperarm slides will also assure ease of movement.
Maintenance
Maintain your tool. It is recommended that the general condition of any tool be examined before
it is used. Keep your tool in good repair by adopting a program of conscientious repair and
maintenance in accordance with the recommended procedures found in this manual.
• Keep all cutting components sharp and clean. Properly maintained cutting components with
sharp cutting edges are less likely to bind and are easier to control.
• Keep handles dry, clean, and free from oil and grease.
• REPLACEMENT PARTS AND ACCESSORIES. When servicing, use only identicalreplacement
parts. Parts that may be suitable for one machine may create a risk of injury when used with
another machine. Approvedaccessories are available from the distributor.
LUBRICATION
• Before using this machine, certain parts coated with rust inhibitor must be first cleanedusing
varnish thinner.
• Lubricate the eccentric mechanism daily with machine oil.
• Periodically check all nuts, bolts, and screws for tightness.
• Periodically lubricate the rollers surface with a clean rag and machine oil.
• Place the Cover over the rollers when not in use
• Grease the cranking arms(4) as necessary using a grease gun with zerk fittings.
• Grease the bolt holes in sliding areas after take down the Hex key screw(14&51) as
necessary.
5 of 8